Contrary to common belief, a lost shine is rarely due to a single mistake but is a failure in controlling the glaze’s molecular stability throughout its entire lifecycle.
- Sugar bloom and dullness are caused by moisture migration (water activity), not just surface condensation.
- Ingredient choice (glucose vs. honey) and reheating protocols directly impact the crystalline structure that creates gloss.
Recommendation: Shift your focus from finding the ‘perfect’ application temperature to managing the interconnected factors of humidity, ingredient chemistry, and thermal shock from creation to storage.
There is no greater frustration for a pastry professional than pulling a perfectly glazed entremet from the refrigerator, only to find the flawless, mirror-like shine has turned into a dull, hazy disappointment overnight. You followed the recipe to the letter. You hit the exact pouring temperature. Yet, the visual shelf-life collapsed. The common advice is to blame condensation, use an airtight container, or check your fridge temperature. While not entirely wrong, these are merely symptoms of a much deeper issue.
The truth is, a lasting shine has little to do with luck and everything to do with science. The problem isn’t a single action, but a chain of events that disrupt the delicate balance of the glaze. We often focus on the moment of pouring, but the battle for gloss is won or lost in the management of its core components—sugar, fat, and water—at a molecular level. It’s about understanding and controlling the forces of crystallization, emulsion stability, and water activity from the moment you begin mixing to the final presentation.
This is where we move beyond the home baker’s recipe and into the realm of the visual shelf-life expert. The key to a multi-day, high-impact shine isn’t a secret ingredient; it’s a holistic understanding of the physics and chemistry at play. It’s about mastering thermal shock, preventing micro-bubbles that seed imperfections, and choosing ingredients based on their chemical properties, not just their taste. This guide will deconstruct the science behind the shine, providing you with the knowledge to diagnose, prevent, and control the factors that turn a fleeting gloss into a stable, enduring finish.
To provide a practical look at a professional application process, the following video demonstrates the handling of a ready-to-use glaze. Observe the fluidity and technique, which are key principles we will be exploring in depth throughout this guide.
This article is structured to build your expertise from the ground up. We will tackle the most common failures, explore the science of your ingredients, and establish professional protocols for temperature, storage, and even final plating. Let’s begin by diagnosing the number one enemy of a glossy finish: humidity.
Summary: Why Your Ganache Glaze Is Losing Its Shine
- Why Does Sugar Bloom Appear on Glazed Cakes in Humid Kitchens?
- How to Remove Micro-Bubbles from Glaze Without popping them manually?
- Glucose Syrup vs. Honey: Which Provides Better Shine Stability?
- The Temperature Mistake That Makes Glaze Too Thin to Cover Edges
- How Many Times Can You Reheat Glaze Before It Loses Its Gloss?
- How to Create Glossy Chocolate Decorations in Under 10 Minutes?
- The Refrigerator Mistake That Causes Sugar Bloom on Finished Bonbons
- The ‘Negative Space’ Rule That Instantly Makes Plating Look Expensive
Why Does Sugar Bloom Appear on Glazed Cakes in Humid Kitchens?
Sugar bloom, that dreaded white, dusty film, is the direct result of moisture dissolving sugar on the surface of your glaze and then recrystallizing into large, coarse crystals that scatter light instead of reflecting it. While many blame refrigerator condensation, the true culprit is often ambient humidity in the kitchen itself. This is a battle of water activity: moisture will always migrate from an area of high concentration (humid air) to low concentration (the surface of your glaze). For a professional, controlling the environment is as critical as the recipe itself.
The moment a glazed cake is exposed to a humid environment, this process begins. In fact, professional chocolatiers aim for conditions with humidity below 55% to avoid this very issue. A static, non-ventilated refrigerator exacerbates the problem by trapping humid air, creating a perfect microclimate for bloom. When the cake is moved from the cold fridge to a warmer room, condensation forms instantly, providing even more moisture to dissolve the surface sugar. The result is a guaranteed loss of shine within hours.
Preventing this requires a multi-pronged strategy. It starts with glazing a thoroughly frozen cake (around -18°C), which causes the glaze to set instantly, creating a firmer barrier. Most importantly, it involves managing the cake’s transition between temperatures and humidity levels. Storing the cake uncovered initially in a ‘No Frost’ or ventilated fridge allows surface moisture to dissipate before you consider covering it. This proactive environmental management is the first principle of extending visual shelf-life.
Action Plan: Preventing Sugar Bloom in Humid Conditions
- Control your workspace: Maintain a kitchen temperature between 18-20°C (64-68°F) and monitor humidity levels when working with and setting glazed items.
- Optimize your storage: Use a ‘No Frost’ ventilated refrigerator instead of a static one to prevent humid air from settling on the glaze surface.
- Manage the temperature transition: Allow glazed cakes to fully set and reach a stable fridge temperature before covering them in an airtight container to trap less moisture.
- Glaze on a frozen foundation: Always apply your glaze to a cake that is completely frozen (at least -18°C) to minimize condensation between the cake and the glaze layer.
- Acclimatize gradually: If possible, move the glazed cake from the freezer to the refrigerator, and then to room temperature in stages to minimize the thermal shock that causes condensation.
How to Remove Micro-Bubbles from Glaze Without popping them manually?
Micro-bubbles are the silent assassins of a perfect mirror glaze. They may seem insignificant, but they are nucleation sites for imperfections and disrupt the smooth, uninterrupted surface required for a flawless reflection. These bubbles are almost always introduced during the blending process when creating the initial emulsion. Using a standard immersion blender with its bell-shaped head is notorious for incorporating air, creating a foamy texture that is impossible to pour smoothly. The professional solution isn’t to pop bubbles one by one, but to prevent their formation from the start and use techniques to eliminate any that remain.
The key lies in the blending technique and the equipment. A tall, narrow container is essential as it forces the glaze to circulate in a vortex, pulling it down into the blender blades rather than splashing it around. The blender itself should be kept perfectly upright and fully submerged at all times. Any tilting will immediately draw air into the mixture. Experience shows that allowing the glaze to rest for 12-24 hours in the refrigerator is a crucial step for any remaining bubbles to naturally rise and dissipate.
This paragraph introduces the challenge of micro-bubbles. To truly understand the professional technique for creating a bubble-free emulsion, the illustration below deconstructs the proper blending posture.
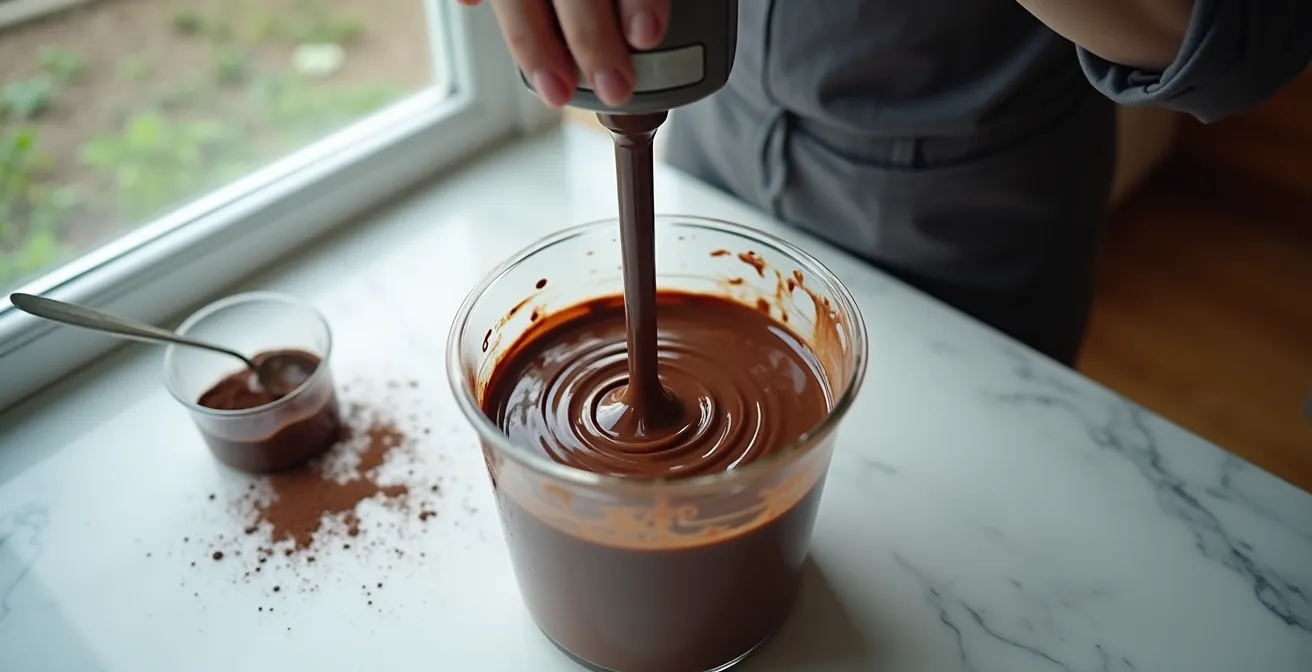
As this image demonstrates, maintaining a vertical angle and ensuring the blender head remains below the surface is non-negotiable. For any stubborn bubbles that survive this process, a final strain through a fine-mesh sieve before use is the last line of defense. This methodical approach ensures a perfectly homogenous, air-free glaze ready for application.
Expert Technique: The MOF Approach to a Bubble-Free Glaze
Renowned French pastry chef and MOF (Meilleur Ouvrier de France) Jean-Michel Perruchon advocates for a specific method. He uses an immersion blender without its protective bell, such as a Bamix, which minimizes air incorporation. The blender is held vertically in a tall, narrow container and run at a low speed. This creates a gentle vortex that emulsifies the glaze without creating foam. After blending, the glaze is strained through a fine sieve and, critically, left to rest overnight in the refrigerator. This resting period allows for complete de-aeration, resulting in a perfectly smooth, bubble-free glaze.
Glucose Syrup vs. Honey: Which Provides Better Shine Stability?
The choice of sugar in a mirror glaze is not merely about sweetness; it’s a critical decision that impacts its anti-crystallization properties and long-term shine. While honey might be tempting for its flavor profile, it is chemically less reliable than glucose syrup for professional applications where visual stability is paramount. Glucose syrup is an “interfering agent” by design. Its complex mixture of sugars physically obstructs the sucrose molecules from arranging themselves into large, light-scattering crystals. This is the very essence of preventing sugar bloom and maintaining a smooth, glossy surface.
Honey, on the other hand, is a natural invert sugar, but its composition is variable. This inconsistency can lead to unpredictable results. A glaze made with honey may look brilliant initially but is far more prone to losing its shine after 24 hours as the sugar structure subtly changes. Furthermore, honey imparts a distinct flavor, which can interfere with the delicate notes of the chocolate or fruit in your entremet. Glucose syrup is flavor-neutral, preserving the purity of your intended taste profile. For consistent, reliable, and long-lasting shine, glucose syrup is the undisputed professional choice.
The following table breaks down the key differences between these two ingredients, highlighting why glucose syrup is the superior choice for ensuring the molecular stability of your glaze.
| Property | Glucose Syrup | Honey |
|---|---|---|
| Anti-crystallization | Specifically designed interfering agent | Variable natural invert sugar |
| Shine Duration | Maintains shine 3-5 days | May lose shine after 24 hours |
| Flavor Impact | Neutral taste | Adds distinct flavor (choose light acacia) |
| Professional Alternative | Can substitute with corn syrup | Less reliable for consistency |
| Recommended DE Value | 42 DE for structure, 60 DE for fluidity | Not applicable – variable composition |
Ultimately, while honey has its place in certain flavor-forward recipes, when the goal is a flawless, long-lasting mirror finish, the controlled chemical properties of glucose syrup make it the only reliable option for a visual shelf-life expert.
The Temperature Mistake That Makes Glaze Too Thin to Cover Edges
Temperature is the single most discussed variable in mirror glazing, yet it’s often misunderstood. The mistake isn’t just about being “too hot” or “too cold,” but about failing to hit the precise viscosity window where the glaze is fluid enough to pour smoothly but viscous enough to cling to vertical surfaces and sharp edges. A glaze that is too hot will be excessively thin, sheeting off the sides of your cake and leaving bald spots, especially on the corners. A glaze that is too cold will be thick and clumpy, creating an uneven, “gloopy” surface that refuses to self-level.
The professional sweet spot is a remarkably narrow range. For a flawless coat that clings to every edge, the ideal pouring temperature is 32-35°C (90-94°F). However, this temperature is meaningless without considering the other half of the equation: the cake must be frozen solid, at approximately -18°C. This temperature differential is what causes the glaze to “seize” or set on contact, creating that perfect, uniform layer. Pouring a 35°C glaze onto a merely chilled cake will result in a runny mess, as there isn’t enough of a thermal shock to set the glaze quickly.
Mastering this requires more than just a digital thermometer; it requires a feel for the glaze’s consistency. The classic “spoon test” is an invaluable professional technique: dip a cold metal spoon into your glaze. The glaze should coat the back of the spoon with an opaque, even layer. If it’s translucent or runs off immediately, it’s too hot. If it clumps, it’s too cold. This simple, tactile check, combined with precise temperature control, is the key to achieving a perfectly enrobed cake every time.
How Many Times Can You Reheat Glaze Before It Loses Its Gloss?
One of the great advantages of a chocolate mirror glaze is its reusability. However, each reheating cycle is a stress test on its delicate emulsion and crystalline structure. Done incorrectly, reheating can permanently destroy the gloss. The primary danger is overheating. A critical rule is to never exceed 45°C (113°F) during this process, as higher temperatures can “break” the emulsion of fat and water, or worse, scorch the chocolate and gelatin, leading to a grainy texture and a complete loss of shine. The goal is to gently melt the glaze back to its working consistency, not to cook it.
The number of times a glaze can be reheated depends entirely on this gentle handling. A glaze that is carefully reheated in a double boiler or in short, controlled bursts in a microwave can be reused 2-3 times over several days without a significant loss of quality. Each time, it should be brought back to its ideal pouring temperature of 32-35°C and given a gentle stir to re-homogenize. Aggressive heating will reduce its lifespan dramatically. As pastry professional Rachida of Gâteau et cuisine notes, proper storage and gentle reheating are key.
Chocolate mirror glaze keeps very well. You can store leftovers in an airtight container in the refrigerator for 3 to 4 days. To reuse, gently reheat it in a double boiler or microwave without exceeding 38°C (100°F).
– Rachida, Gâteau et cuisine
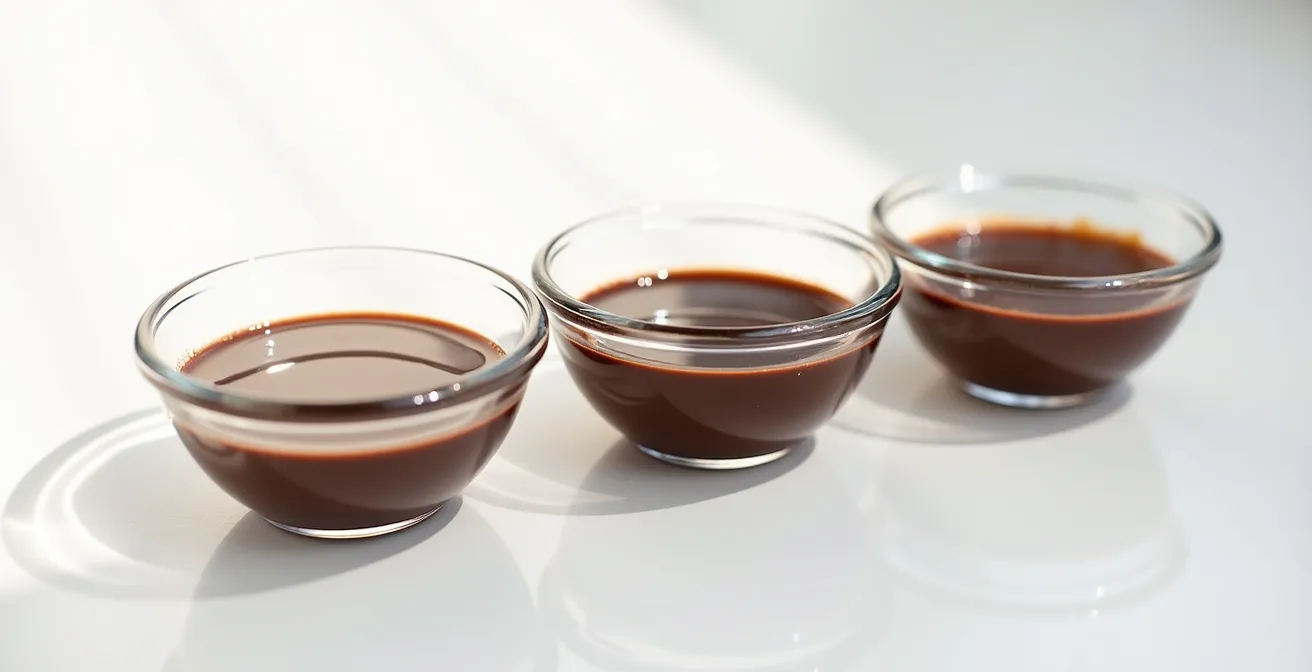
This image perfectly captures the story of temperature’s effect on viscosity. On the left, a cold, thick glaze; in the center, the perfect fluid state; on the right, a glaze that is too hot and thin.
By understanding that each reheat is a controlled “reset” of the glaze’s structure, you can maximize the life of your product. Treat it with care, respect the temperature limits, and your glaze will reward you with a brilliant shine time and time again.
How to Create Glossy Chocolate Decorations in Under 10 Minutes?
Creating quick, high-gloss chocolate decorations hinges on one core principle: rapid and efficient tempering. Traditional tempering methods can be time-consuming, but professionals rely on seeding techniques to achieve a stable crystalline structure in minutes. The goal is to introduce the correct type of cocoa butter crystals (Form V) into melted chocolate to kickstart the proper crystallization process. When done correctly, this results in decorations with a sharp snap, a beautiful gloss, and resistance to fat bloom.
One of the most efficient modern methods involves using Mycryo, which is pure cocoa butter in a powdered, pre-crystallized form. This eliminates the need for a “seed” of solid chocolate and provides an incredibly reliable and fast temper. The process is simple: melt your chocolate, cool it to the precise working temperature, and then stir in a small percentage of Mycryo powder. This seeds the entire batch almost instantly, making it ready for use.
The Mycryo Seeding Method for Rapid Tempering
For a fast, professional temper, melt your dark chocolate completely and allow it to cool to between 32°C and 33.5°C. This temperature is crucial. Then, add 1% of the chocolate’s weight in Mycryo powder (for example, 10g of Mycryo for 1kg of chocolate). Stir the powder in thoroughly. The Mycryo disperses evenly, seeding the entire mixture with stable cocoa butter crystals. The chocolate is tempered and ready to be spread thinly on acetate sheets for a mirror-like shine or used for dipping and molding, all in under 10 minutes.
Once tempered, the final step for achieving maximum gloss on flat decorations is the surface you work on. Spreading the tempered chocolate thinly onto a sheet of acetate plastic is the professional’s secret. The perfectly smooth, non-porous surface of the acetate imparts a flawless, mirror-like finish to the chocolate as it sets. Once hardened, the decorations peel away with a brilliant shine that is impossible to achieve on parchment or wax paper.
The Refrigerator Mistake That Causes Sugar Bloom on Finished Bonbons
For finished bonbons and chocolate decorations, the refrigerator is often the enemy, not the friend. The most common and damaging mistake a professional can make is refrigerating chocolates too soon. Well-tempered chocolate needs time to fully crystallize and stabilize at a controlled room temperature. Rushing this process by placing them in the cold, humid environment of a fridge induces thermal shock and creates the perfect conditions for sugar bloom.
The science is clear: finished pieces must be allowed to crystallize for 12-24 hours at 18-20°C before they even see the inside of a refrigerator. During this critical period, the cocoa butter crystals are locking into their stable Form V structure. This process gives the chocolate its gloss, snap, and resistance to bloom. Introducing the cold, moist air of a refrigerator prematurely halts this process and causes condensation to form on the still-setting surface. This moisture dissolves surface sugar, which then recrystallizes into the tell-tale white haze of sugar bloom upon returning to room temperature.
Even for short-term storage, the protocol is clear. As noted in professional pastry guides, the goal is to protect the finished product from moisture at all costs. An airtight container is non-negotiable, but only *after* the chocolate has fully set at room temperature. Placing warm or setting chocolates in a sealed container will trap moisture and guarantee bloom. The mantra for a long visual shelf-life is: patience at room temperature first, protection in the refrigerator second. Rushing this critical crystallization phase is a mistake that undoes all the hard work of perfect tempering.
Key Takeaways
- Mastering shine is about controlling molecular stability, not just temperature.
- Environmental control (humidity, ventilated fridges) is as important as the recipe itself.
- Gentle handling, from blending to reheating, preserves the glaze’s delicate emulsion and crystalline structure.
The ‘Negative Space’ Rule That Instantly Makes Plating Look Expensive
After meticulously crafting a dessert with a flawless, high-gloss finish, the final presentation can either elevate it to a work of art or diminish its impact. The single most powerful principle in high-end pastry plating is the intentional use of negative space. This isn’t about leaving the plate empty; it’s about using the empty space as an active element of the composition to frame and highlight the dessert. An overcrowded plate feels chaotic and cheapens the product. A plate with considered negative space communicates confidence, elegance, and luxury.
The underlying philosophy is that a perfectly crafted object doesn’t need excessive adornment. Its quality speaks for itself. This idea is perfectly captured by the principles of advanced pastry plating.
The luxury comes from the object being so perfect it needs no other adornment.
– Professional Pastry Plating Principles
To apply this rule effectively, follow a few key techniques. First, use oversized plates; a larger canvas immediately creates more breathing room. Second, apply the Rule of Thirds from photography and painting: position your main element (the glazed entremet) at an intersection point of the plate’s grid, rather than dead center. This creates a more dynamic and visually engaging composition. Finally, if you add other elements like a sauce, a quenelle of sorbet, or a single berry, place them strategically within the negative space to balance the main piece, not to crowd it. Each element should feel intentional and necessary.
- Place your glazed entremet off-center on an oversized white plate to immediately create a sense of space and focus.
- Use a partial or asymmetrical glaze pour to create a compelling contrast between the glossy, finished surface and the matte texture of the cake itself.
- Position your cake at a “power point” according to the Rule of Thirds for a composition that is naturally pleasing to the eye.
- If adding another component, place a single, strategic element (like a single piece of gold leaf or one perfect raspberry) in the largest area of empty space to create balance and draw the eye.
- Above all, keep the rim and edges of the plate immaculately clean. A clean border is the frame for your artwork and is essential for maximum impact.
By mastering the science of shine and the art of presentation, you move beyond simply executing recipes. You become the architect of the final product’s visual journey, ensuring every dessert you create not only tastes exceptional but also delivers a powerful and lasting visual impact. To apply this holistic understanding, the next logical step is to audit your own processes, from ingredient selection to final plating, and identify where you can implement these professional controls.