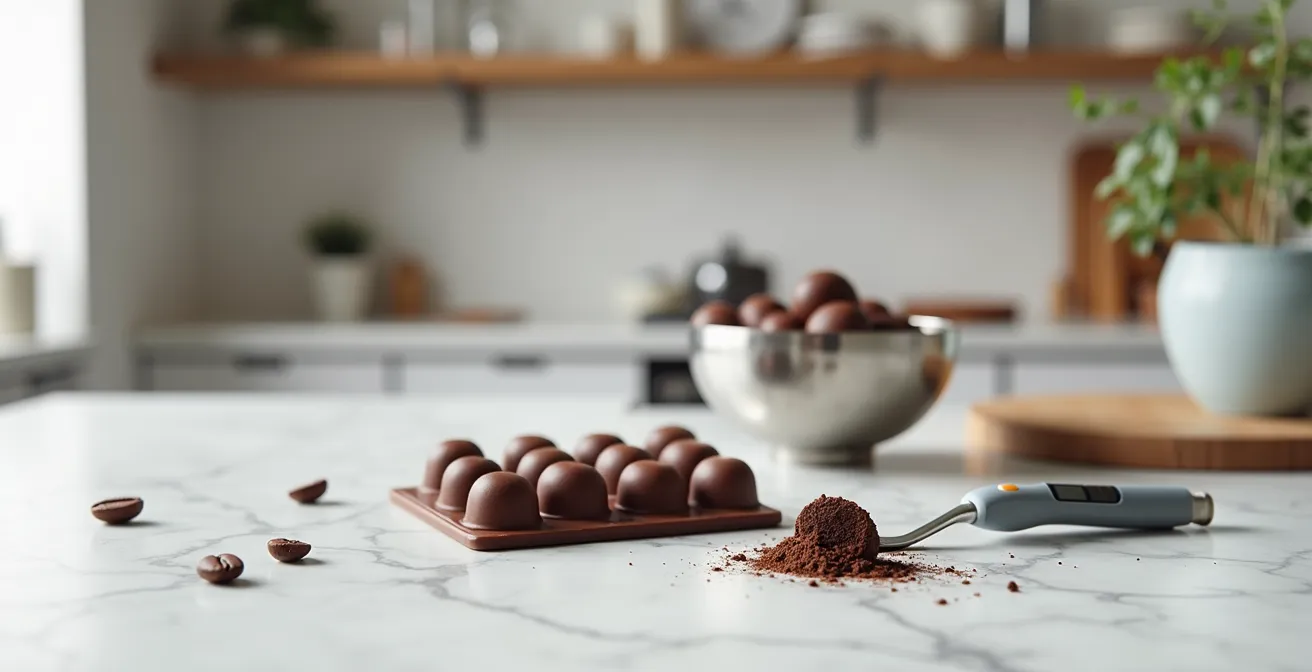
Making professional-quality bonbons isn’t about owning expensive machines or a long list of gadgets.
- Success depends on precisely controlling temperature to achieve the correct crystal structure.
- Eliminating every trace of moisture and using the right molds are non-negotiable principles.
Recommendation: Invest your budget in a precise digital probe thermometer and high-quality polycarbonate molds first. Your skill in mastering the core techniques will always be more valuable than any single piece of equipment.
The dream is alluring: crafting jewel-like bonbons at home, with a glossy finish and a satisfying snap. The reality for many hobbyists, however, is a frustrating cycle of dull, streaky chocolate that refuses to release from its mold. In response, the internet presents two conflicting paths. One is an endless shopping list of expensive gadgets: tempering machines, dedicated heating cabinets, and pricey marble slabs, suggesting that success is simply a purchase away. The other path offers over-simplified hacks that ignore the science, leading to predictably disappointing results.
But what if the secret to professional results lies not in the *quantity* of your gear, but in your *grasp* of a few key scientific principles? What if you could achieve a perfect temper and a flawless shine by acting as a frugal scientist, not a wealthy collector of tools? The truth is, your success hinges on controlling a few critical variables: temperature, moisture, and crystal formation. Your equipment shouldn’t be a status symbol; it should be a carefully chosen set of instruments that give you precise control over these elements.
This guide will not give you a long shopping list. Instead, it will deconstruct the “why” behind the few truly essential tools. We will explore the science of crystallization, the unforgiving nature of water, and the practical methods to achieve professional discipline in your home kitchen. By focusing on principle over gadgets, you’ll learn to build a minimalist, highly effective home chocolate lab without overspending, empowering you to create bonbons that look and taste exceptional.
Summary: The Home Chocolatier’s Equipment Blueprint
- Why Is Beta-Crystal Formation Crucial for the Snap of Your Bar?
- How to Organize Your Kitchen for a 2-Hour Chocolate Session Without Chaos?
- Polycarbonate vs. Silicone Molds: Which Gives the Best Shine for Beginners?
- The Water Drop Mistake That Seizes Your Batch Instantly
- When to Use a Microwave vs. Double Boiler for Batches Under 500g?
- Infrared vs. Probe Thermometer: Which Is More Accurate for Agitated Chocolate?
- How to Scale a Recipe from 20 to 500 Bonbons Efficiently?
- How to Temper Chocolate Without a Marble Slab in Under 15 Minutes?
Why Is Beta-Crystal Formation Crucial for the Snap of Your Bar?
That satisfying “snap” when you bite into a high-quality chocolate bar isn’t a happy accident; it’s a direct result of precise science. The key lies in the crystalline structure of cocoa butter. When you temper chocolate, your goal is to encourage the formation of a specific type of crystal, known as Form V (or Beta-V). This is the most stable of the six possible crystal forms that cocoa butter can take. According to the foundational 1966 research by Willie and Lutton on the polymorphism of cocoa butter, only this specific crystal structure provides the desirable qualities we associate with great chocolate: a high-gloss shine, a firm texture that snaps cleanly, and a smooth, quick melt in your mouth.
The other crystal forms (I-IV) are unstable, leading to a dull finish and a soft, crumbly texture that melts too quickly in your hand. Form VI, while also stable, forms slowly and is responsible for the dreaded “fat bloom”—the greyish streaks that can appear on poorly stored or tempered chocolate. The stability of Beta-V crystals is linked to their melting point; research from Crystal Growth & Design reveals that Form V crystals melt at a narrow range of 30.0–34.5°C (86–94°F). This is just below human body temperature, which is why a perfectly tempered chocolate bar remains solid at room temperature but melts luxuriously on your tongue. Understanding this principle is the first step: you’re not just melting and cooling chocolate, you’re a crystal scientist guiding a physical transformation.
How to Organize Your Kitchen for a 2-Hour Chocolate Session Without Chaos?
A successful chocolate session is less about frantic artistry and more about calm, controlled execution. Before you even melt your first piece of chocolate, you must organize your workspace like a laboratory. The primary goal is to control variables and minimize movement. Chaos is the enemy of consistency, and a disorganized kitchen is a breeding ground for mistakes like water splashes or temperature fluctuations. By setting up dedicated zones, you create a logical workflow that allows you to focus entirely on the chocolate itself, not on finding a misplaced spatula.
Think of your counter as three distinct stations: a “Hot Zone” for melting, a central “Tempering Zone” for the main work, and a clean “Molding Zone.” This layout prevents cross-contamination—especially from water—and ensures every tool is at hand exactly when you need it. A pre-filled sink or a “dirty bowl” for used tools also prevents you from having to turn your back on your temperature-sensitive chocolate to wash something. This disciplined approach is a professional habit that costs nothing but yields immense returns in efficiency and quality. It transforms your kitchen from a place of potential disasters into a controlled environment where you can execute the delicate process of tempering with confidence.
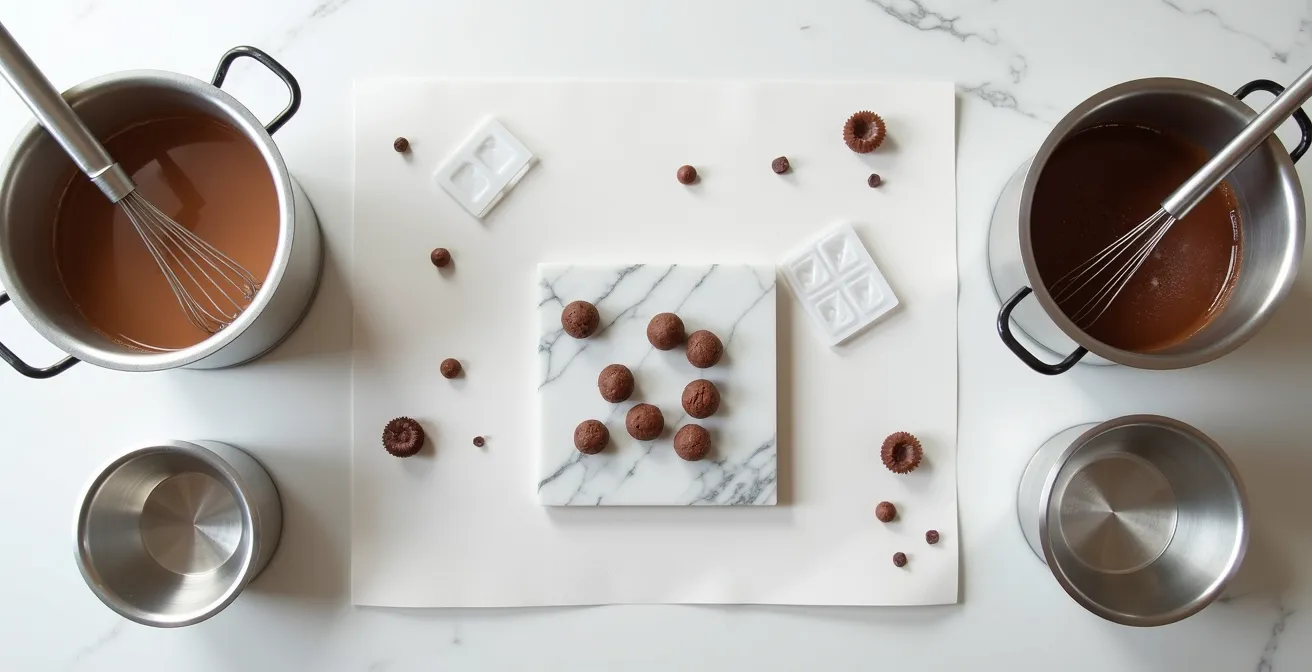
This overhead view illustrates the ideal setup. Notice the clear separation between the melting equipment, the central work surface, and the clean molds ready for filling. Adopting this kind of organization is the first step toward working like a professional.
Your 5-Point Kitchen Setup Checklist: Chocolate Workspace
- Hot Zone: Set up your double boiler or microwave station on one side of your workspace for the initial melting phase.
- Tempering Zone: Designate the center of your workspace with a heat-resistant surface, keeping your thermometer and scraper at the ready.
- Molding Zone: On the opposite side, place your clean, dry molds on a rack for airflow, with your bench scraper easily accessible.
- Cleanup Station: Pre-fill your sink with hot, soapy water or, even better, have a dedicated “dirty tools” bowl nearby to contain mess.
- Safety Buffer: Keep a roll of paper towels or clean kitchen towels within arm’s reach to instantly dry hands or wipe up any moisture.
Polycarbonate vs. Silicone Molds: Which Gives the Best Shine for Beginners?
When it comes to achieving that coveted mirror-like shine, your choice of mold is critical. While flexible silicone molds are inexpensive and release easily, they are the enemy of a glossy finish. The shine on a bonbon is a direct reflection of the surface it set against. A professional shine requires an absolutely rigid, non-porous, and perfectly smooth surface. This is where polycarbonate molds are unequivocally superior. Their hard, glass-like surface allows the tempered chocolate to form a flawless skin.
The magic happens during cooling. As properly tempered chocolate cools, its Beta-V crystals cause it to contract slightly. In a rigid polycarbonate mold, this contraction pulls the chocolate away from the mold walls cleanly, leaving behind a perfect, high-gloss surface. In a flexible silicone mold, this same contraction can cause the mold itself to deform slightly, disrupting the surface and resulting in a dull or semi-gloss finish. While silicone can be useful for very complex shapes with undercuts, for the classic bonbon, polycarbonate is the only choice for a professional result.
Polycarbonate molds work best to make the shiniest bonbons, but you have to temper your chocolate and cocoa butter correctly. If your chocolate isn’t tempered, the bonbons won’t come out of the mold.
– Sugar Geek Show, Chocolate Raspberry Galaxy Bonbons Tutorial
This highlights a crucial point of our “skill over gadgets” philosophy. The polycarbonate mold is a superior tool, but it’s an unforgiving one. It doesn’t create the shine; it *reveals* the shine you created through perfect tempering. It forces discipline, and this comparison table makes the choice clear for any aspiring chocolatier.
| Feature | Polycarbonate | Silicone |
|---|---|---|
| Shine Quality | Mirror-like, professional finish | Matte to semi-glossy |
| Crystal Formation | Forces perfect contraction for shine | Flexible surface disrupts finish |
| Demolding | Clean release when properly tempered | Easier release but may distort shape |
| Best Use | Professional bonbons, bars | Complex shapes with undercuts |
| Durability | Long-lasting with proper care | Can tear or degrade over time |
| Price Point | Higher initial investment | More affordable |
The Water Drop Mistake That Seizes Your Batch Instantly
In the world of chocolate, water is your number one enemy. It is not an ingredient; it is a contaminant. Even the tiniest amount of moisture introduced to melted chocolate will cause it to “seize,” transforming it from a silky, fluid mass into a thick, grainy, and unworkable paste. The science behind this is simple: chocolate is a mixture of very fine, dry particles (cocoa solids and sugar) suspended in a fat (cocoa butter). When water is introduced, it causes the sugar particles to dissolve and clump together, instantly destroying the smooth suspension. The terrifying part is how little it takes; chocolate experts confirm that even just 1-2 drops of water can ruin an entire batch.
This can happen from many sources: steam from a double boiler, a wet spatula, or even condensation on a bowl taken from the refrigerator. This is why a disciplined, organized workspace is so critical. Every tool must be bone-dry. You must be vigilant. A single moment of carelessness can undo all your hard work. The visual difference is stark and immediate, transforming a glossy liquid into a dull, lumpy sludge.
While there are emergency “rescue” methods, they come with a significant caveat. Adding more liquid (like boiling water or warm cream) can smooth out the texture, but it does so by creating a ganache or sauce. You have saved the product, but you have lost the temper. The rescued chocolate can be used for things like hot chocolate or as a filling, but it can never be used for molding or creating a shiny, snappy shell again. The primary lesson is always prevention. Treat water with the respect a mortal enemy deserves.
When to Use a Microwave vs. Double Boiler for Batches Under 500g?
For the home chocolatier working with small batches (under 500g), the choice between a microwave and a double boiler is a matter of control versus convenience. The double boiler (bain-marie) is the traditional method, providing gentle, indirect heat. Its primary advantage is that it’s harder to scorch the chocolate. However, its greatest weakness is the introduction of chocolate’s mortal enemy: water. Steam can easily sneak into your bowl, leading to a seized batch.
The microwave, on the other hand, is fast, clean, and completely dry. It is the preferred method of many frugal professionals for small batches because it eliminates the risk of water contamination. The key to using a microwave successfully is discipline and patience. You cannot simply set it for two minutes and walk away. You must use short bursts of power (15-20 seconds at 50% power) and stir thoroughly between each interval. This mimics the gentle heating of a double boiler without the steam. You are manually controlling the heat input, ensuring no part of the chocolate overheats and scorches.
For a beginner working with a small, precious amount of high-quality chocolate, the microwave offers a more controlled environment, provided you respect its power. Think of the double boiler as a gentle but risky partner, and the microwave as a powerful but precise tool that demands your full attention. For batches under 500g, mastering the pulsed microwave technique is a core skill that saves time and dramatically reduces the risk of the single most common chocolate-making failure.
Infrared vs. Probe Thermometer: Which Is More Accurate for Agitated Chocolate?
Temperature is the single most important variable in tempering, and your thermometer is the most critical piece of equipment you will buy. This is not the place for frugality in terms of quality. But which type is best? This isn’t a question of one being “better,” but of using the right tool for the right job. The two main options are an infrared (IR) thermometer and a digital probe thermometer.
An infrared thermometer is fast and convenient. It measures surface temperature from a distance, which is excellent for quick checks during the initial melting phase to ensure the chocolate isn’t overheating. However, it has a major limitation: it only reads the surface. When you are agitating chocolate during the cooling and re-warming phases of tempering, the surface temperature can be very different from the core temperature of the mass. Relying solely on an IR thermometer during these critical stages is a recipe for failure.
This is where the digital probe thermometer becomes essential. It reads the internal temperature of the agitated mass, giving you a true and accurate picture of what’s happening within your chocolate. As professional workflows demonstrate, the best approach is often a dual one: use the infrared for a quick “danger check” during melting, but switch exclusively to the probe for the precise work of hitting your target tempering temperatures. The probe is your tool for accuracy; the infrared is your tool for speed. For a beginner building a kit, the digital probe is the non-negotiable first purchase. It is the key to repeatable success.
Be careful that you don’t raise the temperature above 32°C (90°F), because that way you will lose your temper, and you will have to start from the beginning. You should check the temperature of your chocolate every now and then, and reheat it if necessary.
– Pastry Maestra
How to Scale a Recipe from 20 to 500 Bonbons Efficiently?
Scaling from a hobbyist batch of 20 bonbons to a semi-professional run of 500 isn’t a simple matter of multiplying ingredients. It requires a fundamental shift in process, workflow, and equipment. The goal of scaling is efficiency; with the right system, experienced chocolatiers report reducing production time from a grueling 4-5 hours to a focused 1-2 hours for a large batch. This efficiency doesn’t come from working faster, but from working smarter and eliminating bottlenecks.
The first bottleneck is always tempering. Manually tempering 5kg of chocolate is vastly different from tempering 500g. The thermal mass is much greater, meaning it cools slower and holds heat longer. This is the point where you must honestly evaluate your time. If you find yourself spending more than 45 minutes a day just on tempering, the investment in a small tabletop tempering machine moves from a luxury to a logical business decision.
The next bottlenecks are space-related. You need enough polycarbonate molds to handle the entire batch in one go; you can’t reuse a mold until the bonbons have fully set. You also need significantly more refrigerator space for the setting phase. Finally, you need a larger, organized workspace to lay everything out. Scaling up is a strategic decision. Before you buy a single new piece of equipment, you should use a framework to analyze your current process and identify exactly where the constraints are. It’s about making calculated investments, not just buying bigger bowls.
Key Takeaways
- Perfect bonbons are a result of creating stable Beta-V crystals through precise temperature control, not by using expensive, specialized gear.
- Your most crucial, non-negotiable investments are a high-quality digital probe thermometer and rigid polycarbonate molds; these tools give you control over the scientific principles that matter.
- Mastering the seeding method for tempering is an essential skill that requires no special surfaces and allows you to achieve professional results with a minimalist setup.
How to Temper Chocolate Without a Marble Slab in Under 15 Minutes?
One of the most persistent myths in chocolate making is that you need a large, expensive marble slab to properly temper chocolate. This is simply untrue. A marble slab is a tool for a specific technique called “tabling,” which rapidly cools chocolate through contact and agitation. It’s impressive to watch, but it’s messy and requires a lot of space. For the frugal home chocolatier, there is a far more efficient, cleaner, and equally effective method: the seeding method.
The seeding method is the epitome of our “principle over gadget” philosophy. Instead of using a cold surface to cool the chocolate, you use the chocolate itself. The technique involves melting about two-thirds of your chocolate, then adding the remaining one-third of finely chopped, solid chocolate (the “seed”). This seed chocolate is already in the desirable, stable Beta-V crystal form. As you stir it into the melted mass, these stable crystals multiply and encourage the entire batch to crystallize in the correct way. It’s a controlled chain reaction. As one expert puts it, the goal isn’t just to add solid chocolate, but to use agitation to disperse its stable Beta-V crystals throughout the melted mass as efficiently as possible.
This method requires nothing more than a bowl, a spatula, and your trusty probe thermometer. It is clean, contained, and gives you exquisite control. Here is a reliable workflow:
- Melt 2/3 of your dark chocolate in a bowl to 110-115°F (43-46°C).
- Remove from heat and immediately add the remaining 1/3 of finely chopped chocolate.
- Stir continuously. The goal is to melt the seed chocolate while bringing the temperature of the entire mass down to about 82°F (28°C).
- If any solid pieces remain, gently reheat the bowl in 5-second bursts until the temperature rises to the working range of 88-90°F (31-32°C) for dark chocolate.
- Test your temper by dipping a spatula in the chocolate. It should set with a satin sheen, hard to the touch, in 3-5 minutes at room temperature.
Mastering this technique frees you entirely from the need for a slab. It proves that with a deep understanding of the principles, your skill and a few simple tools are all you truly need.
The journey from amateur to artisan chocolatier is not about the equipment you accumulate, but the principles you master. The next step isn’t to browse for more gadgets; it’s to confidently melt your first batch of chocolate with purpose, armed with a thermometer, a spatula, and the knowledge of the science you are controlling. Start practicing these techniques today.