Sinking chocolate chips are a physics problem, not a baking failure; the solution lies in controlling batter viscosity until the cake’s structure sets.
- Coat chunks in flour to increase surface friction and grip within the batter.
- Use colder ingredients and even frozen chunks to keep the batter thick for longer in the oven’s initial heat.
- Choose smaller mini-chips, as their lower mass-to-surface-area ratio reduces the effect of gravity.
Recommendation: Master the relationship between batter density, temperature, and mixing technique to solve the sinking issue permanently and achieve bakery-quality results.
There is a quiet frustration familiar to every home baker: you pull a batch of beautiful, golden-brown chocolate chunk muffins from the oven, only to slice one open and find that every single piece of chocolate has congregated in a dense, disappointing layer at the bottom. The internet offers familiar advice—toss the chips in flour, use a thicker batter—but these tips often feel like baking superstitions rather than reliable science. They are pieces of a much larger puzzle involving concepts like particle suspension and batter rheology, which sound complex but are surprisingly intuitive.
The truth is, preventing your chocolate chunks from sinking isn’t about a single magic trick. It’s about understanding and controlling the physical forces at play inside your mixing bowl and oven. The core issue is a battle between the density of your chocolate and the viscosity of your batter, all happening in the crucial window before the muffin’s structure sets. When your batter is too thin or heats up too quickly, gravity simply wins, pulling the heavier chocolate down through the liquid medium.
But what if you could become the master of these forces? This guide reframes the problem from the perspective of a food physicist. Instead of just listing “what” to do, we will explore the “why” behind each technique. We will delve into the science of viscosity, the impact of temperature on batter stability, and the strategic timing of incorporating your inclusions. By treating your batter as a dynamic suspension system, you can move beyond hope and start engineering a perfect distribution of chocolate in every single muffin, every single time.
This article breaks down the science and strategy for achieving perfectly suspended chocolate chunks. You’ll learn the fundamental principles of batter physics and discover actionable techniques to apply in your own kitchen.
Contents: The Science of Suspended Chocolate Chunks
- Why Do Chunks Sink in Thin Batter but Float in Thick Dough?
- How to Coat Chunks in Flour to Improve Suspension During Baking?
- Mini Chips vs. Hand-Cut Chunks: Which Melts Better in Cookies?
- The Low-Temperature Mistake That Causes Inclusions to Sink Before Setting
- When to Add Chunks: The Last-Minute Fold Technique for Even Spread
- Whole vs. Crushed: Which Texture Works Best Inside a Bonbon?
- When to Fold in Chocolate Chunks to Prevent Them Melting Completely?
- How to Achieve the Perfect Crackly Top on Brownies Every Time?
Why Do Chunks Sink in Thin Batter but Float in Thick Dough?
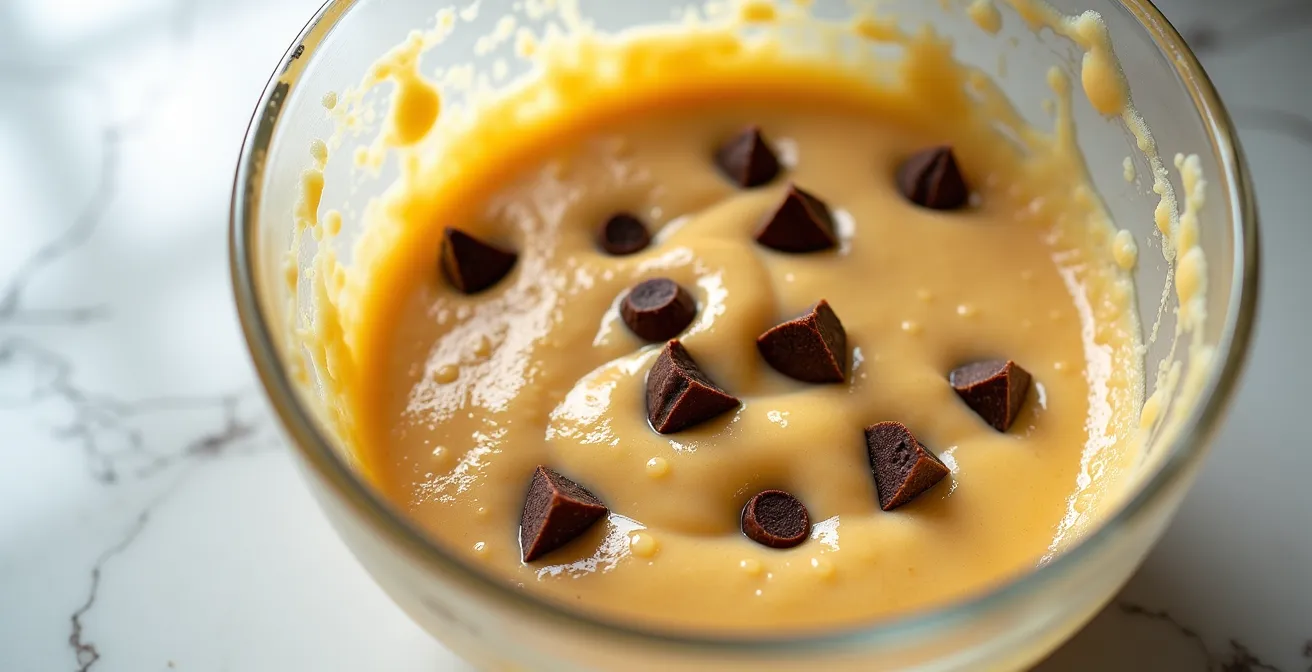
The fundamental reason chocolate chunks sink is a classic physics problem: density versus viscosity. Chocolate chips are significantly denser than muffin batter. Gravity naturally pulls these heavier objects downward. Whether they succeed in reaching the bottom depends entirely on the resistance provided by the medium they’re in. A thick, viscous batter acts like a dense cushion, holding the chunks in a stable suspension. A thin, runny batter, however, offers very little resistance, allowing the chunks to easily travel downwards.
This challenge is amplified inside the oven. As the batter heats up, its viscosity decreases—it becomes thinner. This is a critical window where disaster can strike. Even a seemingly thick batter can become fluid enough for the inclusions to begin their descent. According to food science research, this phase separation increases as the batter thins with heat, occurring before the starches gelatinize and the egg proteins coagulate to set the final structure. The goal is to maintain a high viscosity for as long as possible until this “setting” point is reached, effectively locking the chunks in place.
Therefore, assessing your batter’s consistency is the first step. A batter that pours like milk is a guaranteed recipe for sunken chips. A proper muffin batter should be thick, dropping from a spoon in clumps rather than flowing in a smooth ribbon. This initial thickness is your first and best line of defense against the pull of gravity. As baking experts confirm, a thin batter is simply unable to support the weight of the chocolate, whereas a thick one provides the necessary physical support to keep them suspended during the bake.
How to Coat Chunks in Flour to Improve Suspension During Baking?
Coating chocolate chunks in flour is the most common advice for a reason: it works by directly addressing the physics of the problem. This isn’t a myth passed down through generations, but a practical application of increasing surface friction. The light dusting of flour or cocoa powder creates a dry, slightly rough exterior on the otherwise slick chocolate. This new texture helps the chunks “grip” the surrounding batter, preventing them from slipping through as easily. Furthermore, the flour absorbs some of the excess moisture immediately surrounding the chunk, creating a slightly thicker, more viscous “halo” of batter around it, further impeding its downward journey.
This simple technique was famously articulated by a home baker’s grandmother who advised, “Toss them in a little flour before adding them to the batter. That little bit of flour will help them from sinking to the bottom.” This traditional wisdom is backed by modern baking science. It’s a simple, effective way to manipulate the batter’s local environment to favor suspension.
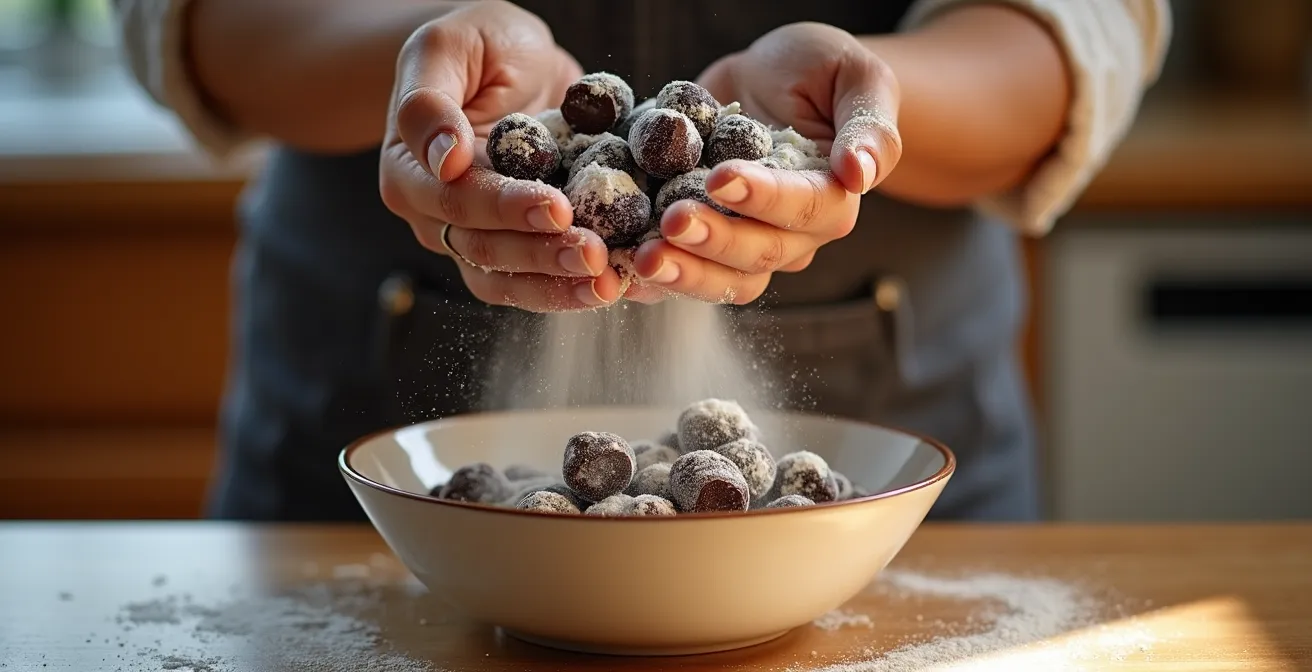
To apply this technique correctly, the key is moderation. You don’t want to add so much flour that it alters the recipe’s overall dry-to-wet ratio, which could result in a dry muffin. A light coating is all that’s needed. Here’s how professionals do it:
- Place your chocolate chunks in a bowl. For up to two cups of chips, add about 1/2 teaspoon of flour or cocoa powder.
- Stir or shake the bowl gently until the chunks are evenly coated with a thin, powdery layer. The goal is simply to remove their surface sheen.
- Fold the coated chunks into your batter as the very last step, mixing just until they are distributed.
Mini Chips vs. Hand-Cut Chunks: Which Melts Better in Cookies?
While this question is often framed around cookies and melting, the more relevant factor for our muffin problem is size and weight. When it comes to suspension, mini chocolate chips are scientifically superior to larger, hand-cut chunks. The reason lies in their surface-area-to-weight ratio. Although a large chunk and a collection of mini chips might weigh the same in total, each individual mini chip has very little mass. Gravity has a much weaker pull on these smaller particles, making it far easier for the batter’s viscosity to hold them in place.
Think of it like trying to suspend a cannonball versus a handful of pebbles in a pool of honey. The cannonball (the large chunk) will sink quickly due to its concentrated mass, while the pebbles (the mini chips) will sink much more slowly, if at all. This is why mini chips often stay perfectly scattered throughout even in slightly thinner batters where larger chunks would fail. Their lighter weight per piece means they sink more slowly and are more likely to be locked into place before they can travel far.
This table breaks down the suspension properties based on a comparative analysis from baking experts:
| Property | Mini Chips | Standard Chunks |
|---|---|---|
| Weight per piece | Lighter (weigh less per chip) | Heavier and more likely to sink |
| Sinking rate | Sink more slowly, often stay in place | Sink faster due to gravity |
| Surface area ratio | Better surface-to-weight ratio | Lower ratio, more mass |
| Best for | Thin batters | Thick batters only |
If your recipe consistently yields a thinner batter, or if you simply want to guarantee an even speckling of chocolate in every bite, switching to mini chips is one of the most effective and foolproof adjustments you can make.
The Low-Temperature Mistake That Causes Inclusions to Sink Before Setting
One of the most overlooked variables in the battle against gravity is temperature. As we’ve established, batter viscosity is highly dependent on temperature. A cold, thick batter provides excellent suspension. However, the moment it enters a hot oven, it begins to warm and thin out. The mistake many bakers make is using room-temperature ingredients, which gives the batter a head start on thinning. This shortens the crucial window where the batter is thick enough to hold the chunks.
Professional bakeries understand this relationship implicitly. According to an analysis of temperature control in food science, viscosity is a key factor in preventing phase separation. By managing temperature, they ensure the batter’s structure remains stable until starch gelatinization occurs, which permanently locks the inclusions. Using cold ingredients (like butter, eggs, and milk straight from the fridge) keeps the initial batter temperature lower. This colder batter takes longer to heat up in the oven, extending the period of high viscosity and giving the leavening agents more time to create a supportive structure before the chunks have a chance to sink.
Taking this principle a step further, you can even use frozen chocolate chunks. Adding frozen chunks directly to your cold batter has a dual benefit: it helps keep the overall batter temperature low, and the chunks themselves take longer to warm up, further delaying any potential melting or sinking. This strategy gives your muffins the best possible chance to set properly.
Your Action Plan: Temperature Management Strategy
- Understand that viscosity is critical; low viscosity from heat causes premature separation and poor-quality results.
- Use cold ingredients (eggs, milk, butter) to start with a colder, more viscous batter that resists thinning longer in the oven.
- Incorporate frozen chocolate chunks directly into the batter to help maintain its low temperature during the initial baking phase.
- Ensure your oven is fully preheated so the baking process starts immediately, helping the structure set faster.
- Work quickly once wet and dry ingredients are combined to get the muffins into the oven before the batter warms up.
When to Add Chunks: The Last-Minute Fold Technique for Even Spread
The timing and method of incorporating your chocolate chunks are just as important as the batter’s properties. The primary goal is to distribute the chunks evenly without compromising the batter’s structure. The biggest enemy here is over-mixing. When you mix batter after the wet and dry ingredients are combined, you begin to develop gluten. Over-developed gluten leads to tough, dense, and rubbery muffins, and it can also thin out the batter, exacerbating the sinking problem.
To avoid this, professionals use a “last-minute fold” technique. The chocolate chunks should be the very last thing you add. Instead of using a whisk or an electric mixer, switch to a silicone spatula or wooden spoon. Add the chunks and use a gentle folding motion—scraping down the side of the bowl and bringing the batter from the bottom up and over the top—rotating the bowl as you go. You should stop folding the moment the chunks appear evenly distributed. A few lumps in the batter are perfectly fine and are actually desirable for a tender muffin crumb.
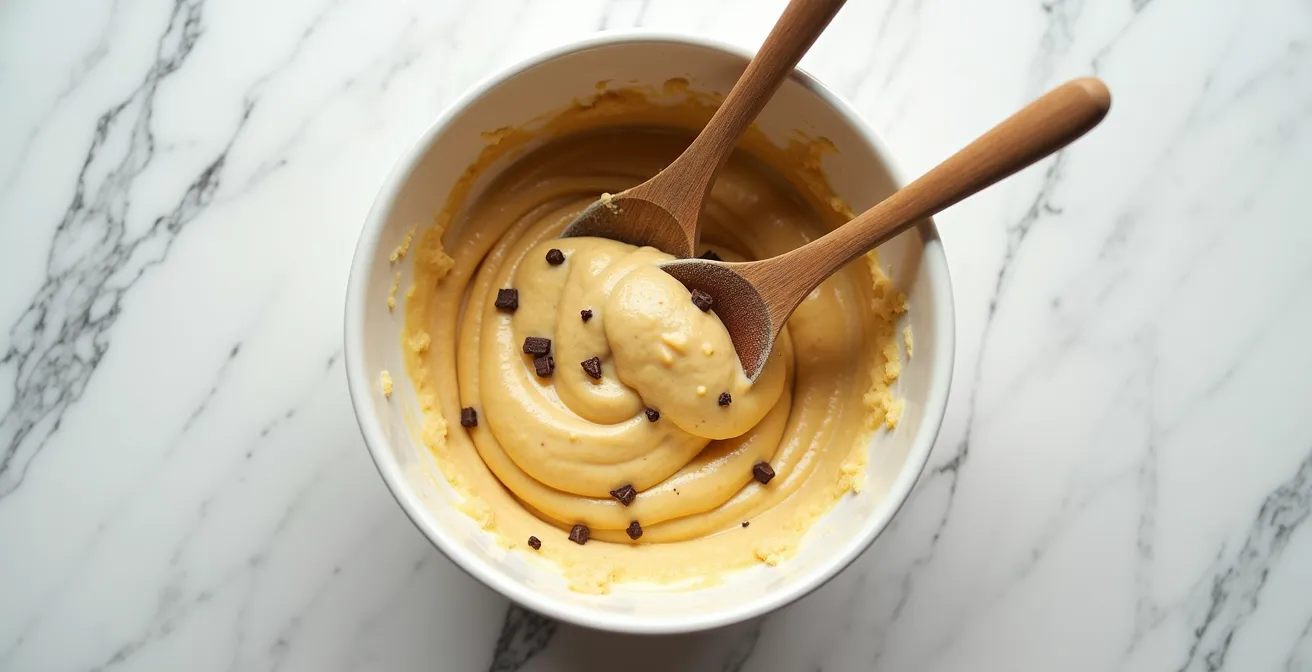
An even more advanced technique involves mixing the chocolate chunks with the dry ingredients first. By doing this, the chunks get coated in flour (as discussed previously) and are already in the bowl before the wet ingredients are added. This minimizes handling time once the batter is formed. The final process looks like this:
- In one bowl, whisk together your dry ingredients (flour, sugar, leavening agents, salt) and your chocolate chunks.
- In a separate bowl, whisk together your wet ingredients (eggs, milk, oil).
- Pour the wet ingredients into the dry ingredients and fold gently with a spatula just until combined. Stop as soon as you no longer see streaks of dry flour.
This method ensures minimal gluten development, preserving the batter’s thickness and tenderness while achieving a perfect distribution of chocolate.
Whole vs. Crushed: Which Texture Works Best Inside a Bonbon?
While the world of bonbons seems far removed from rustic muffins, the principles governing inclusions offer valuable lessons. In confectionery, the choice between whole nuts and crushed pieces is a deliberate decision about texture and distribution, and the physics are directly applicable. A whole chunk of chocolate, like a whole nut, is a single, heavy object. A crushed chunk, however, behaves like chocolate shards or very coarse shavings—a collection of lighter, more varied pieces.
As we’ve seen, weight is a primary driver of sinking. Crushing a larger chocolate chunk into smaller shards and pieces fundamentally changes its suspension properties. You are creating a mix of sizes, many of which will be light enough to be easily suspended by the batter, while the slightly larger pieces create those desirable pockets of melted chocolate. This “crushed” approach offers a happy medium between the even speckling of mini chips and the dramatic pools of large chunks.
This table, adapted from principles used in baking, illustrates the trade-offs:
| Characteristic | Whole Chunks | Crushed/Shards |
|---|---|---|
| Weight | Heavier, tend to sink more | Lighter individual pieces |
| Distribution | Create thick ribbons of chocolate | More even throughout |
| Texture impact | Large irregular pieces create pockets of chocolate | Consistent chocolate flavor in each bite |
| Visual appeal | Dramatic chocolate pockets | Speckled appearance |
For a truly artisanal muffin, consider using a high-quality chocolate bar and chopping it by hand, but aim for a variety of sizes, from large chunks down to small shards. Tossing this mixture in flour before folding it into the batter will help suspend the entire range of sizes, giving you the best of both worlds: great visual appeal and a well-distributed chocolatey experience.
When to Fold in Chocolate Chunks to Prevent Them Melting Completely?
Preventing premature melting is intrinsically linked to the same principles that prevent sinking: temperature control and minimal mixing. Adding chocolate chunks to a warm or overworked batter is a recipe for disaster. If the batter is too warm, the chocolate will begin to melt on contact, creating streaks and disappearing into the crumb rather than remaining as distinct pockets of gooey goodness. This is often a result of using room-temperature dairy and eggs without realizing their effect on the overall mixture.
Professional bakers often bring ingredients to room temperature to ensure smooth emulsification, but they do so carefully. For muffins, where a thick, slightly lumpy batter is desired, using colder ingredients is often preferable. This keeps the chocolate solid during mixing. A key technique is to sift all dry ingredients, including cocoa powder, to break up lumps. This aerates the mixture and ensures you won’t have to overmix later to break up a clump of flour, which would warm and thin the batter.
The ideal procedure is to toss the solid, cold chocolate chunks into the sifted dry ingredients. When you then add the cold wet ingredients, you only need to mix for a few seconds. The mantra is to stop stirring when you can still see lumps and just a few streaks of flour remain. The batter will finish hydrating on its own. This minimal-contact approach ensures the chocolate chunks stay whole and the batter stays thick and cool, giving them no opportunity to melt or sink before they hit the oven’s heat.
Key Takeaways
- The core issue is a physics battle: the chocolate’s high density versus the batter’s viscosity (thickness). A thick batter suspends chunks; a thin batter lets them sink.
- Temperature is your greatest tool. Cold ingredients (butter, milk, eggs) and even frozen chunks keep the batter viscous for longer in the oven, giving the structure time to set.
- Technique matters. Coating chunks in flour increases friction, while a gentle, last-minute folding technique prevents over-mixing, which thins the batter and creates tough muffins.
How to Achieve the Perfect Crackly Top on Brownies Every Time?
While a brownie’s crackly top and a muffin’s fluffy dome seem like different goals, they are both direct results of a well-formed structure—a structure that is easily ruined by sinking inclusions. When heavy chocolate chunks sink, they don’t just disappear from the top half of the muffin; they create a dense, gummy, and often undercooked layer at the bottom. The consequences of this are severe, as food science studies demonstrate that dense components sinking to the bottom create this undesirable layer while leaving a fragile, coarse structure at the top.
This weak upper structure is incapable of rising properly. Instead of a proud, domed top, you get a muffin that is flat, or worse, one that collapses as it cools. The final stage of ensuring suspension happens in the oven itself. The leavening agents, like baking powder, react immediately once the wet and dry ingredients are combined. Your job is to get the muffins into a fully preheated oven as quickly as possible to capitalize on that initial burst of leavening.
Achieving a bakery-style dome is all about giving that reaction the best environment to succeed. A high initial baking temperature (e.g., 425°F or 220°C for the first 5-7 minutes) causes the exterior to set quickly while the powerful oven spring pushes the center upwards. This rapid rise helps set the muffin’s crumb before the chunks have had any significant time to sink. By managing viscosity, temperature, and mixing, you ensure the chunks are still suspended when this powerful oven spring occurs, allowing for a perfect dome and an evenly textured crumb from top to bottom.
Now that you understand the physics behind why chocolate chunks sink and the scientific principles to prevent it, you are no longer just following a recipe; you are conducting a delicious experiment. By controlling viscosity, managing temperature, and applying proper technique, you can engineer the perfect muffin every time. It’s time to apply these principles in your own kitchen laboratory. Start your next batch of muffins with these strategies and observe the delightful, evenly distributed results.