Techniques & Tips
The difference between a good home cook and a truly confident one isn’t about having more recipes—it’s about understanding the fundamental techniques that make those recipes work. When you grasp why chocolate seizes, how emulsions stay stable, or what visual cues signal the perfect temperature, you stop simply following instructions and start cooking with intention and control.
This resource brings together the essential techniques that bridge the gap between amateur experimentation and professional-level results. From the precise science of chocolate work to the chemistry of perfect textures, these foundational skills will transform how you approach every recipe in your kitchen, giving you the confidence to troubleshoot, adapt, and create consistently excellent results.
Understanding Temperature: The Foundation of Precision
Temperature control is the invisible thread that connects nearly every advanced cooking technique. Whether you’re tempering chocolate, creating a stable ganache, or achieving the perfect rise in choux pastry, understanding thermal dynamics separates guesswork from mastery.
Reading Visual Cues vs. Using Thermometers
Professional bakers often debate the merits of instinct versus instruments. The truth is, both skills are essential. A digital probe thermometer provides objective accuracy—crucial when tempering chocolate requires hitting a precise 31-32°C (88-90°F) window for dark chocolate. However, visual cues like the way chocolate flows off a spatula or the subtle shimmer on a ganache’s surface offer real-time feedback that no device can match.
Think of thermometers as your training wheels: they build your understanding of what “ready” looks like at a molecular level. Over time, you’ll recognize the thickening of a custard at 82°C (180°F) by its coating texture on a spoon, or judge when sugar syrup reaches soft-ball stage by observing bubble size and surface movement. The goal isn’t to choose one method over the other, but to develop both sensory awareness and technical precision.
Managing Cooling Environments
The ambient temperature of your workspace affects outcomes more than most home cooks realize. Chocolate work, for instance, demands a cool room—ideally between 18-20°C (64-68°F). Work in a warm kitchen, and your carefully tempered chocolate will break before you’ve even filled your molds. Similarly, pastry dough becomes sticky and unmanageable when room temperature rises above 22°C (72°F), as the butter softens prematurely.
Practical strategies include working in the coolest part of your kitchen, using marble surfaces that naturally stay cold, and timing intensive techniques for early morning hours. For chocolate work specifically, some professionals keep a small portable air conditioner running in their workspace. These aren’t signs of obsession—they’re recognition that environmental control is technique.
The Science of Chocolate Work
Chocolate stands apart from nearly every other ingredient in the kitchen due to its complex crystalline structure. Understanding how cocoa butter behaves—and misbehaves—unlocks the door to professional-quality confections, from perfectly snappy bonbons to glossy ganache finishes.
Crystallization and Tempering Fundamentals
Here’s the essential truth about chocolate: cocoa butter can solidify into six different crystal formations, but only one—Form V crystals—produces the qualities we desire: shine, snap, and stability at room temperature. Tempering is simply the process of encouraging these desirable crystals while preventing the unstable forms from dominating.
The traditional tempering curve involves three phases:
- Melting: Heat chocolate to 45-50°C (113-122°F) to erase all existing crystal memory
- Cooling: Bring it down to 27-28°C (80-82°F) to encourage Form V crystal formation
- Working temperature: Gently rewarm to 31-32°C (88-90°F) for dark chocolate, maintaining those stable crystals while achieving fluid workability
When chocolate “blooms”—developing that grayish, streaky appearance—it’s not spoiled. The fat or sugar has simply crystallized on the surface, usually due to temperature fluctuations or moisture exposure. While aesthetically disappointing, bloomed chocolate remains perfectly safe to remelt and re-temper.
Choosing the Right Chocolate: Fat Content Matters
Not all chocolate behaves identically, and understanding fluidity percentages transforms how you select ingredients. Couverture chocolate—the professional’s choice—contains at least 31% cocoa butter, giving it superior flow characteristics essential for coating and molding. You’ll see these labeled with droplet symbols: one droplet indicates thick consistency ideal for mousses, while three droplets signal high fluidity perfect for thin shell work.
High-cocoa-butter chocolate costs more, certainly, but consider the practical trade-off: it spreads more easily into molds, creates thinner (thus more elegant) shell work, and produces a superior mouthfeel due to cocoa butter’s unique melting point—right at body temperature, which is why quality chocolate literally melts on your tongue. Attempting to substitute with compound chocolate or adding vegetable fats disrupts this precise thermal behavior, often resulting in waxy texture and poor setting characteristics.
Moisture: The Hidden Enemy
Chocolate seizes—transforms from glossy liquid to grainy paste—when even a tiny amount of water enters the equation. Paradoxically, you can successfully add substantial liquid (as in ganache), but a single drop causes disaster. Why? Small amounts of water dissolve the sugar particles, creating a thick syrup that clumps the cocoa particles together. Larger quantities can incorporate properly into an emulsion.
Practical prevention measures include ensuring all tools are completely dry, avoiding steam exposure, and never covering warm chocolate with a lid (condensation will drip back down). If working with infusions for flavored chocolate, always strain thoroughly and ensure any liquid additions are calculated into your recipe as part of a proper emulsion formula.
Creating Stable Emulsions and Perfect Textures
The Chemistry Behind Silky Ganache
Ganache represents one of pastry’s most elegant emulsions: the marriage of fat (chocolate) and water (cream). Understanding the science here prevents the common pitfalls of separation, graininess, or overly soft texture. The key lies in creating a stable emulsion where tiny fat droplets remain suspended in the liquid phase, prevented from coalescing by lecithin naturally present in chocolate.
The friction method—starting with a small amount of liquid, creating a tight paste, then gradually incorporating more liquid—gives you maximum control. This technique, borrowed from making mayonnaise, ensures each addition fully emulsifies before the next. The visual progression should be: tight, shiny paste → elastic, glossy cream → smooth, flowing ganache.
Ratios matter tremendously. A 1:1 ratio (chocolate to cream by weight) produces pipeable ganache for truffle centers. A 2:1 ratio creates spreadable frosting consistency. A 3:1 ratio yields firm ganache suitable for cutting into bonbons. Temperature matters too: emulsification works best when both components are between 35-40°C (95-104°F). Working too hot causes separation; too cool prevents proper integration.
Manipulating Sugar and Fat Structures
Beyond chocolate, the interplay between sugar and fat governs texture across the entire pastry spectrum. Creaming butter and sugar isn’t just mixing—it’s mechanically incorporating air cells that provide structure and tenderness. The size of sugar crystals directly impacts outcomes: superfine sugar creates tighter, more uniform air cells for delicate cakes, while coarser sugar provides pleasant textural contrast in cookies.
Cooling methods post-baking continue to shape texture. A cookie pulled from the oven is still undergoing chemical changes; its final texture depends on how quickly it cools. Leaving cookies on the hot pan continues cooking via residual heat—useful for chewy centers. Immediate transfer to a cooling rack halts the process, preserving softer texture. Understanding this carry-over cooking principle lets you pull items from the oven at exactly the right moment for your desired final result.
Resting time for dough serves multiple purposes: it allows gluten to relax (reducing toughness), permits flour to fully hydrate (improving texture), and gives flavors time to develop. A cookie dough rested overnight in the refrigerator will spread less during baking and develop more complex caramel notes as enzymes slowly break down starches into sugars.
Essential Baking Techniques for Consistent Results
Cocoa Powder: More Than Just Flavor
Cocoa powder functions as a structural ingredient in baking, not merely a flavoring. Its acidity level affects how it interacts with leavening agents. Natural cocoa powder (pH 5-6) is acidic and reacts vigorously with baking soda, producing carbon dioxide for lift. Dutch-processed cocoa has been alkalized to neutral pH (7-8), offering milder flavor and darker color but requiring baking powder instead of soda for proper rise.
Substituting one for the other without adjusting leavening agents leads to dense, sunken cakes or oddly bitter flavors. The fat content in cocoa powder also varies—from 10-12% in standard supermarket varieties to 20-24% in premium options. Higher fat content delivers richer flavor and more tender crumb, though it costs more.
Blooming cocoa powder—mixing it with hot liquid before adding to batter—intensifies flavor dramatically. Heat activates aromatic compounds that remain dormant in dry powder. This simple 30-second step transforms ordinary chocolate cake into something notably more complex and deeply flavored.
Mastering Choux Pastry
Choux pastry (for éclairs, profiteroles, cream puffs) operates on unique principles. The panade—the cooked flour-water-butter paste—must reach the right consistency before eggs are added. You’re looking for a smooth ball that pulls cleanly from the pan sides and leaves a thin film on the pan bottom. This film indicates sufficient moisture has evaporated, concentrating the paste for proper structure.
Egg addition follows a critical pattern: incorporate each egg fully before adding the next, and stop when the batter reaches “reluctant ribbon” consistency—it should fall from your spatula in a thick ribbon that takes 3-4 seconds to settle back into the mass. Too loose, and your choux spreads instead of puffing; too stiff, and it can’t expand properly.
The baking environment matters enormously. High initial heat (220°C/425°F) creates rapid steam expansion, forming the hollow interior. Reducing heat midway (to 180°C/350°F) allows the structure to set without burning. Never open the oven door during the first 20 minutes—the temperature drop can collapse your carefully built structure. A toothpick test isn’t reliable here; instead, look for deep golden color and no remaining moisture beads on the surface.
Navigating Oven Challenges
Every oven lies. Even new, well-calibrated ovens typically vary by ±10-15°C (±20-25°F) from their set temperature. More importantly, virtually all ovens have hotspots—areas that run consistently hotter or cooler due to heating element position, air circulation patterns, or insulation variations.
Map your oven’s personality by performing a simple bread test: arrange white bread slices across all racks and toast them at 180°C (350°F). The varying degrees of browning reveal exactly where your oven runs hot or cool. Use this knowledge strategically: position delicate items in cooler zones, rotate pans halfway through baking, and adjust your rack position based on what you’re making.
Material conductivity affects baking speed and browning. Dark metal pans absorb heat more readily than shiny ones, potentially over-browning bottoms. Glass and ceramic retain heat longer, continuing to cook contents even after removing from the oven. Light-colored aluminum pans offer the most even, predictable heat conduction for most baking applications. Understanding these thermal properties lets you adapt any recipe to whatever cookware you actually own.
Proper preheating is non-negotiable for consistent results. Most ovens require 15-20 minutes to fully stabilize at temperature—not just to reach the set point, but to heat the oven walls and racks that radiate heat to your food. Rushing this step introduces a variable that undermines all your other careful technique.
These techniques form the foundation of confident, consistent cooking. As you develop your understanding of temperature, chemistry, and physical processes, you’ll find recipes becoming less like strict instructions and more like flexible frameworks—guides you can adapt, troubleshoot, and eventually transcend based on what’s actually happening in front of you. That transformation from recipe-follower to intuitive cook is what these techniques ultimately deliver.

Why Does Your 350°F Oven Bake Differently Than the Recipe Author’s Oven?
You follow the recipe perfectly, yet your bakes fail. The problem isn’t the recipe; it’s the disconnect between the recipe’s ideal conditions and the unique thermal reality of your home oven. As an appliance technician, I can tell you that…
Read more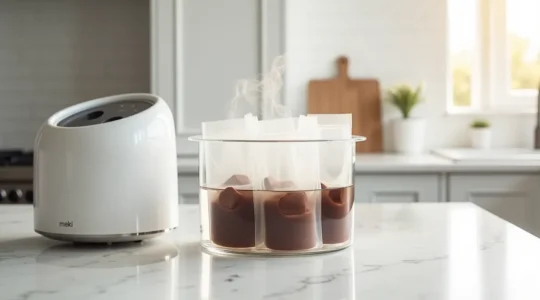
Why is Sous-Vide the Safest Method for Tempering Chocolate at Home?
The absolute safety and consistency of sous-vide for chocolate work stem from its ability to transform tempering from a delicate art into a repeatable scientific process. It offers unparalleled temperature precision, eliminating the risk of scorching or seizing common with…
Read more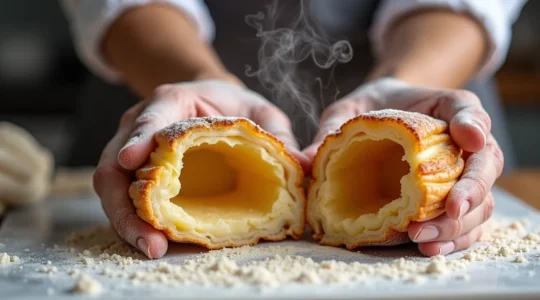
How to Know When Choux Pastry Is Dry Enough Inside Without Cutting It Open?
In summary: Stop relying on just a golden-brown color, which often leads to underbaked, collapsed puffs. Train your senses to become the ultimate baking tool: feel the weight, listen for silence, and test the shell’s firmness. Master the “double bake”…
Read more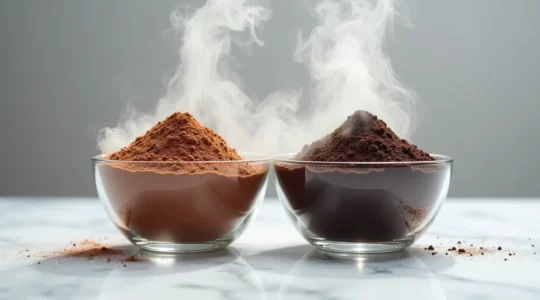
Natural vs. Dutch Process: When Does Swapping Cocoa Powder Break a Recipe?
Swapping cocoa powders isn’t a simple 1:1 exchange; it’s a chemical reaction that determines if your cake rises or falls. Natural cocoa is acidic and needs baking soda to react and create lift. Dutch-process cocoa is neutral or alkaline and…
Read more
Why Does Using Melted Butter Create a Chewier Texture Than Creamed Butter?
The chewiness of a baked good is primarily determined by the controlled formation of a sugar-glass matrix, not just gluten development. Melted butter (a liquid fat emulsion) coats flour proteins more effectively than creamed butter (a solid fat foam), physically…
Read more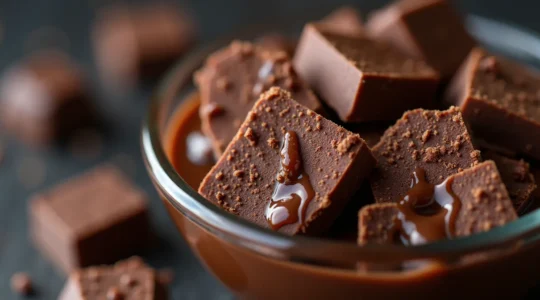
How to Fix a Broken Ganache That Looks Oily and Curdled?
A broken, oily ganache is not a failure, but a reversible separation of fat and water caused by thermal shock. The key is to gently re-warm the mixture to the correct temperature window (90-110°F / 32-43°C). Use an immersion blender…
Read more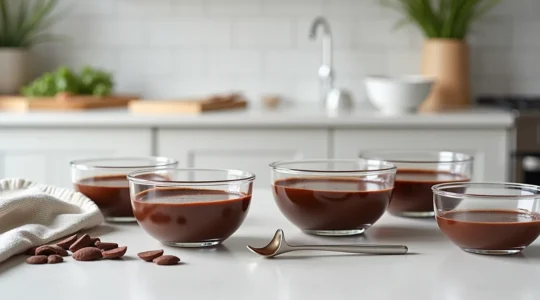
How to Temper Chocolate Without a Marble Slab in Under 15 Minutes?
In summary: Tempering isn’t about melting; it’s a precise temperature game to cultivate stable “Beta-V” cocoa butter crystals. Forget the marble slab. Modern methods like seeding or sous-vide offer foolproof precision for home cooks. Mastering the temperature curve (melt, cool,…
Read more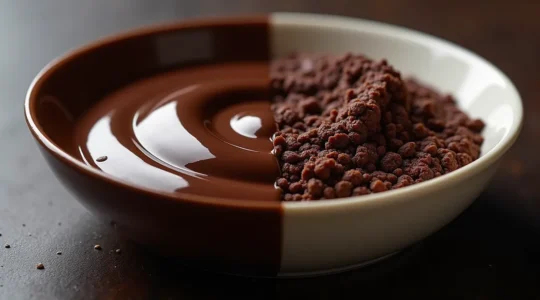
Why Using Supermarket Chips Instead of Couverture Ruins Your Ganache?
Your ganache failure isn’t a skill issue; it’s a chemistry problem caused by using the wrong type of fat. Supermarket chocolate chips contain added vegetable fats and stabilizers that actively disrupt the fragile chocolate-and-cream emulsion required for a silky ganache….
Read more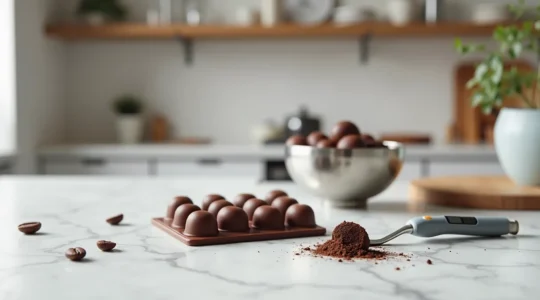
What Equipment Do You Really Need to Start Making Bonbons at Home?
Making professional-quality bonbons isn’t about owning expensive machines or a long list of gadgets. Success depends on precisely controlling temperature to achieve the correct crystal structure. Eliminating every trace of moisture and using the right molds are non-negotiable principles. Recommendation:…
Read more