Swapping cocoa powders isn’t a simple 1:1 exchange; it’s a chemical reaction that determines if your cake rises or falls.
- Natural cocoa is acidic and needs baking soda to react and create lift.
- Dutch-process cocoa is neutral or alkaline and requires baking powder (a complete leavener) to work correctly.
Recommendation: Always match your cocoa type to the leavening agent specified in a recipe, or use a reliable substitution guide to adjust the chemistry and prevent baking failures.
There’s a specific kind of disappointment reserved for bakers: pulling a chocolate cake from the oven only to find it dense, gummy, or stubbornly flat. You followed the recipe to the letter, but a single, seemingly innocent substitution—swapping one tin of cocoa powder for another—sabotaged the entire result. The internet offers a dizzying array of advice: some swear by natural cocoa, others by Dutch-processed. You’re told to use baking soda, or maybe it was baking powder. This confusion is the root of countless baking failures.
But what if the key wasn’t about memorizing rigid rules, but about understanding the fundamental chemistry at play? The truth is, your kitchen is a laboratory, and cocoa powder is a powerful reactive agent. The difference between a fluffy, tender crumb and a dense, fudgy brownie isn’t magic; it’s a predictable outcome of pH levels, fat content, and particle solubility. Once you understand these properties, you stop being a recipe follower and become the master of the reaction.
This guide moves beyond the simple “acid vs. alkali” advice. We will dissect the chemical identity of each type of cocoa powder, explaining precisely how it interacts with other ingredients. We’ll explore why one powder creates a moister cake, how humidity can ruin your cocoa before you even use it, and why the type you choose has a dramatic impact on flavor and even nutritional value. By the end, you won’t just know *which* cocoa to use; you’ll understand *why*, empowering you to diagnose and perfect any chocolate recipe.
To navigate the science of cocoa, we will explore the critical questions that determine baking success. This guide is structured to build your knowledge from the foundational principles of leavening to the finer points of texture and flavor.
Contents: The Science of Cocoa in Baking
- Why Does Natural Cocoa Require Baking Soda Instead of Baking Powder?
- How to ‘Bloom’ Cocoa in Hot Water to Intensify Flavor by 50%?
- 10/12 vs. 22/24 Fat: Which Powder Makes Moister Cakes?
- The Humidity Mistake That Causes Lumps in Your Cocoa Tin
- What Sieve Mesh Size Prevents Cocoa Clumps on Tiramisu?
- Natural vs. Dutch-Processed: Which Powder Has More Antioxidants?
- Why Does Dissolving Sugar in Hot Butter Create the Crinkle?
- How Does High Cocoa Solids Percentage Affect Your Blood Pressure?
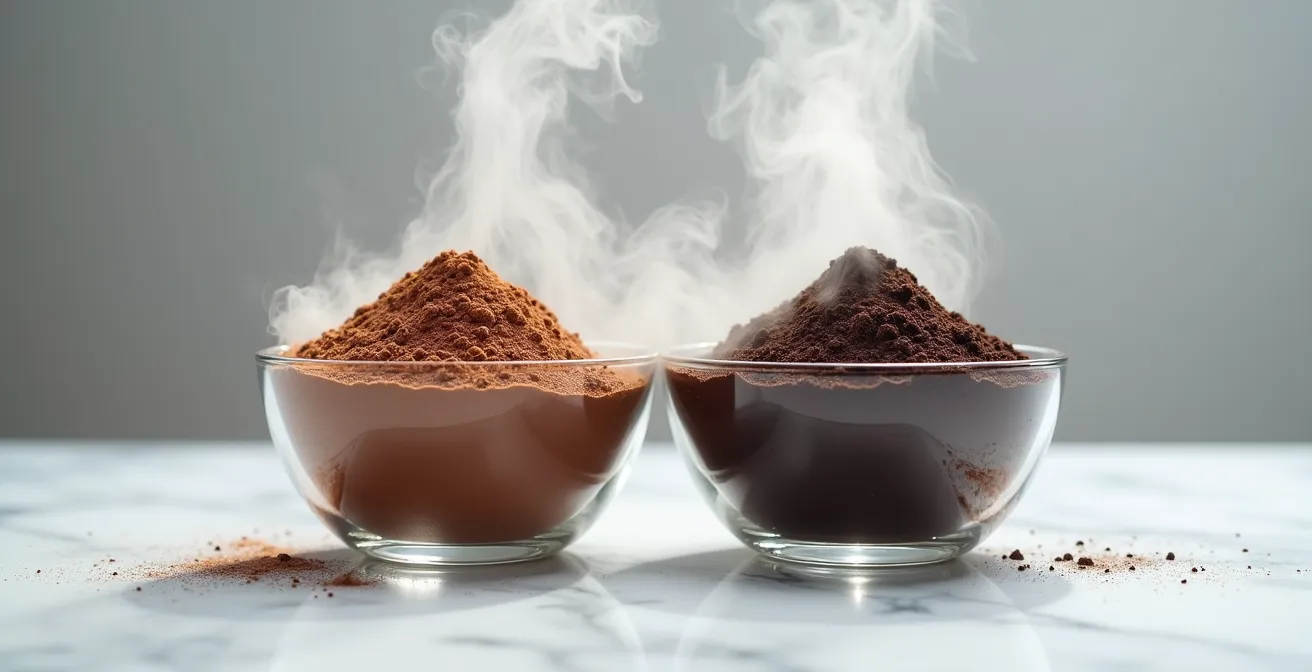
Why Does Natural Cocoa Require Baking Soda Instead of Baking Powder?
The single most critical difference between natural and Dutch-processed cocoa lies in their pH level. This chemical property directly dictates which leavening agent you must use. Natural cocoa powder is simply roasted and ground cocoa beans. It is acidic, with a pH of 5.3-5.8. This acidity is a crucial ingredient in the leavening reaction. When this acid comes into contact with an alkali (a base) like baking soda (sodium bicarbonate), it creates a chemical reaction that releases carbon dioxide gas. These gas bubbles are what cause your batter to rise, creating a light, airy crumb.
Dutch-processed cocoa, on the other hand, has been washed with an alkaline solution to neutralize its acidity. This process, known as alkalization, raises its pH to a neutral or even slightly alkaline 7-8. Because it lacks the necessary acid, Dutch-process cocoa will not react with baking soda. If you use it in a recipe calling for baking soda, you’ll get no lift. Instead, Dutch-processed cocoa requires baking powder, which is a complete leavening system in a box—it contains both the alkali (baking soda) *and* the acid needed to create a reaction. Using the wrong cocoa with the wrong leavener is the most common reason for a failed chocolate cake.
So, can you substitute one for the other? Yes, but only if you also adjust the leavening agent to rebalance the chemistry of the recipe. Failure to do so will impact not only the rise but also the color and flavor of your final product.
Action Plan: Leavening Agent Substitution Guide
- Assess the Recipe: If a recipe calls for baking soda and natural cocoa, do not substitute with Dutch-process cocoa without adjusting the leavener.
- Substitute Dutch for Natural: If you must use Dutch-processed cocoa, replace the recipe’s baking soda with double the amount of baking powder.
- Substitute Natural for Dutch: To use natural cocoa in a recipe designed for Dutch-processed, replace the baking powder with about half the amount of baking soda. Remember, you’re removing the acid from the powder and adding it back with the cocoa.
- Analyze Mixed Leavener Recipes: If a recipe contains both baking soda and baking powder, identify which is dominant. More baking soda suggests natural cocoa is the intended choice for its acidity.
- Understand Leavening Power: Keep in mind that 1 teaspoon of baking powder only has the leavening power of 1/4 to 1/3 teaspoon of baking soda, so adjustments must be precise.
How to ‘Bloom’ Cocoa in Hot Water to Intensify Flavor by 50%?
Have you ever noticed a slightly gritty texture or a less-than-intense chocolate flavor in your bakes? The cause may be that your cocoa powder wasn’t properly dissolved. “Blooming” is a simple but transformative technique that addresses this by mixing cocoa powder with a hot liquid—like water, coffee, or oil—before adding it to the rest of your ingredients. This process does two critical things on a molecular level to unlock cocoa’s full potential.
First, it dissolves the solid cocoa particles. Cocoa powder contains starch granules that need heat and moisture to swell and dissolve, just like cornstarch. Without blooming, these particles can remain suspended in the batter, leading to a grainy mouthfeel and dry clumps. Second, the heat helps to release trapped flavor compounds from the cocoa solids and melts the cocoa butter. This creates a richer, smoother, and far more intense chocolate flavor, often described as being up to 50% more powerful. The technique ensures the cocoa is evenly distributed throughout the mixture for a uniform bake.

As you can see, the transformation from a dry, clumpy powder into a glossy, liquid paste is immediate. According to research from baking experts at Dr. Oetker, this pre-dissolving step is key to creating smoother cake batters and buttercreams. By blooming your cocoa, you are essentially creating a concentrated chocolate liquid that integrates seamlessly into your recipe, ensuring a soft, tender crumb and deep, well-rounded flavor.
10/12 vs. 22/24 Fat: Which Powder Makes Moister Cakes?
Not all cocoa powders are created equal when it comes to fat content, a factor that profoundly impacts the final texture of your baked goods. The numbers “10/12” or “22/24” on a package refer to the percentage of cocoa butter remaining in the powder after the beans are processed. Standard American cocoa powders are typically “10/12,” meaning they contain 10-12% fat. European-style or premium powders are often “22/24,” with a much higher fat content of 20-24%.
So which one makes a moister cake? The answer is unequivocally the high-fat powder. Fat plays a crucial role in creating a tender texture. It coats the flour proteins, inhibiting gluten development. Less gluten means a softer, less chewy crumb. This is why high-fat cocoa is the secret to rich, fudgy brownies and moist devil’s food cakes. The extra cocoa butter also contributes to a richer mouthfeel and a deeper, more luxurious chocolate flavor. As noted by baking expert Dini Kodippili of The Flavor Bender, this difference is not subtle.
Cocoa powder with a higher fat content will have a richer, deeper flavor than cocoa powder with a lower amount of fat.
– Dini Kodippili, The Flavor Bender – Baking 101
While low-fat cocoa is excellent for recipes where you want a lighter texture, like meringues or angel food cake, opting for a high-fat (20/22 or 22/24) powder is the best choice when moisture and a fudgy texture are the primary goals. The following table breaks down the common types and their ideal applications.
| Fat Content Type | Percentage | Common Availability | Best Uses |
|---|---|---|---|
| Low-fat cocoa | 0.5% | Specialized | Meringues, angel food cakes |
| Regular (10/12) | 10-12% | US Standard | General baking |
| High-fat (20/22) | 20-22% | Europe Standard | Moist cakes, brownies |
| Premium (22/24) | 22-24% | Professional | Ganaches, frostings, fudgy textures |
The Humidity Mistake That Causes Lumps in Your Cocoa Tin
Opening a tin of cocoa powder only to find it has solidified into hard, stubborn clumps is a common frustration. This phenomenon is not a sign of spoilage, but rather a result of cocoa powder’s hygroscopic nature—its tendency to attract and absorb moisture from the surrounding air. When cocoa powder absorbs humidity, the particles stick together, forming clumps that are difficult to break up and incorporate smoothly into a batter.
Interestingly, the type of cocoa powder you use can make this problem worse. According to research from deZaan cocoa specialists, the alkalization process makes Dutch-processed cocoa even more hygroscopic. Powders with a pH above 7.5 attract significantly more water molecules than their acidic, natural counterparts. This means your expensive Dutch-processed cocoa is particularly vulnerable to clumping if not stored correctly, especially in a humid environment like a kitchen.
Storing cocoa powder near a stove, a dishwasher, or a frequently used sink is a common mistake that exposes it to steam and high humidity. To preserve its freshness and prevent clumping, proper storage is essential. Following a few best practices will ensure your cocoa powder remains a fine, free-flowing powder ready for any recipe.
- Store in an airtight container: The original packaging is often not sufficient. Transfer cocoa to a container with a tight-fitting lid to block out moisture and air.
- Keep it cool and dry: A pantry or cupboard away from heat sources is ideal. Avoid storing it above the refrigerator, which can generate heat.
- Protect from light and odors: Light can degrade the flavor, and cocoa powder can absorb strong odors from spices or other foods stored nearby.
- Use within two years: While cocoa powder doesn’t spoil, it loses its flavor intensity over time. For best results, use it within this timeframe.
- Handle clumps: If clumping does occur, you can salvage it by sifting it through a fine-mesh sieve or giving it a quick pulse in a food processor to break up the lumps.
What Sieve Mesh Size Prevents Cocoa Clumps on Tiramisu?
For desserts like tiramisu or truffles, the final dusting of cocoa powder is both a flavor component and a visual statement. A clumpy, uneven layer can ruin the presentation. The secret to achieving that flawless, velvety finish lies not just in sifting, but in using the right tool and technique. While any sieve is better than none, professional pastry chefs understand that the mesh size of the sieve is critical for perfect particle distribution.
For a super-fine, even coating, a fine-mesh sieve of at least 30-40 mesh is recommended. This ensures that only the smallest particles make it through, preventing any micro-clumps from marring the surface. However, the technique is just as important as the tool. As pastry professionals know, sifting from too high up allows air resistance and electrostatic charge to cause the fine powder to “drift,” creating an uneven dusting. The best method is to sift low and slow, holding the sieve just a few inches above the surface.
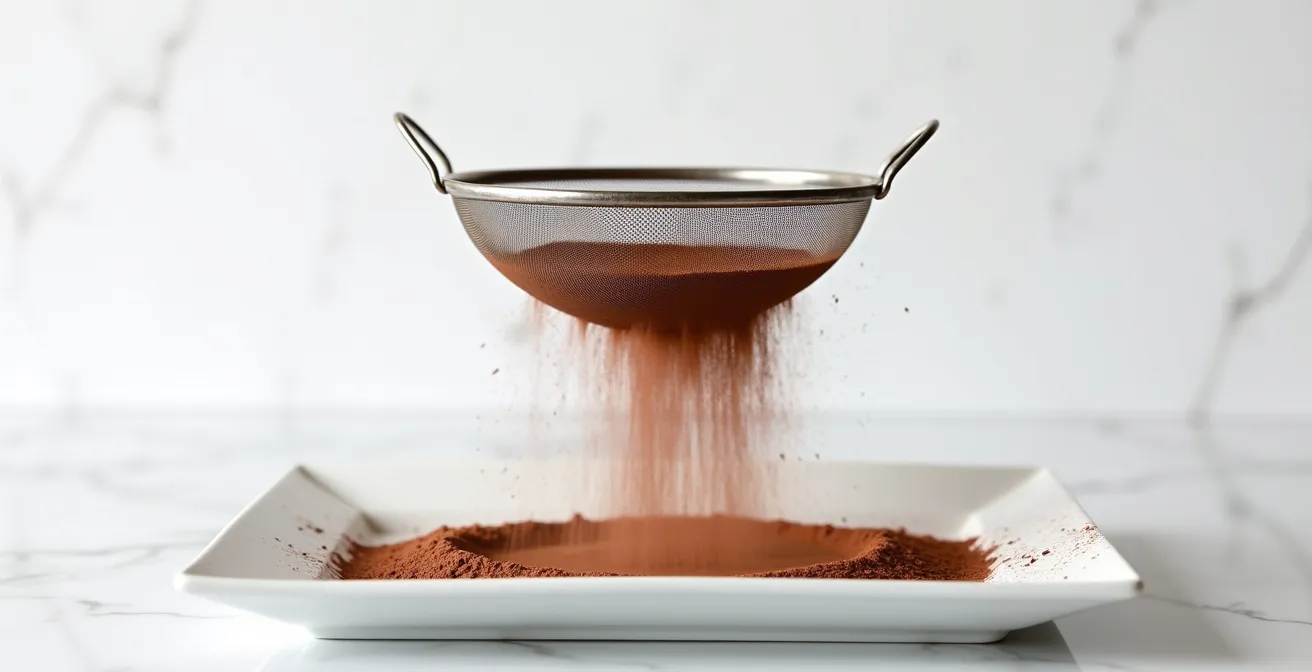
The perfect, delicate layer shown here is the result of this precise technique. By controlling the height and speed, you can create a perfectly uniform coating without any blemishes. To take it a step further, many chefs employ a two-step sifting process to guarantee a flawless result, as detailed by industry experts.
Professional Pastry Dusting Techniques
For a flawless finish, professional pastry chefs often use a drum sieve (tamis) or a pump-action duster, which offer superior control over particle distribution. A key technique, detailed in publications like Pastry Arts Magazine, is to pre-sift the cocoa powder into a separate bowl first. This initial pass breaks up all major clumps. The second, final dusting is then applied low and slow over the dessert. This double-sifting method ensures that absolutely no lumps remain, resulting in a perfectly smooth, professional-grade surface every time.
Natural vs. Dutch-Processed: Which Powder Has More Antioxidants?
Chocolate is often celebrated for its health benefits, largely due to its high concentration of antioxidants, particularly a class of compounds called flavanols. These powerful molecules are linked to various health benefits, including improved cardiovascular function. However, the amount of flavanols in your cocoa powder is drastically affected by how it is processed. If you’re choosing cocoa for its nutritional value, the distinction between natural and Dutch-processed is paramount.
Natural cocoa powder, being the least processed, retains the highest concentration of its original flavanols. The alkalization process used to create Dutch-processed cocoa, however, is destructive to these delicate compounds. In fact, studies on cocoa processing show that between 60-90% of flavanols are lost during alkalization. The heavier the Dutching process (resulting in a darker color and higher pH), the greater the loss of antioxidants. A “black” cocoa powder, which has been heavily alkalized, contains almost no flavanols and is used almost exclusively for its dramatic color.
Therefore, if antioxidant content is your goal, natural cocoa is the clear winner. While Dutch-processed cocoa offers a milder flavor and darker color, these benefits come at a significant nutritional cost. The choice between them becomes a trade-off: are you prioritizing flavor profile and color, or are you seeking the maximum health benefits from your chocolate?
This table from cocoa industry analysis clearly illustrates the trade-off between processing, pH, and nutritional content. The relationship is inverse: as the pH level rises through processing, the antioxidant retention plummets.
| Processing Type | pH Level | Antioxidant Retention | Health Benefits |
|---|---|---|---|
| Natural Cocoa | 5.3-5.8 | High (full retention) | Maximum flavanols, antioxidants preserved |
| Lightly Dutch | 6.8-7.2 | Moderate (40% retained) | Some antioxidants remain |
| Heavy Dutch | 7.5-8.0 | Low (10-40% retained) | Minimal antioxidant benefit |
| Black Cocoa | 8.0+ | Very Low (<10%) | Primarily for color, not nutrition |
Why Does Dissolving Sugar in Hot Butter Create the Crinkle?
The coveted shiny, crackly top on a perfect brownie is not an accident; it’s the result of precise chemistry. That paper-thin, meringue-like crust is formed when sugar is fully dissolved in the fat (usually melted butter and/or oil) and then baked. As the brownie bakes, this sugar-fat syrup rises to the surface and forms a delicate crust that cracks as the brownie cools. The key to achieving this is ensuring the sugar has completely dissolved before the batter goes into the oven. Undissolved sugar crystals will result in a dull, matte finish.
Interestingly, your choice of cocoa powder can also influence this delicate crust. According to advanced baking chemistry studies, the acidity of natural cocoa can slightly invert the sucrose (break it down into its component sugars, glucose and fructose). This alteration in the sugar-syrup structure can potentially make the crust less shiny and stable than one made with a neutral Dutch-processed cocoa. So, for the shiniest possible crinkle top, a Dutch-processed cocoa might provide a slight edge by not interfering with the sugar’s structure.
If your brownies consistently lack that signature crinkle top, it’s time to troubleshoot your process. The issue almost always lies in one of a few key chemical steps. By methodically checking each one, you can diagnose the problem and achieve that perfect finish.
- Verify the Cocoa Type: Check if the recipe was designed for natural or Dutch-processed cocoa, as the pH balance affects the crust’s texture.
- Check Fat Content: High-fat (22/24) cocoa contributes more fat to the sugar-syrup, creating a softer, more substantial crust with larger, more defined cracks.
- Ensure Sugar Dissolution: Make sure you are whisking the sugar into the hot butter long enough for it to dissolve completely. The mixture should look glossy, not grainy.
- Monitor Baking Temperature: A temperature that is too low may not allow the crust to form and set properly before the rest of the brownie bakes.
- Adjust Leavening: If you suspect you’ve used the wrong cocoa type for the recipe, adjusting the leavening (as per our guide in the first section) can help restore the intended pH balance.
Key Takeaways
- The fundamental rule: Natural cocoa’s acidity requires baking soda for leavening, while neutral Dutch-processed cocoa requires the complete system of baking powder.
- For moister, fudgier results, choose a high-fat (20-24%) cocoa powder. The extra fat inhibits gluten and creates a more tender crumb.
- The health benefits (antioxidants and flavanols) are overwhelmingly found in natural cocoa, as the Dutching process destroys 60-90% of these compounds.
How Does High Cocoa Solids Percentage Affect Your Blood Pressure?
The idea that chocolate can be good for your heart is a popular one, often linked to its potential to help regulate blood pressure. The mechanism behind this effect is tied to the rich concentration of flavanols in cocoa. These compounds are believed to stimulate the production of nitric oxide in the body, which acts as a vasodilator, relaxing and widening blood vessels. This improved blood flow can lead to a reduction in blood pressure. In addition, nutritional analysis shows that cocoa powder is a good source of minerals like magnesium and potassium, both of which are also linked to cardiovascular health and blood pressure regulation.
However, it’s a common misconception that a higher percentage of “cocoa solids” automatically means greater health benefits. As we’ve learned, the processing method is far more important. Research from sources like Valrhona highlights a crucial distinction: a high-solid Dutch-processed powder will have a minimal effect on blood pressure because its flavanol content has been decimated by alkalization. In contrast, a moderate-solid natural cocoa powder, which has retained its bioactive compounds, will be significantly more effective.
Therefore, the question is not simply about the percentage of cocoa, but about the *type* of cocoa. For anyone looking to leverage the cardiovascular benefits, the choice is clear: natural, unprocessed cocoa powder is the superior option, as it delivers the flavanols necessary to potentially influence blood flow and blood pressure. The heavily processed, dark Dutch powders, while visually dramatic, offer little more than color and a mild flavor from a nutritional standpoint.
Armed with this chemical knowledge, it’s time to revisit your favorite recipes not as a follower, but as a baking scientist. Analyze your ingredients, predict the reactions, and start creating consistently perfect chocolate results.