In summary:
- Tempering isn’t about melting; it’s a precise temperature game to cultivate stable “Beta-V” cocoa butter crystals.
- Forget the marble slab. Modern methods like seeding or sous-vide offer foolproof precision for home cooks.
- Mastering the temperature curve (melt, cool, re-warm) is the key to achieving a professional, glossy finish and satisfying snap.
- Visual cues, like how chocolate drapes off a spatula, can confirm a successful temper before it even sets.
- Proper storage after tempering is just as crucial to prevent bloom and preserve your hard work.
The dream of creating glossy, professional-looking chocolate creations at home often shatters against the intimidating image of a pastry chef expertly working molten chocolate on a massive marble slab. It seems complex, messy, and reserved for those with specialized equipment and years of training. Most guides offer simplistic advice like “use a microwave” or “add some solid chocolate,” but they rarely explain the magic behind the method, leaving you with dull, soft, or streaky results when things go wrong.
This frustration stems from a misunderstanding of the core principle. Tempering chocolate is not simply about melting and cooling. It’s an act of scientific precision, a process of guiding cocoa butter to form its most stable crystalline structure. The traditional tabling method is just one way to achieve this; it’s a manual technique for temperature control. But what if the true key wasn’t the slab, but the temperature itself? What if you could achieve that same molecular stability with modern, simpler, and more reliable methods available in your own kitchen?
This guide demystifies the science of tempering. We will move beyond the “what” and dive deep into the “why.” You will learn to think like an innovative chef, using temperature as your primary tool. We will explore the critical role of Beta-crystals, identify the visual signs of a perfect temper, and master foolproof techniques that make the marble slab obsolete. Prepare to unlock the secret to that coveted snap and brilliant shine, every single time.
For those who prefer a visual summary, the following video provides a great overview of the fundamental steps involved in the tempering process, complementing the detailed scientific explanations in this guide.
To navigate this deep dive into the art and science of chocolate, we’ve structured this guide to build your knowledge from the foundational principles to practical application and troubleshooting. The table of contents below outlines your path to mastering chocolate tempering.
Summary: The Modern Chef’s Guide to Flawless Chocolate Tempering
- Why Must You Cool Chocolate to 27°C Before Reheating to 32°C?
- Why Is Beta-Crystal Formation Crucial for the Snap of Your Bar?
- How to Spot Proper Tempering by Eye Before It Sets on the Mold?
- Infrared vs. Probe Thermometer: Which Is More Accurate for Agitated Chocolate?
- Why Does Sous-Vide Prevent Chocolate from Burning or Seizing?
- How to Keep Your Chocolate at Working Temperature for 1 Hour Straight?
- How to Roll Perfectly Round Truffles Without Melting Them in Your Hands?
- The Refrigerator Mistake That Causes Sugar Bloom on Finished Bonbons
Why Must You Cool Chocolate to 27°C Before Reheating to 32°C?
The specific temperature curve in chocolate tempering isn’t arbitrary; it’s a strategic manipulation of cocoa butter’s crystalline structure. When you first melt chocolate (typically to around 45-50°C), you are essentially creating a clean slate, dissolving all existing cocoa butter crystals. The crucial cooling phase that follows, aiming for approximately 27°C (81°F), is where the magic of crystal control begins. This temperature is the ideal breeding ground for the specific type of crystals we want: the stable Beta-V crystals.
As the chocolate cools, various types of crystals (from unstable Type I to the desirable Type V) begin to form. Cooling it down to 27°C encourages a rapid and abundant formation of both stable and unstable crystals. This might seem counterintuitive, but it’s a necessary step to create enough “seed” crystals. The final, gentle reheating to the working temperature of 31-32°C (88-90°F) is the masterstroke. This slight increase in heat is just enough to melt away all the unwanted, unstable crystals (Types I-IV), which have lower melting points, while leaving the precious, stable Beta-V crystals intact and ready to multiply.
This precise two-step process—cooling to nucleate and reheating to select—is what guarantees a successful temper. Research on beta crystal development confirms that the prime formation zone is between 83°F (28.3°C) and 89°F (31.6°C). By navigating this thermal window, you are not just melting chocolate; you are conducting a symphony of crystallization that results in a final product with a glossy shine, a firm texture, and that signature “snap.”
Why Is Beta-Crystal Formation Crucial for the Snap of Your Bar?
The “snap” of a high-quality chocolate bar is the audible and textural proof of a perfect temper, and it’s entirely dependent on the formation of Beta-V crystals. Cocoa butter is a polymorphic fat, meaning its molecules can stack together in six different crystalline patterns, labeled Type I through Type VI. Think of these like different ways of building with LEGOs—some structures are flimsy and fall apart easily, while one is strong and perfectly interlocked. In the world of chocolate, the Beta-V crystal is that strong, stable structure.
When chocolate is simply melted and cooled without proper tempering, it forms a chaotic jumble of unstable crystals (mostly Types I-IV). These crystals are loose, disorganized, and have low melting points. The result is chocolate that is soft at room temperature, melts instantly on your fingers, and has a dull, often streaky or blotchy appearance known as fat bloom. It bends rather than snaps. It lacks the structural integrity to be satisfying.
Tempering is the process of coaxing the cocoa butter to crystallize exclusively in the Beta-V form. These crystals are compact, uniform, and tightly packed, creating a dense, homogenous structure throughout the chocolate. This dense network is what gives tempered chocolate its signature characteristics: a beautiful, high-gloss shine (because the smooth surface reflects light evenly), a firm bite, and that clean, sharp “snap” when broken. It also provides a higher melting point—just above human body temperature—which is why well-tempered chocolate melts pleasantly in your mouth, not in your hand. According to chocolate science, this is because the prized Beta-V crystals don’t melt until they reach the critical temperature of 94°F (34.4°C).
As explained by the experts at Smoothies & Sundaes, this is a fundamental aspect of chocolate chemistry:
The process of tempering chocolate (also known as crystallization) is the alignment of stable cocoa butter crystals (Beta V) in melted chocolate, allowing those crystals to form, grow and set. Cocoa butter is a complex fat that is polymorphic, which means that the cocoa butter within chocolate can take on many forms.
– Smoothies & Sundaes, Tempering Chocolate (Crystallization)
How to Spot Proper Tempering by Eye Before It Sets on the Mold?
While a thermometer is your most reliable tool, a trained eye can spot the tell-tale signs of a successful temper long before the chocolate fully hardens. This skill allows you to work with confidence, knowing your chocolate is ready for molding or dipping. The key is to observe changes in viscosity and surface finish. As the chocolate cools into the correct working temperature range and the Beta-V crystals begin to form and multiply, its behavior changes subtly but distinctly.
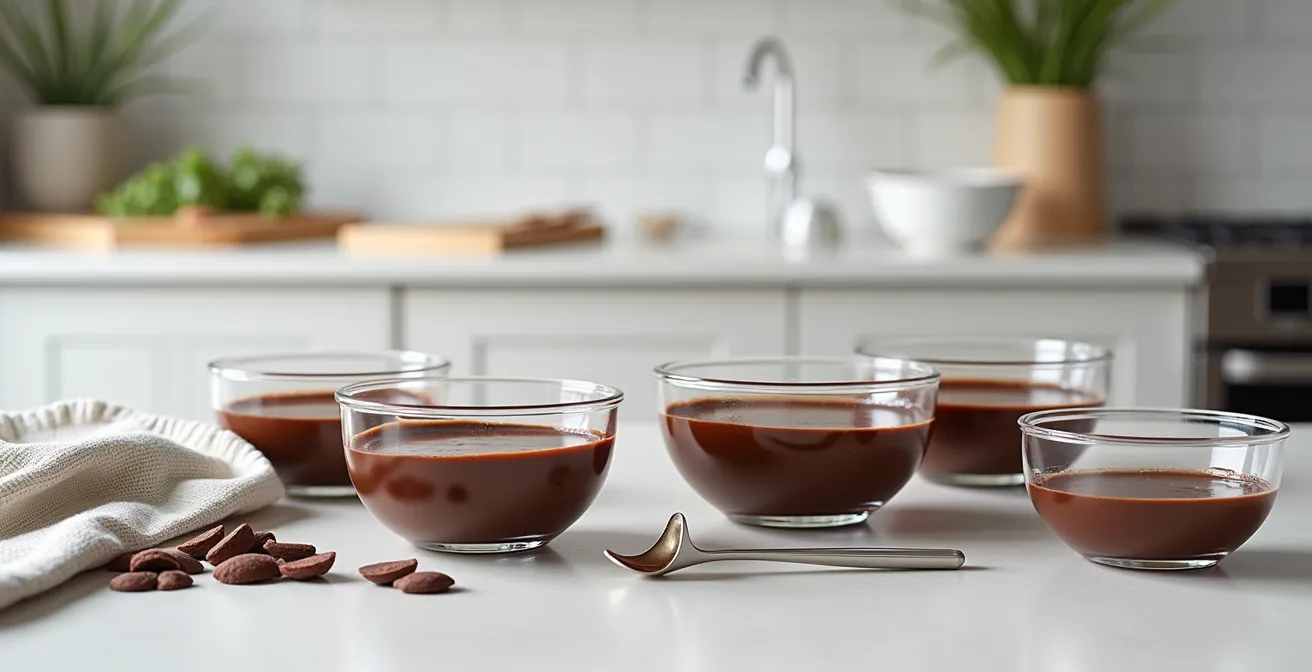
The most common and effective visual test is the “spatula test.” Dip a clean offset spatula, a knife, or a piece of parchment paper into your chocolate and set it aside at cool room temperature (around 20°C / 68°F). If the chocolate is in temper, it should start to set within a few minutes. You’ll see it lose its wet glossiness and develop a matte, streak-free finish as it hardens uniformly from the edges inward. If it remains wet, tacky, or develops streaks after 5 minutes, your chocolate is out of temper.
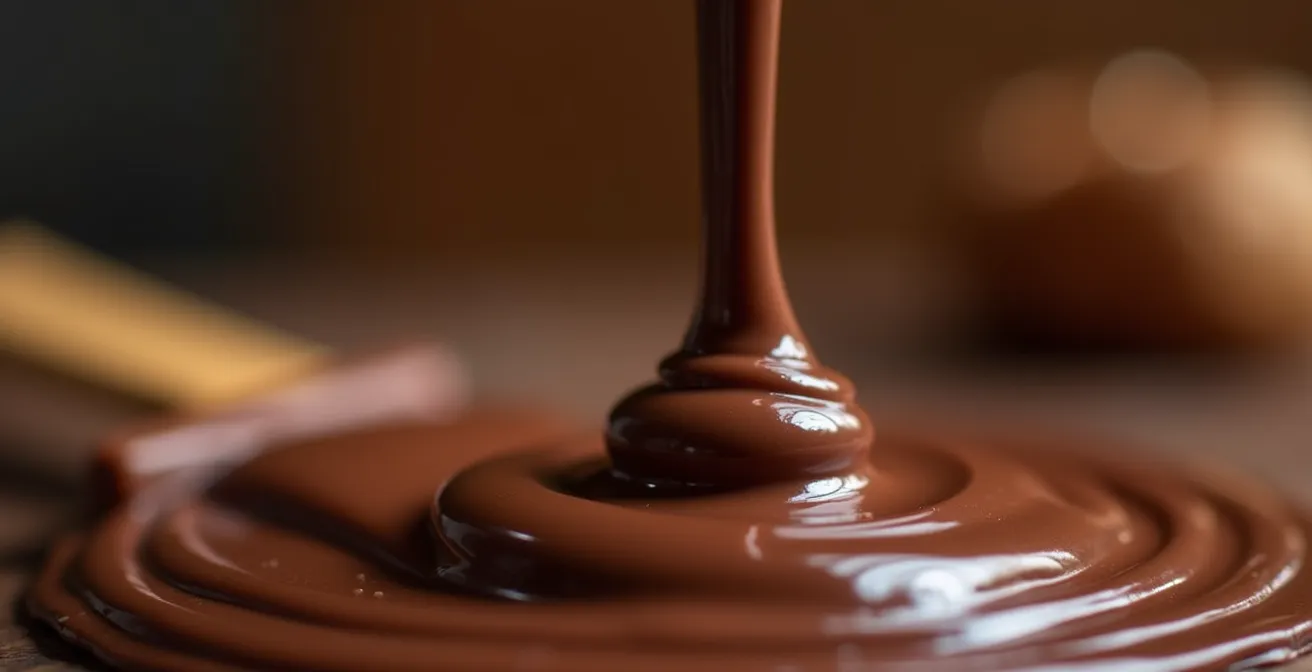
Another crucial indicator is the way the chocolate behaves in the bowl. Properly tempered chocolate will be slightly thicker than fully melted, untempered chocolate. When you lift your spatula, it should flow off in a thick, but fluid, ribbon. It will show “memory,” meaning it holds its shape for a moment where it falls back into the bowl. If it’s too thin and watery, it’s likely too hot. If it’s overly thick, clumpy, and hard to stir, it has cooled too much and is beginning to over-crystallize. Learning to recognize this perfect “drape” is a sign of an experienced hand.
This table summarizes the key visual differences to look for, helping you diagnose the state of your chocolate quickly.
| Visual Indicator | Properly Tempered | Out of Temper |
|---|---|---|
| Setting Time | Sets within 1-2 minutes | Remains soft/tacky |
| Surface Appearance | Matte finish developing quickly | Stays glossy, wet-looking |
| Touch Test | Feels cool to lower lip | Feels warm or room temp |
Infrared vs. Probe Thermometer: Which Is More Accurate for Agitated Chocolate?
In the pursuit of temperature precision, the choice of thermometer is critical. The two main contenders for the modern home chef are the digital probe thermometer and the infrared (IR) thermometer. Each has distinct advantages and disadvantages, and for truly accurate work with agitated chocolate, the answer isn’t choosing one over the other, but understanding how to use them in tandem. The core issue is what they measure: surface vs. internal temperature.
A probe thermometer, inserted into the mass of the chocolate, measures the core temperature. This is the most accurate reading of the overall state of your chocolate. Since the goal of tempering is to create a homogenous crystal structure throughout the entire batch, knowing the internal temperature is non-negotiable. It is the ground truth. However, its drawback is its response time; it can be slow to update, and continuous dipping and cleaning can be cumbersome during a fast-paced process.
An infrared thermometer, on the other hand, is incredibly fast. It reads the surface temperature of whatever it’s pointed at instantly. This is extremely useful for quick checks while stirring. As you agitate the chocolate, you’re constantly bringing warmer chocolate from the bottom to the surface to cool. An IR thermometer can give you instant feedback on this cooling process. However, it only reads the surface, which can be several degrees cooler than the core, especially in a still bowl of chocolate. Relying solely on an IR thermometer is a common mistake that can lead to an inaccurate temper.
The professional workflow, therefore, uses both. Use the infrared thermometer for rapid monitoring while you stir and cool the chocolate. Its speed helps you gauge the cooling rate and avoid overshooting your target temperature. Once you believe you’re close to your target (e.g., 27°C for cooling or 32°C for the working temp), use a reliable digital probe thermometer to verify the true internal temperature of the mass. This two-thermometer approach combines the speed of the IR gun with the accuracy of the probe, giving you complete thermal control.
Why Does Sous-Vide Prevent Chocolate from Burning or Seizing?
The sous-vide method, a technique of cooking food in a precisely controlled water bath, has emerged as a revolutionary and virtually foolproof way to temper chocolate. Its power lies in its ability to eliminate the two greatest enemies of the chocolatier: scorching heat and accidental water contact. It provides an environment of perfect, gentle, and stable temperature that other methods can’t match.
Traditional methods like the microwave or a double boiler are fraught with risk. A microwave heats unevenly, creating “hot spots” that can easily scorch the chocolate, turning it grainy and bitter. A double boiler, while better, risks introducing steam or a stray water droplet into the bowl. Even a tiny amount of water will cause the chocolate to “seize”—the sugar and cocoa particles will clump together, turning the silky liquid into a thick, pasty, and unusable mass. Sous-vide elegantly solves both problems.
By placing the chocolate in a sealed, waterproof bag and immersing it in the water bath, the risk of seizing is reduced to zero. Furthermore, the immersion circulator maintains the water at a precise temperature (accurate to a fraction of a degree), meaning the chocolate can never overheat or burn. It melts slowly and evenly, ensuring a perfectly fluid base. For example, a solid block of dark chocolate set in a sous-vide at 46°C (115°F) will melt gently and safely over an hour or two without any need for stirring or supervision. This method allows you to follow the tempering curve with unparalleled accuracy, holding the chocolate at the exact melting, cooling, and working temperatures for as long as you need.
This table clearly illustrates the superiority of sous-vide for temperature-sensitive tasks.
| Method | Temperature Control | Seizing Risk | Time Required |
|---|---|---|---|
| Sous-Vide | Precise to 0.1°C | Zero (sealed environment) | 60-120 minutes |
| Microwave | Uneven, hot spots | Medium | 2-5 minutes |
| Double Boiler | Good but requires monitoring | Low-Medium (steam risk) | 10-20 minutes |
How to Keep Your Chocolate at Working Temperature for 1 Hour Straight?
Achieving the perfect temper is only half the battle; maintaining it is where many home cooks falter. Once your chocolate is at its ideal working temperature (around 31-32°C for dark chocolate), it’s in a delicate state of equilibrium. If it cools down too much, it will become thick and over-crystallized. If it gets too hot, you’ll melt the stable Beta-V crystals and have to start the tempering process all over again. The key to holding it steady is managing thermal inertia and applying gentle, controlled heat.
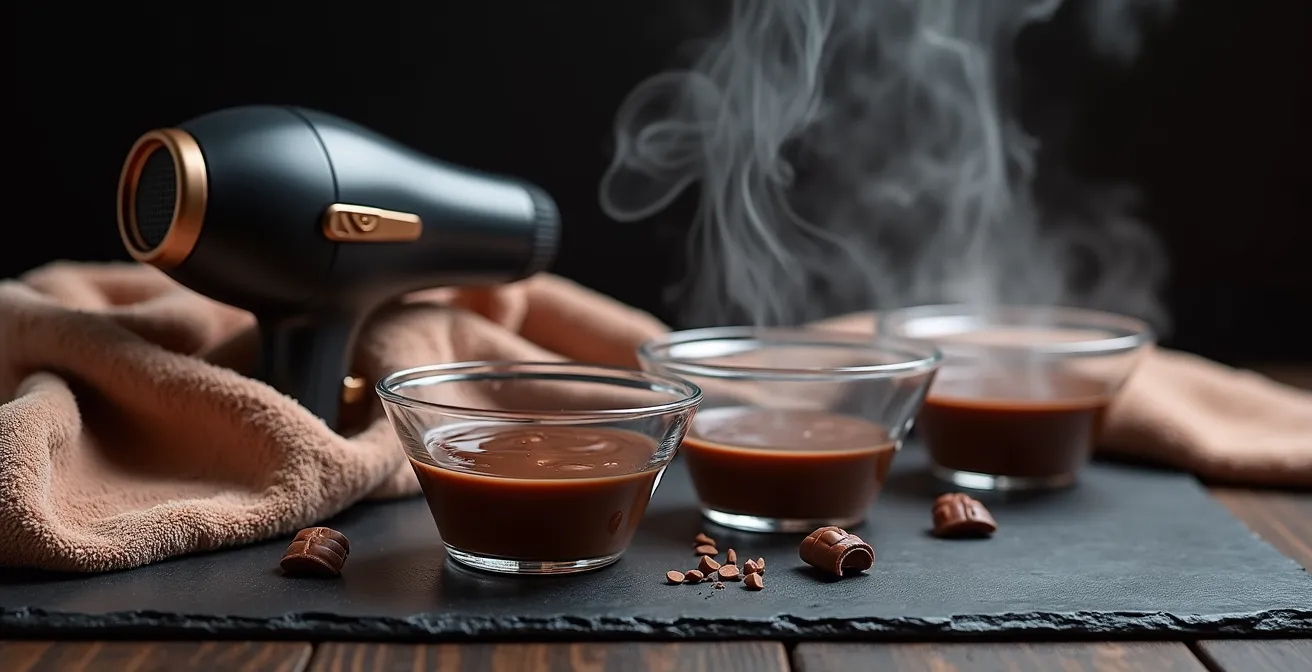
For small batches and short working times, a simple but effective technique is to use a hairdryer or a heat gun. If you notice the chocolate beginning to thicken in the bowl, gently wave the hairdryer over the surface while stirring continuously. Use short bursts of heat and keep the dryer moving to avoid creating hot spots. This provides just enough energy to keep the temperature in the working zone. The goal is to kiss the surface with warmth, not to actively heat the chocolate.
For longer projects, you need a more stable system. One professional trick is to leverage thermal inertia. Place your bowl of tempered chocolate inside a larger, pre-warmed, vacuum-insulated bowl (like a high-quality thermos food jar). This, combined with a towel wrapped around the outside, dramatically slows heat loss. Another reliable method is to create a lukewarm water bath. Place your chocolate bowl over a pot of water maintained precisely at your target working temperature. This acts as a gentle heat buffer, preventing the chocolate from cooling down. You can use a sous-vide circulator in the water for ultimate precision, or simply monitor with a thermometer and add warm water as needed.
Here are a few methods to maintain that perfect state:
- Once the chocolate reaches 27°C, bring the temperature back up to 31-32°C using a hairdryer, heat gun, or microwave in 5-second bursts.
- Utilize a pre-warmed, vacuum-insulated bowl wrapped in a towel to slow down heat loss and maintain a stable temperature.
- Create a gentle heat buffer by placing your bowl over a larger bowl of water maintained precisely at 32°C.
How to Roll Perfectly Round Truffles Without Melting Them in Your Hands?
Rolling perfectly round, smooth ganache truffles is an art that battles against a simple law of physics: your hands are warm, and chocolate melts. The secret to success lies in a combination of a stable ganache, temperature management, and efficient technique. A sticky, melty mess is often a sign that your ganache is too soft or your hands are too warm.
First, the foundation is the ganache itself. A truffle ganache needs to be firm enough to hold its shape. The key is the chocolate-to-cream ratio. For dark chocolate truffles that are easy to handle, you should aim for a 2:1 ratio of chocolate to cream by weight. This creates a firm but still decadent center. After making the ganache, let it chill in the refrigerator until it’s firm enough to scoop, but not rock solid. This can take an hour or more.
When it’s time to roll, speed and coolness are your allies. Work quickly, using your fingertips rather than the warmer palms of your hands. Many professionals wear thin, disposable food-safe gloves, which act as a slight barrier and keep things clean. If you find the ganache becoming soft and difficult to work with, don’t fight it. The “cold hands” technique is a professional lifesaver: simply rinse your hands under cold water for a moment, dry them thoroughly, and continue rolling. The brief temperature drop is often all you need. If the ganache itself becomes too soft, return the entire tray to the refrigerator for 15-30 minutes to firm up again.
Your Action Plan: The Cold Hands Technique for Perfect Truffles
- Chill Hands: If ganache starts to melt, rinse or dunk your hands in cold water to cool them, then dry completely before continuing.
- Re-Chill Ganache: If the ganache becomes too soft to work with, place the entire plate back in the refrigerator for 30 minutes to firm it up again.
- Work Smart: Use thin disposable gloves and roll the truffles between your fingertips, which are cooler than your palms. Work quickly to minimize heat transfer.
- Scoop First, Roll Later: Use a small cookie scoop or melon baller to portion out all the ganache onto a parchment-lined tray first. Chill these portions before rolling.
- Final Check: Once rolled, chill the truffles again before dipping them in tempered chocolate to ensure a clean, crisp shell.
Key takeaways
- Tempering success hinges on controlling Beta-V crystal formation through a precise temperature curve, not on having a marble slab.
- Modern methods like sous-vide and precise seeding are more reliable and accessible for home cooks than traditional tabling.
- Maintaining the working temperature using gentle heat (like a hairdryer or water bath) is as crucial as achieving it in the first place.
The Refrigerator Mistake That Causes Sugar Bloom on Finished Bonbons
After going through the meticulous process of tempering, the final step—setting and storage—can tragically undo all your hard work. A common mistake is to place freshly dipped chocolates directly into a cold refrigerator. While it seems logical to speed up hardening, this abrupt temperature shock is the primary cause of condensation, which in turn leads to sugar bloom and ruins the texture and appearance of your creations.
Sugar bloom appears as a grainy, white or grayish, mottled coating on the surface of the chocolate. It happens when moisture condenses on the cool chocolate surface. The water droplet dissolves some of the sugar in the chocolate. As the water evaporates, the sugar re-crystallizes on the surface in a coarse, disorganized pattern, creating that undesirable gritty texture and dull look. This is especially problematic when moving chocolates from a cold fridge to a warmer, more humid room.
The professional solution is to allow chocolate to set in a cool, dry environment, ideally around 18-20°C (64-68°F). This gradual cooling allows the Beta-V crystal network to form slowly and strongly without any thermal shock. If you must use a refrigerator to set items with perishable fillings like ganache, the key is to prevent condensation. Place the chocolates in an airtight container *before* they go into the fridge. When you take them out, leave them in the sealed container until they have come to room temperature completely. This allows any condensation to form on the outside of the container, not on the chocolate itself.
This careful handling is the final piece of the puzzle. It protects the stable crystal structure you worked so hard to create. An unstable structure, which can be caused by improper melting from the start, is also a major contributor to bloom. That’s why ensuring chocolate is fully melted in the 50°C to 60°C range during the initial step is so vital for long-term stability, as it erases any problematic crystal memory before you even begin to temper.