The most common frustration when making vegan chocolate mousse is a grainy or collapsed final product. This isn’t a failure of the recipe, but a misunderstanding of the science. The secret to a light, airy, and stable mousse that rivals its classic counterpart lies not in simply substituting ingredients, but in mastering the fragile chemistry between the aquafaba protein matrix and the precise temperature for cocoa butter crystallization. This guide decodes that science to ensure your dessert is a success every time.
Serving a vegan guest shouldn’t mean compromising on dessert quality. Yet, the quest for a chocolate mousse without eggs or cream often ends in disappointment: a texture that’s too dense, a foam that collapses, or a finish that’s grainy. The common advice to “just whip chickpea water” is deceptively simple and ignores the delicate science at play. It’s an approach that sets up many well-intentioned hosts for failure, leaving them with a sad, soupy bowl instead of a decadent, airy dessert.
The truth is, creating a structurally sound, silken vegan mousse is less about culinary art and more about food science. Success hinges on controlling variables that traditional recipes take for granted. But what if the key wasn’t in finding a magic recipe, but in understanding the principles of emulsion stability, protein structures, and thermal dynamics? This perspective transforms the process from a hopeful guess into a predictable method.
This guide will walk you through the critical scientific principles and techniques. We will explore why folding is a precise mechanical action, how to manipulate temperature for rapid setting, and how the choice of chocolate dictates the final structure. By mastering these concepts, you can move beyond the recipe and consistently produce a flawless vegan chocolate mousse that will impress any guest, vegan or not.
To navigate this deep dive into the science of vegan mousse, the following sections will break down each crucial element, from fundamental techniques to advanced troubleshooting. This structure is designed to build your expertise step by step.
Summary: The Secrets to a Perfect Egg-Free and Cream-Free Chocolate Mousse
- Why Do You Fold Egg Whites Gently Instead of Whisking?
- How to Get Mousse to Set in 1 Hour for Emergency Dinners?
- Gelatin vs. Agar-Agar: Which Gives the Creamiest Mousse Texture?
- The ‘Too Hot’ Chocolate Base Error That Cooks Your Yolks Instantly
- What Chocolate Percentage Yields the Lightest Mousse Structure?
- Why Does Chickpea Water Whip Like Egg Whites?
- How Much Cream Can You Fill Before the Eclair Bursts?
- How to Know When Choux Pastry Is Dry Enough Inside Without Cutting It Open?
Why Do You Fold Egg Whites Gently Instead of Whisking?
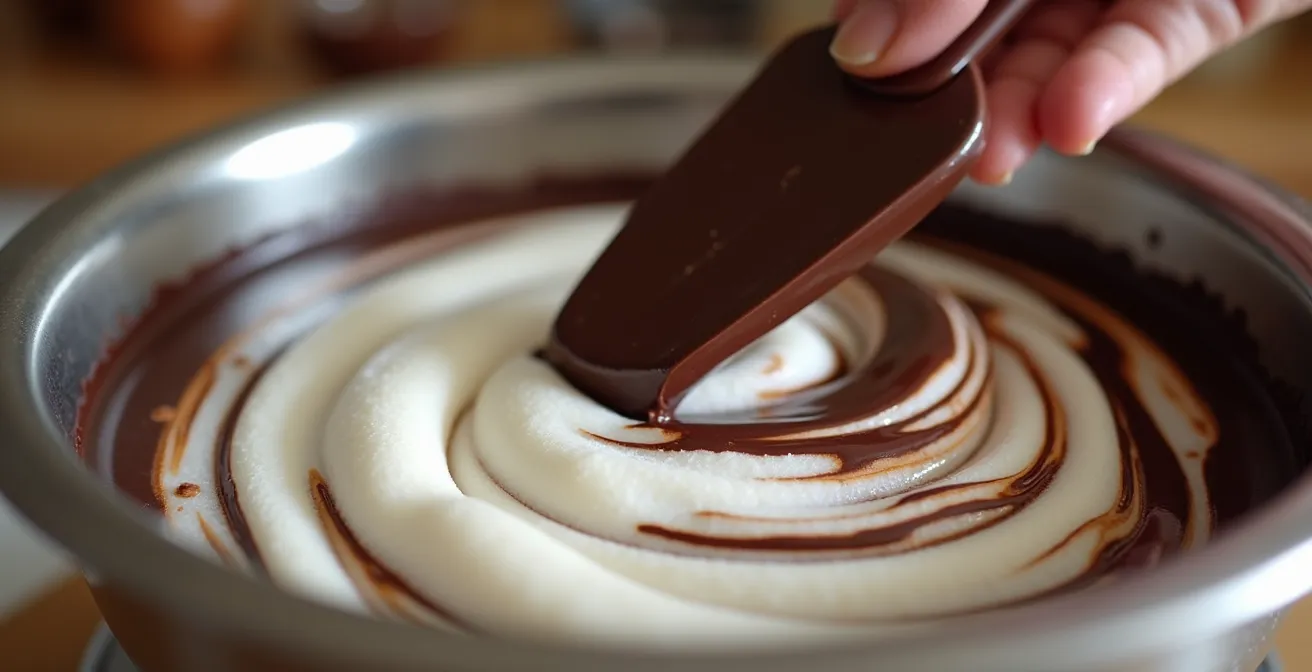
In the context of our vegan mousse, the “egg whites” are, of course, the whipped aquafaba. The reason for gentle folding remains identical and is purely structural. Whisking is an act of incorporation and agitation; its purpose is to create a foam by trapping air inside a protein structure. Folding, however, is an act of preservation. Once you’ve spent time whipping your aquafaba into a stable, airy foam—a delicate protein matrix—the goal is to combine it with the dense chocolate base while losing as little of that trapped air as possible. A whisk, with its many fine wires, would aggressively agitate the mixture, rupturing the air bubbles and deflating the foam instantly.
A large spatula is the tool of choice because its broad surface gently lifts and turns the mixture over on itself. This method minimizes bubble collapse, ensuring the final mousse is light and voluminous. The temperature of the chocolate is also a critical factor before you even begin folding. To prevent immediate deflation, it’s crucial that the melted chocolate has had at least 20-25 minutes to cool to just warm to the touch. Introducing a hot base would cause a thermal shock, melting your carefully built protein structure on contact, no matter how gentle your folding technique is.
Action Plan: Mastering the Aquafaba Fold
- Temper the Base: Add one-third of the whipped aquafaba to the cooled chocolate first. Mix this portion in more vigorously to lighten the dense chocolate, making it more receptive to the remaining delicate foam.
- Execute the J-Motion: Use a large silicone spatula to cut down through the center of the mixture. Then, sweep the spatula along the bottom of the bowl and up the side, turning the mixture over on itself in a distinct “J” motion.
- Rotate and Repeat: After each fold, rotate the bowl a quarter turn. Work with purpose and speed, but maintain a gentle hand. The goal is to fully incorporate the ingredients in as few folds as possible to minimize air loss.
How to Get Mousse to Set in 1 Hour for Emergency Dinners?
The standard setting time for mousse relies on the slow process of cocoa butter crystallization in the refrigerator. For an emergency, you must accelerate this process. The key is maximizing the surface area exposed to cold. Instead of portioning the mousse into deep ramekins or glasses, spread it in a thin, even layer on a cold metal baking sheet or a wide, shallow dish. Metal is an excellent thermal conductor and will draw heat out of the mousse much faster than glass or ceramic. Placing this tray in the freezer, not the fridge, is the second part of the strategy. The intense cold of the freezer will force the cocoa butter to solidify rapidly.
This paragraph introduces the concept of rapid setting. To understand it visually, the illustration below shows the ideal setup for accelerating the cooling process.
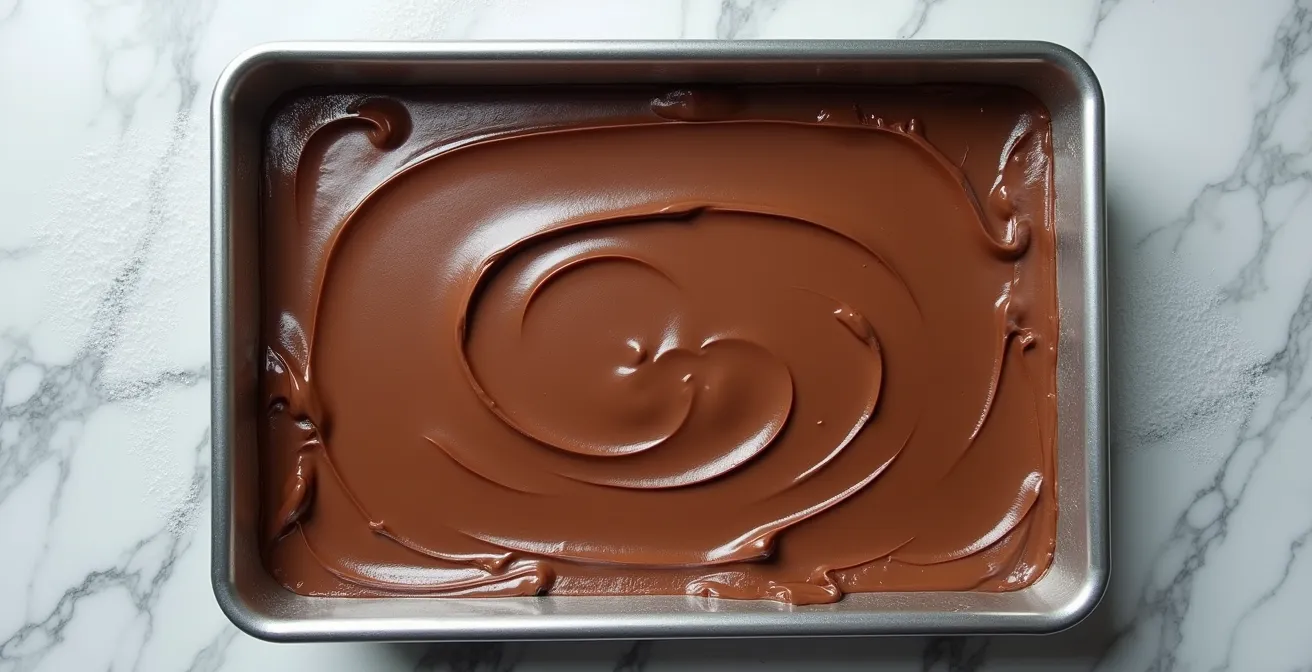
As you can see, the large, flat surface area is crucial. After about 45-60 minutes in the freezer, the mousse will be firm enough. You can then scoop it into serving glasses for a rustic, quenelle-style presentation. Your choice of chocolate also plays a role. Chocolates with a higher percentage of cocoa solids typically contain more cocoa butter, which is the fat that solidifies and gives the mousse its structure. Using chocolate within an optimal range of 50-70% cocoa will provide enough cocoa butter for a firm set without making the mousse overly bitter or dense.
Gelatin vs. Agar-Agar: Which Gives the Creamiest Mousse Texture?
In a vegan context, gelatin is not an option, so the true question is about the different vegan stabilizers. The answer depends entirely on your desired final texture. For a truly creamy, spoonable texture that mimics a classic mousse, the best “stabilizer” is often none at all. Relying solely on the natural setting power of cocoa butter, as detailed by chocolatiers at Callebaut, results in the most authentic texture, provided your fat content and emulsion are correct. However, this mousse is more delicate and best eaten the same day.
When you need more stability for make-ahead desserts or mousse cakes, you must turn to other options. Agar-agar provides a very firm set, but its texture is more of a brittle gel than a cream. It’s excellent for clean slices in a tart but can feel slightly firm and less luxurious in a simple mousse. Xanthan gum, used sparingly, can add a creamy, pudding-like body and prevent weeping, but it doesn’t provide the same light structure as a well-made aquafaba foam.
This table compares the most common approaches to stabilizing a vegan mousse, helping you choose based on your specific needs.
| Stabilizer | Final Texture | Setting Time | Best Use Case |
|---|---|---|---|
| No Stabilizer | Light, cloud-like, delicate | 2-3 hours | Same-day consumption |
| Agar-Agar | Firm, slightly brittle gel | 1 hour | Make-ahead mousses for cakes |
| Xanthan Gum | Creamy, smooth, stable | 2 hours | Pudding-like consistency needs |
Ultimately, for the creamiest texture, focus on perfecting your aquafaba aeration and your chocolate emulsion rather than reaching for a gelling agent. The latter should be reserved for when structural integrity, not creaminess, is the primary goal.
The ‘Too Hot’ Chocolate Base Error That Cooks Your Yolks Instantly
While vegan mousse contains no egg yolks, the principle of “cooking” the foam is precisely the same. The error here is causing a thermal shock that denatures the proteins in your whipped aquafaba. Aquafaba foam is a delicate matrix of proteins and trapped air. When you introduce melted chocolate that is too hot, the heat instantly breaks down this protein structure. The foam liquefies, the air escapes, and the emulsion breaks. The result is often a grainy, separated, or completely liquid mess. This is the single most common reason for vegan mousse failure.
As Megan from Detoxinista warns in her expert guide, this mistake is catastrophic for the final texture. Her advice underscores the importance of patience:
If you add hot melted chocolate to the whipped aquafaba, your mousse will either melt right away, or have a grainy texture
– Megan from Detoxinista, Chocolate Aquafaba Mousse Guide
If you’ve made this error, don’t throw the mixture away. While the mousse cannot be saved, the base can be repurposed. You can chill the collapsed mixture until it’s firm and roll it into chocolate truffles, add hot plant-based milk to create a rich hot chocolate, or simply use it as a decadent sauce over vegan ice cream or fruit. The key is to let the chocolate cool until it is barely warm to the touch (around 100°F or 38°C) before you even think about folding it into your foam.
What Chocolate Percentage Yields the Lightest Mousse Structure?
The choice of chocolate percentage is a delicate balancing act between flavor, structure, and lightness. It’s a common misconception that a higher percentage is always better. While high-cocoa-content chocolate (80%+) provides a firm set due to its high amount of cocoa butter, it can also create a dense, fudgy, and sometimes grainy texture. The lower sugar content in these chocolates means the final mousse can be intensely bitter. Furthermore, these chocolates contain less lecithin, an emulsifier that helps stabilize the mixture.
This image illustrates how different chocolate percentages can drastically alter the final texture of the mousse, from light and airy to dense and rich.
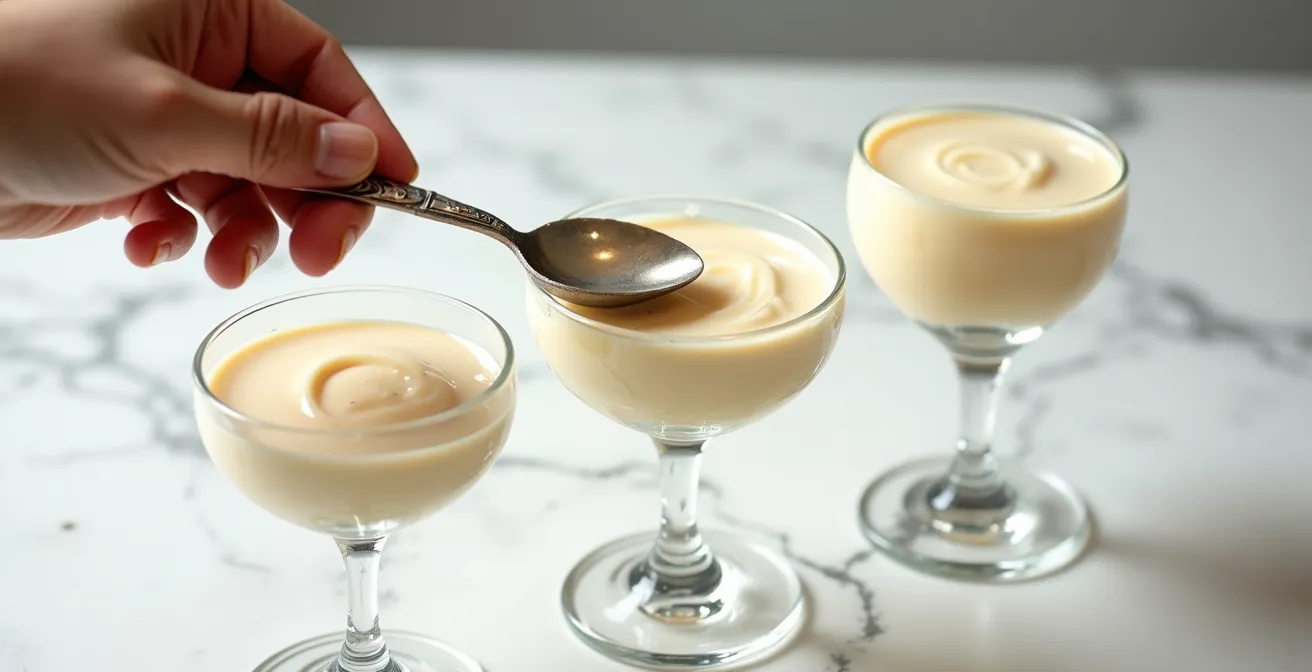
Conversely, chocolate with a very low percentage (below 50%) often lacks enough cocoa butter to set firmly, resulting in a mousse that is too soft or soupy. It also tends to be overly sweet. The sweet spot for a light yet stable structure generally lies between 60% and 72% cocoa content. This range offers enough cocoa butter for a reliable set, a balanced flavor profile that isn’t overwhelmingly bitter, and sufficient emulsifiers for a smooth texture. Scientific analysis shows that chocolate naturally contains lecithin which acts as a vital thickener and stabilizer in the emulsion, a property that is more balanced in this mid-range.
Why Does Chickpea Water Whip Like Egg Whites?
The “magic” of aquafaba lies in its composition, which is remarkably similar to that of egg whites. When chickpeas are cooked, proteins and carbohydrates (specifically saponins) leach out into the cooking water. The result is a viscous liquid containing a blend of these components. It is the proteins that are the primary actors in its whipping ability. Just like the albumin in egg whites, these plant-based proteins unwind (denature) when agitated by a whisk. They then rearrange themselves to form a network, or protein matrix, that traps air bubbles, creating a stable foam.
Research confirms that on a functional level, aquafaba has similar protein levels to egg whites, which explains its capacity to foam. To enhance this foam, adding a small amount of acid is a professional technique. As pastry expert Blooming Nolwenn notes, an acid like cream of tartar or lemon juice not only helps create a more stable, robust foam but also helps neutralize any subtle “beany” flavor that might be present. The consistency of the aquafaba is also paramount. A practical test from Alexandra’s Kitchen found that homemade aquafaba is often too thin and must be reduced on the stove to match the viscosity of canned aquafaba before it will whip properly, a crucial step for achieving stiff peaks.
So, it is not magic, but a fortunate combination of proteins and starches that mimics the functional properties of egg whites, allowing for a stable and airy foam perfect for vegan meringues and mousses.
How Much Cream Can You Fill Before the Eclair Bursts?
This question, seemingly unrelated to mousse, offers a perfect analogy for understanding structural capacity and failure. An eclair is a hollow pastry shell. Its structure, created by steam during baking, can only hold a certain volume of filling before the pressure becomes too great and the delicate shell cracks or bursts. The same principle applies directly to your vegan mousse. The whipped aquafaba forms a delicate, air-filled structure—a protein matrix that acts as the “shell” of your mousse.
The “filling” in this analogy is the dense, heavy chocolate base. If you try to incorporate too much chocolate relative to the volume of your foam, you are exceeding the structural capacity of the protein matrix. The weight of the chocolate will overwhelm the delicate air bubbles, causing the entire structure to collapse. This isn’t a failure of ingredients, but a failure to respect the physics of the system. This is why recipes specify precise ratios of aquafaba to chocolate. It’s not an arbitrary number; it’s a calculation of structural load.
Therefore, when you see a mousse recipe, think of it like an engineer assessing a bridge’s load limit. The foam provides the structure, the chocolate is the load. Exceed the limit, and you get a catastrophic collapse—a burst eclair, a soupy mousse. Respecting the ratio is respecting the structural integrity of your dessert.
Key Takeaways
- Temperature is non-negotiable: A chocolate base that is even slightly too warm will instantly destroy the aquafaba foam, leading to a grainy or liquid result.
- Technique over speed: Gentle, precise folding is essential to preserve the air you’ve whipped into the aquafaba. Rushing this step guarantees a dense mousse.
- Chocolate choice dictates texture: The ideal cocoa percentage (60-72%) balances flavor with the right amount of cocoa butter and lecithin for a perfect set and smooth emulsion.
How to Know When Choux Pastry Is Dry Enough Inside Without Cutting It Open?
Just as with the eclair analogy, this question from classic patisserie provides a crucial lesson in non-destructive testing that we can apply to our mousse. A baker knows a choux puff is perfectly baked not by cutting it open, but by observing external cues: it’s golden brown, feels light for its size, and sounds hollow when tapped. Cutting it open would ruin the product. Similarly, how do you know your mousse is perfectly set without scooping into it and ruining the presentation? You learn to read the visual and tactile cues.
A properly set mousse will have a distinct look and feel. First, the surface will lose its wet, high gloss and take on a more matte or satin finish. Second, if you gently tilt the glass, the mousse will be completely firm and will not jiggle or flow. It might even pull away slightly from the edge of the glass. The most definitive test is tactile: gently press the surface with the back of a spoon. It should offer resistance and feel firm, not soft or sticky. The spoon should come away clean.
Learning these cues allows you to judge “doneness” with confidence. It transforms you from a novice who has to destructively test one serving to see if the batch is ready, to a specialist who can assess the final state of the product through observation alone, ensuring every serving presented is perfect.
Armed with this knowledge of the science behind the ingredients and techniques, you are no longer just following a recipe; you are conducting a delicious experiment with predictable outcomes. You have the tools to troubleshoot, adapt, and consistently create a flawless vegan chocolate mousse. Start creating your perfect dessert today.