In summary:
- Stop relying on just a golden-brown color, which often leads to underbaked, collapsed puffs.
- Train your senses to become the ultimate baking tool: feel the weight, listen for silence, and test the shell’s firmness.
- Master the “double bake” technique—piercing the shell and returning it to the oven—to guarantee a crisp, hollow interior every time.
- Understand that doneness is a process, starting from drying the dough in the pot to managing steam in the oven.
There is no greater disappointment in baking than pulling a tray of beautifully golden, perfectly puffed choux from the oven, only to watch them deflate into sad, soggy disks. Or worse, you fill them, take a bite, and discover a dreaded gummy, raw interior. This common frustration plagues bakers who rely on the most misleading advice of all: “bake until golden brown.” Color is a liar. It tells you nothing about the internal structure, which is the true heart of successful choux pastry.
The solution isn’t a kitchen timer or a new recipe. The secret is to stop baking with just your eyes and start using all of your senses. This guide will transform you from a recipe-follower into a sensory detective. We’ll move beyond the superficial and dive into the tactile, auditory, and structural cues that professionals use to gauge perfect doneness without ever sacrificing a single puff. We’ll explore the critical role of moisture migration, from the initial panade to the final moments in the oven.
Forget the guesswork and the sacrificial cuttings. We will delve into the science of steam, the mechanics of oven heat, and the subtle signals your pastry sends you. By learning to interpret the weight, sound, and feel of your choux, you will gain the confidence to know—not just hope—that every single puff is perfectly hollow, crisp, and ready for its glorious filling.
This article breaks down the entire process, providing the sensory checkpoints you need at every stage. Follow along to master the art and science of perfectly dried choux pastry, ensuring your éclairs and cream puffs are flawlessly hollow from this day forward.
Summary: A Sensory Guide to Perfectly Hollow Choux Pastry
- Why Must You Dry the Dough in the Pot Before Adding Eggs?
- How to Judge the ‘V-Shape’ Drip Test for Perfect Consistency?
- Convection vs. Static Oven: Which Dries Choux More Evenly?
- The Thickness Mistake That Prevents Your Choux from Rising Under Craquelin
- When to Poke a Hole in the Shell to Release Steam?
- Why Is Water Evaporation Critical for the Rise of Choux?
- Why You Must Rotate Your Tray Halfway Through Baking?
- How to Thicken Pastry Cream Without It Turning Rubbery After Cooling?
Why Must You Dry the Dough in the Pot Before Adding Eggs?
The quest for a hollow choux begins long before the pastry enters the oven; it starts in the pot. This initial drying stage, known as creating the ‘panade’, is not merely about combining ingredients. It is a critical chemical transformation. The goal is to cook the flour, which allows the starches to gelatinize and absorb the maximum amount of liquid. This process is essential because a well-gelatinized starch structure can hold more fat from the eggs and butter, creating a dough that is strong and elastic enough to expand dramatically under the force of steam.
Your senses are your best guide here. As you stir the dough over medium heat, you’ll notice a series of changes. The raw, pasty smell of flour will give way to a subtly nutty, toasted aroma—the first sign of success. Visually, the dough will start to pull away from the sides of the pan, forming a cohesive, smooth ball. Most importantly, pay attention to the bottom of the pan. A thin, starchy film will form where the dough makes contact with the hot surface. This is the definitive sensory cue that gelatinization is complete. According to food science, the flour must reach approximately 175°F (80°C) for this to happen effectively. Rushing this step results in a weak dough that can’t hold its structure, leading to poor rise and a dense interior.
To master the panade, attune yourself to these signals:
- Visual Cue: The dough gathers into a clean, smooth ball that doesn’t stick to the pan’s sides.
- Texture Test: A noticeable, almost translucent film appears on the bottom of the pot.
- Aroma Change: The scent evolves from raw flour to a gentle, cooked, and slightly nutty fragrance.
- Time Indicator: Continue stirring vigorously for a full 2-3 minutes after the ball has formed to ensure sufficient drying.
How to Judge the ‘V-Shape’ Drip Test for Perfect Consistency?
Once your panade is properly dried and has cooled slightly, you begin incorporating the eggs. This is the most subjective and crucial stage for determining the final texture. Add too few eggs, and the dough will be too stiff to pipe or expand. Add too many, and the choux will spread into flat puddles in the oven. The goal is to achieve a pipeable paste that is strong enough to hold its shape yet soft enough to rise. The classic method for judging this is the ‘V-shape’ test, a vital tool for any sensory detective in the kitchen.
To perform the test, lift a generous amount of dough on a spatula and let it fall back into the bowl. The ideal consistency is achieved when the dough slowly drips off the spatula, forming a distinct, glossy “V” shape that is about 2-3 inches long before it breaks. If the dough is too stiff and clings to the spatula, it needs more egg. If it is too loose and runs off immediately, you have unfortunately gone too far. It’s essential to add the last egg gradually, even a teaspoon at a time, as a single spoonful can be the difference between success and failure.
Professional Pastry School Consistency Testing
At renowned institutions like Ferrandi Paris, chefs teach that perfect consistency can be a matter of preference. Some prefer a slightly drier dough for more structural integrity in complex shapes, while others use a wetter dough for maximum expansion in cream puffs. They supplement the V-test with the ‘furrow test’: a baker runs their finger through the surface of the batter in the bowl. If the trench holds its shape for a moment before slowly closing in on itself, the consistency is perfect. This provides a secondary, tactile confirmation of the dough’s strength.
Should your dough become too runny, all is not lost. The professional recovery method is to make a small, new batch of very stiff panade (flour, water, butter) without any eggs. Once cooled, this can be gradually mixed into the runny batter to absorb the excess moisture and restore the correct consistency. This technique saves the batch and reinforces the importance of careful, incremental egg addition.
Convection vs. Static Oven: Which Dries Choux More Evenly?
The oven environment is where your carefully prepared dough undergoes its magical transformation. The type of heat your oven uses—static (conventional) or convection—plays a massive role in both the initial rise and the crucial final drying phase. Neither is inherently superior; they simply offer different advantages that a savvy baker can leverage. Understanding how each affects your choux is key to achieving an even, crisp shell and a perfectly hollow interior.
A static oven, with heating elements at the top and bottom, provides a gentler, more stable heat. This is often better for the initial, explosive rise (the first 15-20 minutes), as it allows the choux to puff up vertically without being pushed sideways by a fan. However, static ovens are notorious for having hot and cool spots, which can lead to uneven drying. In contrast, a convection oven circulates hot air with a fan, creating a more uniform temperature throughout the cavity. This is far superior for the second half of baking—the drying phase—as it wicks away moisture from the surface of every puff evenly, ensuring a uniformly crisp shell. The risk with convection is that the fan can cause the delicate, rising choux to tilt or bake lopsided if used from the start.
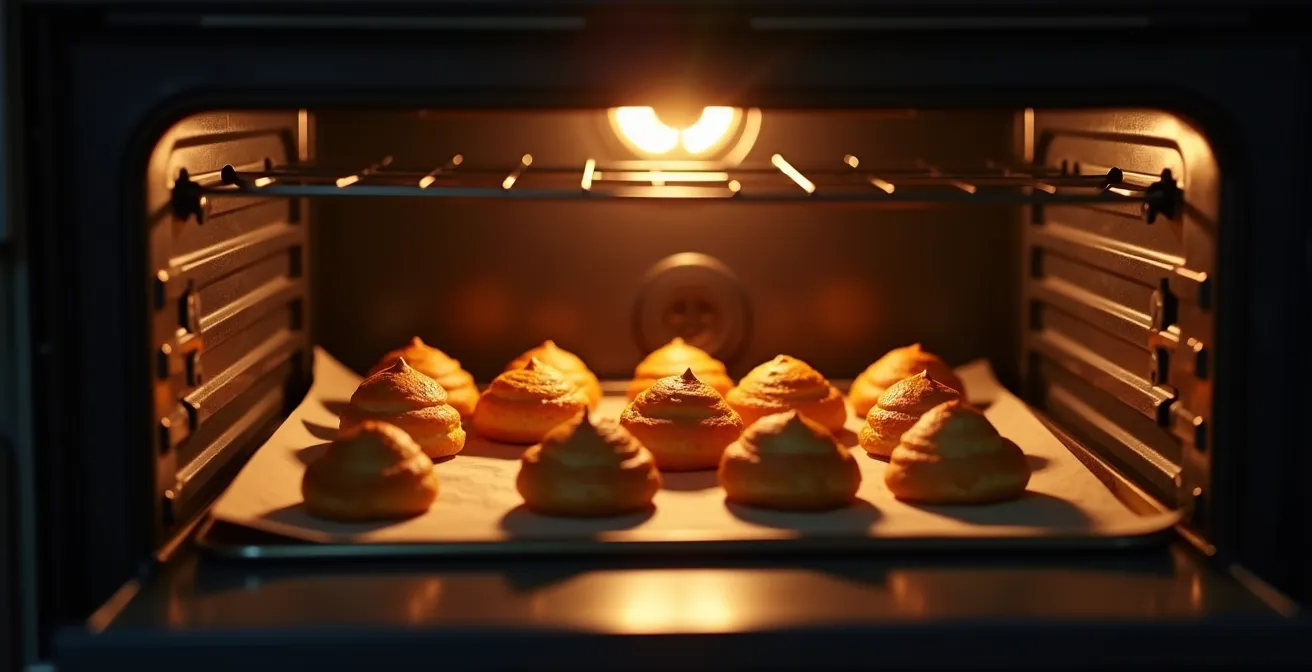
As the illustration of heat circulation suggests, the ideal approach is often a hybrid method. You can start the choux in a static oven to encourage a straight, powerful rise, then switch to convection mode (or simply reduce the temperature and prop the door open) for the final drying period. This gives you the best of both worlds: maximum lift and a perfectly even, golden-brown finish.
This comparative table, based on extensive testing from resources like Sweet & Savory by Shinee’s pastry guides, breaks down the performance of each oven type.
| Oven Type | Initial Rise (First 15-20 min) | Final Drying Phase | Recommended Temperature |
|---|---|---|---|
| Static Oven | Better – gentler heat for stable rise | Slower – may have hot spots | 400°F (200°C) then 350°F (175°C) |
| Convection | Risk of lopsided rise from fan | Superior – even drying | 375°F (190°C) consistent |
| Hybrid Method | Start static for rise | Switch to convection for drying | 400°F static then 350°F convection |
The Thickness Mistake That Prevents Your Choux from Rising Under Craquelin
Craquelin, the crisp, crackled cookie topping, adds a delightful texture and sweetness to choux pastry. However, it also introduces a new variable that can easily sabotage your rise if not handled correctly. The most common mistake is rolling the craquelin dough too thick. While it may seem like a minor detail, the thickness of this topping has a profound impact on heat transfer and steam expansion, directly affecting whether your choux becomes a magnificent puff or a dense, squat puck.
Think of the craquelin as a weighted blanket. If it is too heavy, it physically prevents the choux from expanding upwards. More critically, it acts as an insulator. Research on pastry physics shows that a thick layer of craquelin slows down the transfer of heat to the choux batter’s surface. This delay is fatal because choux relies on a rapid, violent burst of steam to inflate. If the heat is too slow, the internal structure sets before it has a chance to expand fully. To avoid this, professional bakers recommend rolling craquelin to precisely 2-3mm thickness. This is thin enough to allow rapid heat transfer while still providing its signature crackle.
The Insulating Blanket Effect of Craquelin
Scientific studies on the topic reveal that a craquelin layer thicker than 3mm creates what is known as the ‘insulating blanket effect’. This significantly slows the rate at which the choux batter’s surface temperature rises. As a result, the internal steam expansion required for a proper rise is stifled, leading to squat pastries with gummy, undercooked interiors. The craquelin must be thin enough to crack apart during baking. A key visual cue for doneness is to look at the exposed choux between these fissures: if it appears dry and matte, the interior is likely well on its way to being perfectly dried. If it still looks pale and shiny, it needs more time.
When to Poke a Hole in the Shell to Release Steam?
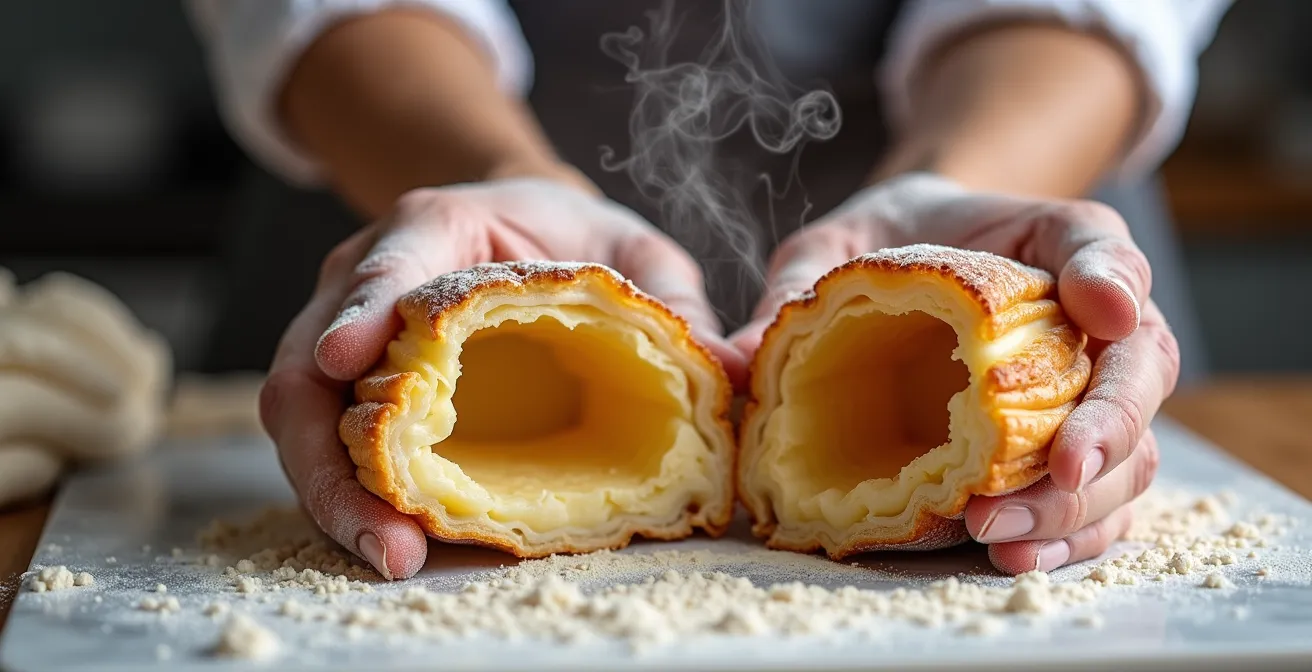
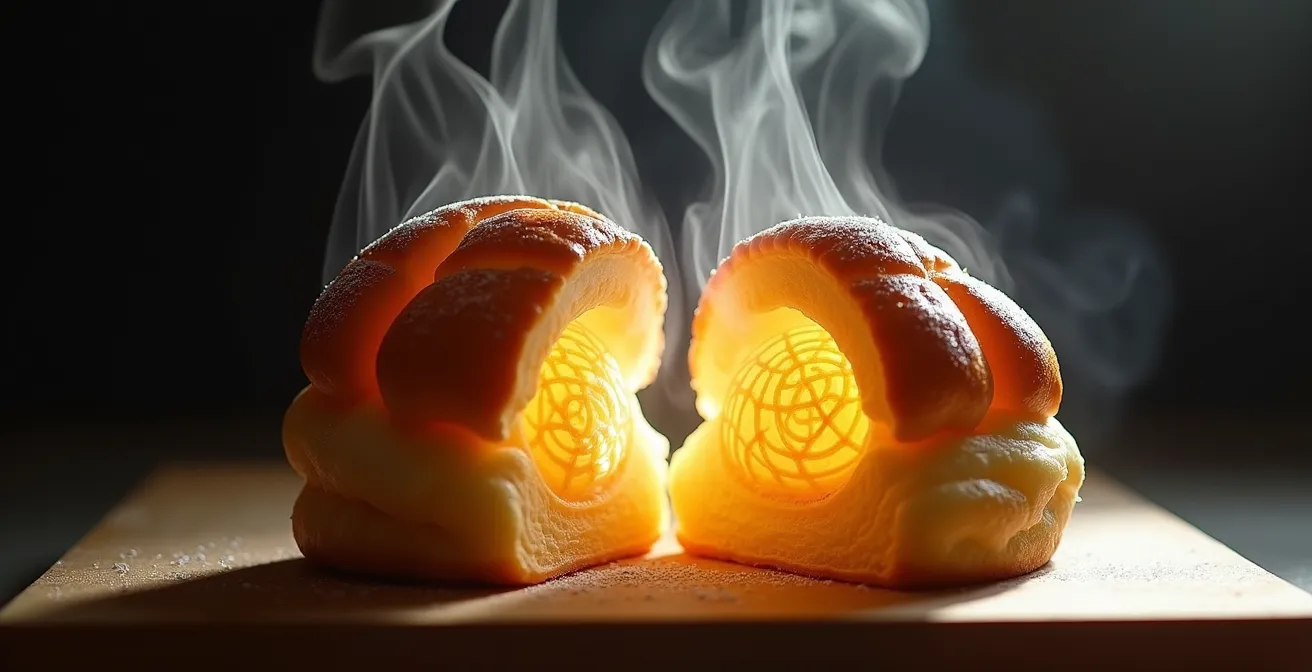
You’ve navigated the panade, perfected the V-shape, and managed your oven. Your choux are golden brown and beautifully puffed. The temptation is to pull them out and declare victory, but this is where many bakers fail. The exterior may be set, but the interior is still full of hot, moist steam. As the choux cools, this steam will condense back into water, turning your crisp creation into a soft, soggy shell that is prone to collapse. The professional solution is the “double bake,” a technique that involves piercing the shell to allow this internal steam to escape.
Timing is everything. Piercing the choux too early, before its structure is fully set, will cause it to collapse instantly. You must wait until the shell is firm and can support itself. This typically occurs after a minimum of 20-25 minutes of baking, when the choux has achieved a deep, not just light, golden-brown color. A good sensory test is to gently nudge one with a wooden spoon; it should feel firm and structurally sound, not soft or delicate.
Once you’ve determined they are ready, follow these steps for the perfect double bake:
- Wait until the choux are a deep golden-brown and feel firm to the touch (at least 20-25 minutes).
- Working quickly, remove the tray from the oven. Using the tip of a thin skewer or a small paring knife, pierce the bottom or side of each puff to create a small vent.
- Turn the oven off completely and prop the door ajar with the handle of a wooden spoon.
- Return the pierced choux to the cooling oven for another 10-15 minutes. This allows the residual internal moisture to vent out, leaving you with an exceptionally crisp and stable shell.
This final drying stage is non-negotiable for achieving the ultimate crispness. It transforms a good choux into a great one, ensuring it stays perfectly crisp for hours, even after being filled.
Why Is Water Evaporation Critical for the Rise of Choux?
The spectacular rise of choux pastry is a feat of kitchen physics, powered entirely by water. Unlike other pastries that rely on chemical leaveners like baking powder or yeast, a choux puff inflates from the sheer force of internal steam. Understanding this mechanism is the key to troubleshooting any issue, from a weak rise to a soggy interior. The entire process is a carefully controlled exercise in moisture migration and evaporation.
When the wet dough hits the hot oven, the water trapped within the gelatinized starch and egg structure quickly turns to steam. Scientific analysis shows that as water converts to steam, it expands by up to 1,600 times its original volume. This immense pressure pushes from the inside out, inflating the pliable dough into a hollow sphere. In the first half of baking, your goal is to encourage this steam expansion. In the second half, your goal is to drive that same moisture out of the pastry’s walls, drying them out so they become a crisp, rigid structure that won’t collapse when it cools.
This is why doneness cannot be judged by color alone. A fully baked, perfectly dry choux is one that has lost a significant amount of its initial water weight. A key metric used by professional bakers is that a finished choux should have lost between 40-50% of its initial piped weight. This massive loss of water is what makes the final product feel impossibly light for its size. A puff that feels heavy is a puff that is still full of moisture, and a puff full of moisture is one that is destined to become soggy.
Why You Must Rotate Your Tray Halfway Through Baking?
Even the best ovens have their own micro-climates. They possess subtle hot and cool zones that can mean the difference between a tray of uniformly perfect choux and a tray with some that are burnt while others remain pale and undercooked. Simply “rotating the tray halfway through” is common advice, but the sensory detective takes it a step further. The goal isn’t just to rotate, but to rotate with purpose—moving choux from cooler zones into hotter zones to ensure even drying and browning.
A professional technique to understand your oven’s personality is the bread-slice grid test. Before a baking session, cover a baking sheet with slices of plain white bread and toast them until they color. The resulting patchwork of light and dark spots will give you a precise map of your oven’s hot and cool zones. This knowledge is power. When baking your choux, you can intentionally place them and, more importantly, know exactly where to move them when you rotate.
The rotation itself should only happen after the choux’s structure is set—typically after the 20-25 minute mark when they have fully risen and have begun to brown. Opening the oven door before this critical point can cause a sudden temperature drop, leading to a catastrophic collapse. When you do rotate, you are not just turning the pan 180 degrees; you are strategically repositioning it to give the paler puffs their turn in the oven’s prime real estate.
Your Final Doneness Checklist: The Sensory Shake Test
- Weight Check: Pick up a puff (carefully!). It should feel feather-light and hollow, almost impossibly light for its size. A heavy puff is a wet puff.
- Acoustic Feedback: Gently shake the puff next to your ear. The sound of silence is the sound of success. You should hear absolutely nothing.
- Troubleshooting Sound: If you hear or feel a dense, moist clump of dough shifting inside, it is not done. Return it to the oven immediately for additional drying time.
- Visual Confirmation: Use your oven map. Are the puffs from the known cool spots still looking pale? They are your primary candidates for more drying time.
- Structural Integrity: Gently press the side. The shell should feel firm, crisp, and unyielding. Any softness indicates a wet interior.
Key takeaways
- Doneness is multi-sensory: a finished choux is light (weight), silent (sound), and firm (touch).
- Color is only one piece of the puzzle; a deep golden brown indicates the structure is likely set, but not that the interior is dry.
- The “double bake” technique—piercing the shell and returning it to a cooling oven—is the single best way to guarantee a crisp, stable shell.
How to Thicken Pastry Cream Without It Turning Rubbery After Cooling?
Now that you have mastered the art of the perfectly hollow, impossibly crisp choux shell, you have earned the ultimate reward: filling it. A flawless shell deserves a flawless filling. The classic choice, pastry cream (crème pâtissière), is deceptively simple but comes with its own common pitfall: a beautiful, smooth cream that turns stiff, weepy, or unpleasantly rubbery after it cools. This textural failure is almost always due to the choice of starch and how it behaves during cooling.
The most common thickener, cornstarch, is highly effective at thickening the hot cream. However, it is also prone to a process called retrogradation. As the cream cools, the starch molecules realign and squeeze out the water they were holding, resulting in a spongy, rubbery texture and sometimes a little puddle of liquid. While a small amount of flour can be more stable, the professional’s secret weapon is often a modified food starch, like ClearJel, which is specifically designed to be stable through heating and cooling cycles without weeping or becoming rubbery.
When you are making your pastry cream, remember to bring the mixture to a full boil for at least one minute while whisking constantly. This is necessary to fully cook the starch, which not only maximizes its thickening power but also eliminates any raw, starchy taste. Immediately after cooking, pressing a piece of plastic wrap directly onto the surface of the cream prevents a skin from forming as it cools, ensuring a perfectly smooth texture from top to bottom.
Understanding your starch options is key to achieving the perfect texture, as this table from food science resources demonstrates.
| Starch Type | Texture Result | Stability | Best Use |
|---|---|---|---|
| Cornstarch | Can turn rubbery/spongy | Prone to retrogradation | Quick applications |
| Flour | Classic, smoother texture | More stable | Traditional recipes |
| Modified Starch (ClearJel) | Perfectly smooth | Highly stable, no weeping | Professional applications |
With these sensory techniques in your arsenal, you are no longer just baking; you are communicating with your dough. Approach your next batch of choux not with hope, but with the quiet confidence of a sensory detective, ready to read the signals and achieve perfection every single time.