In summary:
- Treat the sphere not as a recipe, but as an engineering project focused on structural integrity and thermal dynamics.
- The shell’s thickness (2.5-3mm) is your primary defense against premature cracking and resistance to the melt.
- Precisely control sauce temperature (120-130°F / 50-55°C for dark chocolate) for a slow, dramatic collapse, not a sudden shatter.
- Protect internal crunchy elements with a fat-based coating (cocoa butter) to preserve their texture.
- Orchestrate the final service with a clear timeline, preparing components in advance to ensure a flawless tableside performance.
You’ve seen it on social media: the moment of hushed anticipation, the elegant pour of shimmering sauce, and the slow, magical collapse of a perfect chocolate sphere to reveal a hidden treasure. For a host aiming to create a truly special occasion, this is more than dessert; it’s a piece of interactive theatre. But between that vision and reality lies a minefield of potential disasters—the dreaded premature crack, the shatter from thermal shock, or the stubborn shell that refuses to yield. It’s a high-stakes performance where the applause is anything but guaranteed.
Many guides will offer simple advice: “temper your chocolate” or “use a silicone mold.” While correct, this advice barely scratches the surface. It treats a complex structural and thermal challenge like a simple bake sale cookie. These platitudes ignore the physics of the melt, the science of sensory perception, and the precise choreography required for a flawless execution. They set you up for a frustrating gamble rather than a predictable success.
What if the secret wasn’t in the recipe, but in the mindset? The key to mastering the melting chocolate sphere is to stop thinking like a cook and start thinking like a theatrical dessert engineer. This guide will reframe the entire process, focusing on the principles of structural integrity, thermal dynamics, and sensory choreography. We will deconstruct the spectacle into its core engineering components, giving you control over every variable for a repeatable, jaw-dropping result.
This journey will take us through the science of emotional reactions, the precise calibration of heat, the structural engineering of the chocolate shell, and the logistical timing of the final performance. By the end, you won’t just have a recipe; you’ll have a blueprint for creating an unforgettable moment of culinary magic.
Summary: Engineering the Perfect Melting Chocolate Sphere
- Why Does Hidden Popping Candy Create an Emotional Reaction?
- How to Heat Sauce to the Exact Temp to Melt the Shell Slowly?
- Liquid Center vs. Hidden Garnish: Which Has More Impact?
- The ‘Too Thick’ Shell Mistake That Resist the Hot Sauce
- When to Serve a ‘Smash Cake’ for Guests to Break Together?
- How to Add a ‘Surprise’ Crunch Element Inside a Soft Fondant?
- How to Use Popping Candy in Chocolate Without It Popping Prematurely?
- How to Time Your Molten Cake Baking While Guests Are Eating the Main Course?
Why Does Hidden Popping Candy Create an Emotional Reaction?
The magic of a great dessert isn’t just in its taste; it’s a full sensory performance. Introducing an unexpected element like popping candy elevates the experience from a simple dish to a memorable event. This isn’t just a gimmick; it’s a scientifically recognized phenomenon known as “sonic seasoning.” The sound and physical sensation of the popping candy create a form of synesthesia, where one sense (sound/touch) influences another (taste). This surprise auditory element amplifies the perceived sweetness and excitement, transforming a passive eating experience into an active, joyful discovery.
The sudden crackle in a soft, silent dessert creates a powerful cognitive and emotional jolt. It breaks expectations in a delightful way, triggering a release of dopamine and creating a vivid memory anchor. Your guests won’t just remember a “chocolate dessert”; they will remember the moment it started talking back to them. This is the essence of dessert engineering: crafting not just flavors, but moments. In fact, research from Oxford University’s Crossmodal Laboratory demonstrates that participants rated identical candies as sweeter when paired with high-pitched sounds, proving the powerful link between what we hear and what we taste.
By hiding this element inside the sphere, you are choreographing a multi-act sensory play. The first act is visual: the elegant sphere. The second is the drama of the melt. The third, and most surprising, is this auditory and textural finale. It’s a secret shared between the dessert and the guest, a final twist that guarantees your creation will be the topic of conversation long after the plates are cleared. The emotional reaction is tied to the violation of expectation—a silent, smooth dessert is supposed to remain silent and smooth. The playful disruption is pure delight.
How to Heat Sauce to the Exact Temp to Melt the Shell Slowly?
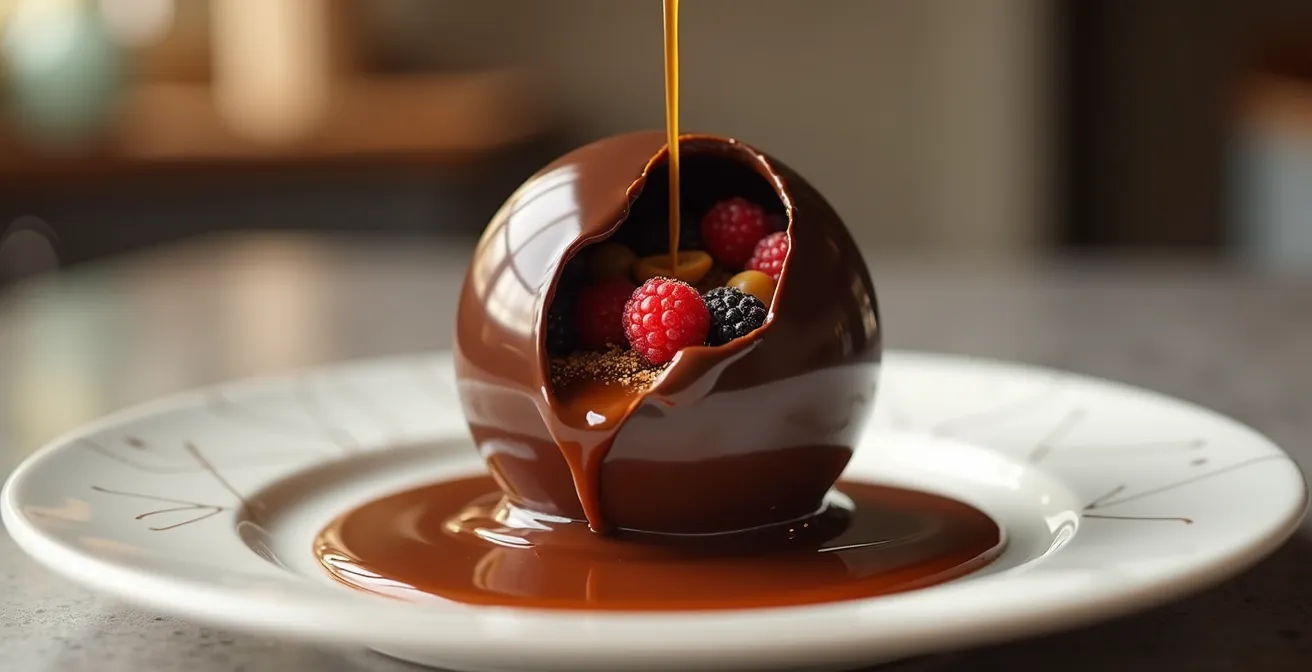
The most dramatic moment in your dessert’s life is its death—the controlled demolition by hot sauce. This is not a brute-force attack; it is a precisely calibrated process of thermal dynamics. Too hot, and the shell suffers thermal shock, cracking instantly and inelegantly. Too cold, and the sauce pools uselessly, failing to initiate the melt. The goal is a cinematic, slow collapse that builds suspense. This requires heating your sauce to a very specific temperature window, which varies based on the type of chocolate shell and the sauce’s composition.
The key is to bring the sauce to a temperature that is just above the chocolate’s melting point, allowing for a gradual transfer of heat. For a standard dark chocolate shell, which has a higher melting point due to its cocoa solids content, the ideal sauce temperature provides enough energy to melt the structure without overwhelming it. For milk or white chocolate, a gentler approach is needed. This is where a reliable digital thermometer becomes your most critical engineering tool.
To achieve this perfect melt, follow these professional thermal guidelines:
- Dark chocolate shells: Heat your sauce to 120-130°F (50-55°C). This provides the optimal energy for a steady melt without causing the chocolate to seize or crack.
- Milk/white chocolate shells: Maintain the sauce at a lower 105-115°F (40-45°C). These chocolates have more milk solids and a lower melting point, making them more susceptible to thermal shock.
- For thick, cream-based sauces (ganache, caramel): A slightly higher temperature of 140-149°F (60-65°C) is effective, as the viscosity slows heat transfer, resulting in a beautifully slow, oozing melt.
- For thin, water-based sauces (fruit coulis): Heat to 158-167°F (70-75°C) to compensate for their lower heat retention; they cool faster upon contact.

As the illustration above shows, melting is a beautiful transition at a microscopic level. The critical threshold to never exceed is 176°F (80°C). Beyond this point, you risk “burning” the chocolate, creating a bitter taste and causing the structure to fracture instantly. A carefully managed temperature, confirmed by your thermometer, is the difference between a controlled, beautiful reveal and a sudden, disappointing mess. According to the experts at Valrhona, one of the world’s leading chocolate producers, maintaining these specific temperature ranges is fundamental to professional pastry work.
Liquid Center vs. Hidden Garnish: Which Has More Impact?
The “payload” concealed within your sphere is the heart of the surprise. Your choice of filling is a critical strategic decision that dictates the nature of the reveal and the subsequent guest reaction. The two primary engineering approaches are the liquid center (like a warm caramel or fruit sauce) and the hidden garnish (a composition of cake, ice cream, berries, and crumbles). Neither is definitively “better”; they simply produce different, predictable impacts. Your role as the dessert engineer is to choose the effect that best suits the narrative of your event.
A liquid center offers a moment of high, singular drama. When the shell breaches, the internal liquid erupts, mingling with the melting chocolate and the pouring sauce. This creates a “volcanic” effect—a powerful, instantaneous, and visually stunning transformation. It’s a single, breathtaking moment. However, this approach is technically more demanding. It often requires the internal liquid to be at a different temperature and risks making the final dessert overly soupy if not balanced correctly. It’s high-risk, high-reward for pure visual spectacle.
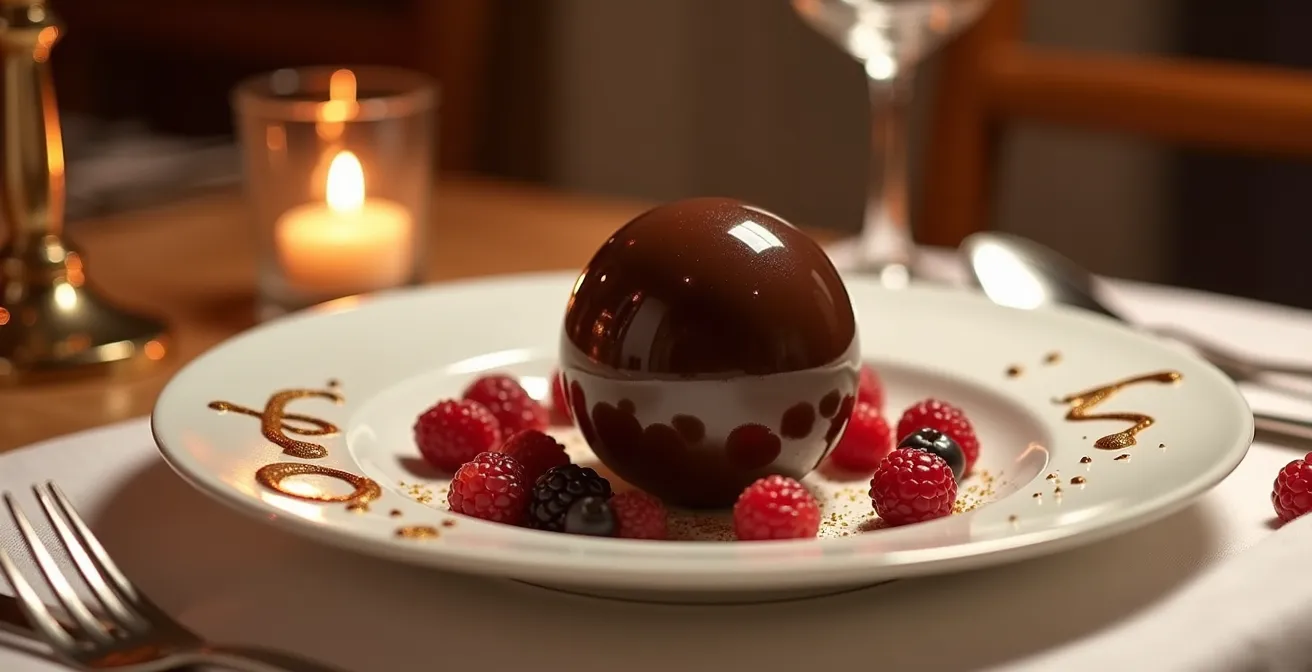
Conversely, a hidden garnish provides a “jewelry box” reveal. The melting shell pulls back like a curtain, exposing a carefully arranged tableau of colors, shapes, and textures. This prompts a longer phase of discovery as guests explore the different elements—a scoop of ice cream, a cube of brownie, a fresh raspberry, a sprinkle of nuts. It’s less of a single explosion and more of an invitation to explore. This method is technically simpler, more forgiving on timing, and allows for infinite customization of flavors and textures. It answers the common question of “what can you put inside?” with “almost anything you can imagine.”
This comparative analysis from a breakdown by dessert experts can help you make a strategic choice:
| Aspect | Liquid Center | Hidden Garnish |
|---|---|---|
| Visual Drama | Volcanic eruption effect | Jewelry box reveal |
| Guest Reaction | Single powerful moment | Extended discovery phase |
| Technical Difficulty | Requires spherification skills | Simpler assembly process |
| Temperature Stability | Must serve immediately | More forgiving timing |
| Customization | Limited to liquids | Infinite combinations possible |
The ‘Too Thick’ Shell Mistake That Resist the Hot Sauce
A common and deeply frustrating failure mode is the “invincible” sphere—a shell so thick and robust that your elegantly heated sauce cascades off it like water off a duck’s back, leaving the structure defiantly intact. The drama evaporates into an awkward moment of failure. This mistake stems from a misunderstanding of the engineering goal. The shell’s purpose is not to be as strong as possible, but to have the perfect balance of structural integrity: strong enough to be handled and assembled, but delicate enough to yield gracefully to the thermal assault of the sauce.
The ideal thickness for a standard 7cm (approx. 3-inch) hemisphere is between 2.5mm and 3mm. Thinner than 2mm, and it’s likely to crack during assembly or handling. Thicker than 3.5mm, and you risk it resisting the melt. The type of chocolate also plays a crucial role. Dark chocolate, with its higher percentage of cocoa solids, is structurally stronger and can be made slightly thinner (around 2-2.5mm). Milk and white chocolate are softer and require the full 2.5-3mm thickness for stability. A simple way to join two hemispheres is to gently warm the rim of one on a clean, warm plate for a second and then press it onto the other, creating a seamless weld.
Achieving this consistent thickness is not a matter of guesswork. It requires a methodical process of coating the mold, allowing it to set, and then applying a second layer to ensure no weak spots. Using an offset spatula to scrape the rim of the mold clean after each coating not only creates a neat edge for assembly but also provides a visual gauge of the wall’s thickness.
Your Pre-Pour Structural Integrity Audit
- Weight Check: Weigh your empty hemisphere mold, then weigh it again after filling and scraping. According to guides like the Sugar Geek Show, a 7cm hemisphere should contain 25-30g of chocolate. This is your most reliable metric for correct thickness.
- Visual Rim Inspection: After scraping the mold’s rim, look at the cross-section. Does it appear to be in the 2.5-3mm range? This is your quick visual confirmation.
- Flex Test: Once the chocolate is fully set and demolded, gently press on the center of the dome with your thumb. It should feel solid, but have an almost imperceptible amount of flex. No flex at all means it’s likely too thick.
- Light Test: Hold the shell up to a bright light. You should not see any light passing through. Any translucent spots are critical weak points that must be reinforced with another thin layer of tempered chocolate.
- Seam Integrity: After joining the two halves, inspect the equator. The seam should be a clean, solid line, not a fragile connection with gaps or thin spots.
When to Serve a ‘Smash Cake’ for Guests to Break Together?
While the slow melt offers elegant drama, there is an alternative school of thought in interactive dessert engineering: the “smash.” This variation trades the controlled, graceful collapse for a moment of cathartic, communal destruction. A “smash cake” or smash sphere is designed not to melt, but to be broken open at the table by the guests themselves, typically with a small wooden mallet. This approach is best suited for high-energy, celebratory events like birthdays, anniversaries, or New Year’s Eve parties, where a bit of boisterous fun is part of the atmosphere.
The engineering principles for a smash sphere are inverted from those of a melting sphere. Here, strength is the goal. The shell must be significantly thicker—often 4-5mm—to withstand handling and deliver a satisfying “crack” when struck, rather than crumbling into dust. It’s less about a delicate reveal and more about a treasure chest that needs to be broken into. This makes it a more forgiving option for beginners, as the precise art of tempering for a perfect melt is replaced by the simpler goal of creating a thick, sturdy shell.
Case Study: The Flambéed Interactive Sphere
For milestone celebrations, professional pastry chef Sammy Wong developed a hybrid technique that combines visual spectacle with interaction. As detailed in a showcase of his work, he uses 3.15-inch (8cm) molds to create robust spheres with 4mm thick shells. These are filled with ice cream and other treats. At the table, the sphere is doused in high-proof Grand Marnier (40% alcohol) and flambéed. The intense, brief heat from the flame melts the thick shell dramatically, creating a fiery spectacle that also allows guests to interact with the dessert as it collapses into a rich sauce.
The decision of when to serve a smash cake versus a melting sphere is purely contextual. A melting sphere suits a more refined, elegant dinner party, where the magic is in the quiet observation of a beautiful process. A smash sphere is for a lively celebration, where the noise and act of participation become part of the entertainment. It turns your guests from a passive audience into active participants in the dessert’s final moments, creating a shared, fun-filled memory.
How to Add a ‘Surprise’ Crunch Element Inside a Soft Fondant?
While this article focuses on chocolate spheres, the engineering principle of protecting textures is universal in high-end pastry. A common challenge is incorporating a dry, crunchy element (like feuilletine, praline, or chopped nuts) into a high-moisture environment (like a fondant, mousse, or ice cream filling) without it becoming soggy. The crunch is a vital textural contrast, and its loss turns a delightful surprise into a mushy disappointment. The solution lies in creating a waterproof, fat-based barrier.
The enemy of crunch is water. Therefore, the key is to coat the crunchy element in a substance that repels water. The perfect material for this is pure cocoa butter. Because it is a 100% fat-based medium, it creates an effective seal against moisture. This technique, known as fat-coating, is a staple in professional kitchens for preserving the integrity of delicate inclusions.
The process is a simple but crucial piece of micro-engineering:
- Melt pure cocoa butter: Gently melt the cocoa butter to around 95°F (35°C). It should be completely liquid but not excessively hot, as too much heat could cook or toast your crunchy elements.
- Coat the elements: Toss your crunchy items (like feuilletine flakes, crushed praline, or toasted nuts) in the melted cocoa butter until they are lightly but completely coated.
- Cool and set: Spread the coated elements in a thin layer on a piece of parchment paper and allow them to cool to room temperature. The cocoa butter will solidify, forming a thin, protective, and waterproof shell around each individual piece.
- Incorporate: Once the coating is set, these “waterproofed” crunchy bits can be folded into your mousse, ice cream, or fondant filling. They will retain their signature snap for hours.
An alternative method described by chocolatiers at workshops like Chocolate Alchemy is the layer technique. You can mix your crunchy element with tempered chocolate to create a thin, solid disc. This disc can then be placed as a separate layer within your dessert, creating a concentrated “crunch zone” that is fully protected by the chocolate’s fat content.
How to Use Popping Candy in Chocolate Without It Popping Prematurely?
Incorporating popping candy into chocolate is a brilliant way to add that surprise sensory element we discussed earlier. However, many attempts end in failure before the dessert even reaches the guest. The candy starts popping and fizzing the moment it’s mixed into the chocolate, wasting the effect and potentially ruining the chocolate’s texture. This happens due to a fundamental misunderstanding of the candy’s activation mechanism. The solution is rooted in basic chemistry.
Popping candy is essentially sugar granules that have been infused with carbon dioxide (CO₂) under high pressure. The “pop” occurs when the sugar dissolves, releasing the trapped gas. The critical engineering insight is what causes the sugar to dissolve. According to the scientific principle behind popping candy preservation, it is activated exclusively by water (H₂O). It is not activated by fat (lipids). This means it can be safely incorporated into any completely moisture-free, fat-based medium, which is precisely what tempered chocolate and cocoa butter are.
Therefore, any premature activation is a sign of one thing: water contamination. Even a tiny amount of water—from a wet spoon, steam from a double boiler, or even high ambient humidity—can set off a chain reaction. To successfully integrate popping candy, you must operate in an entirely anhydrous (water-free) environment. The professional methods are as follows:
- Ensure absolute dryness: Your bowl, spatula, and molds must be perfectly dry. When tempering chocolate, ensure no steam from your water bath can enter the bowl.
- Control the temperature: Mix the popping candy into your tempered chocolate at the very last moment, just before molding. For dark chocolate, this is around 88-90°F (31-32°C). This ensures the chocolate is fluid enough for mixing but cool enough to set quickly.
- Create ‘popping paint’: For a stunning visual and sensory effect, mix the candy into colored cocoa butter. You can then paint this mixture inside your molds before casting the shell, as taught by professionals from institutions like the Ecole Chocolat. The pop will be the first thing guests experience.
- Use encapsulated candy: For high-moisture fillings like ice cream, source fat-encapsulated popping candy. This is a commercial product where the candy already has a protective fatty layer, making it more resilient.
Key Takeaways
- Dessert engineering is about controlling variables: shell thickness, sauce temperature, and filling choice are strategic decisions, not guesses.
- The perfect shell (2.5-3mm) is a balance of strength for handling and delicacy for a controlled melt. Audit its integrity before service.
- The secret to a cinematic melt is precise sauce temperature (120-130°F for dark chocolate) to prevent thermal shock and ensure a slow, graceful collapse.
How to Time Your Molten Cake Baking While Guests Are Eating the Main Course?
The final, and perhaps most stressful, element of your dessert performance is the orchestration of service. A melting sphere, much like a molten lava cake, is a dessert of the moment. It cannot be fully assembled hours in advance. The timing must be impeccable to transition seamlessly from the main course to the grand finale. This requires a professional service timeline, treating your kitchen like a backstage area and the dining room like a stage. The key is not to do everything at the last minute, but to front-load the preparation and establish a clear, calm countdown for the final assembly.
Panic sets in when too many tasks are left for the final moments. A dessert engineer eliminates this by breaking down the process into stages that can be completed long before guests arrive. The sphere itself is stable once created. The sauces can be made ahead. The internal garnishes can be prepped. The “at-service” phase should be a simple, elegant assembly line, not a frantic scramble. This approach minimizes stress and maximizes the chances of a flawless presentation.
Professional Service Protocol by Byron Talbott
To ensure a perfect tableside pour every time, celebrity chef Byron Talbott follows a strict service protocol that removes all last-minute variables. His timeline, adapted from his published professional methods, is a masterclass in dessert orchestration:
- Day 1 (or morning of): Temper the chocolate and cast the hemisphere shells. Once set, join them to form spheres and store them in an airtight container at a cool, dry room temperature (around 65-70°F or 18-21°C).
- 1 Hour Before Service: Bring the spheres out to ensure they are at ambient room temperature, which prevents thermal shock. Prepare the hot sauce and pour it into a thermal carafe to maintain its ideal temperature (e.g., 120°F) without needing to reheat.
- During Main Course: Prepare the cold elements. Plate the ice cream, garnishes, and any other non-sphere components onto your serving dishes.
- At Service: As main course plates are cleared, simply place a pre-made sphere onto each prepared plate. Present the plates to the guests, followed by the dramatic, tableside pour from the thermal carafe. Always prepare 1-2 backup spheres as “insurance” against handling accidents.
This timeline demonstrates that almost all the labor occurs well before the critical moment. The final “performance” is merely the last, simple step of placing the sphere and pouring the sauce. By adopting this methodical, professional countdown, you transform a potentially chaotic process into a controlled and graceful execution. You are no longer a frantic cook; you are a calm, confident showrunner, ready for curtain call.
By embracing this engineering mindset—from the structural build of your shell to the thermal dynamics of the sauce and the precise choreography of service—you are no longer simply hoping for the best. You are designing for success. You have the blueprint, the tools, and the professional protocols to transform a viral trend into a personal triumph. The next step is to step into your lab—your kitchen—and start building.