Contrary to popular belief, the coveted crackly top on a brownie isn’t a baking ‘trick’ but a direct result of creating a paper-thin meringue layer on the surface.
- It’s achieved by dissolving sugar in hot fat and egg whites, allowing it to rise and re-crystallize during baking.
- Fudginess is controlled by inhibiting gluten development, primarily by using melted fat (butter or oil) instead of creaming it with sugar.
Recommendation: Focus on the batter’s initial temperature and mixing method to control sugar dissolution and gluten formation, rather than just relying on egg whipping.
You followed the recipe to the letter. You used the best chocolate you could find, folded the flour with the care of a surgeon, and watched the oven like a hawk. Yet, when you pull out the pan, you’re greeted with a dull, cakey surface instead of that glorious, paper-thin, crackly crust you crave. For any home baker obsessed with perfection, this is a familiar frustration. The internet is full of quick fixes and “secret tricks,” most of which revolve around vigorously whipping eggs and sugar, hoping to trap enough air to create some magic in the oven.
While these methods can sometimes work, they often miss the point. They treat the symptoms, not the cause. But what if the true key to that shatteringly crisp top wasn’t about luck or aggressive whipping, but about chemistry? What if it was a controlled reaction you could replicate with scientific precision every single time? This guide moves beyond the kitchen folklore to unpack the science. We will explore how dissolving sugar in hot butter, the choice of fat, and even the way you add chocolate chips are all critical variables in a single equation: creating the perfect brownie.
This article will deconstruct the process, giving you a blueprint for achieving not only that elusive crackly top but also a supremely fudgy interior. We’ll examine the fundamental science, debunk common myths, and provide actionable steps to transform your brownie game from hopeful guesswork to consistent mastery.
Summary: Decoding the Perfect Brownie Crust and Texture
- Why Does Dissolving Sugar in Hot Butter Create the Crinkle?
- How to Slice Warm Brownies Without Them Falling Apart?
- Butter vs. Oil: Which Makes the Fudgiest Brownie Interior?
- The Toothpick Test Mistake That Leads to Dry, Overbaked Brownies
- When to Fold in Chocolate Chunks to Prevent Them Melting Completely?
- How to Replace Eggs in Brownies Using Aquafaba for Identical Results?
- Why Does Using Melted Butter Create a Chewier Texture Than Creamed Butter?
- Mexican Mole vs. Indian Masala: Which Spice Profile Suits Brownies Best?
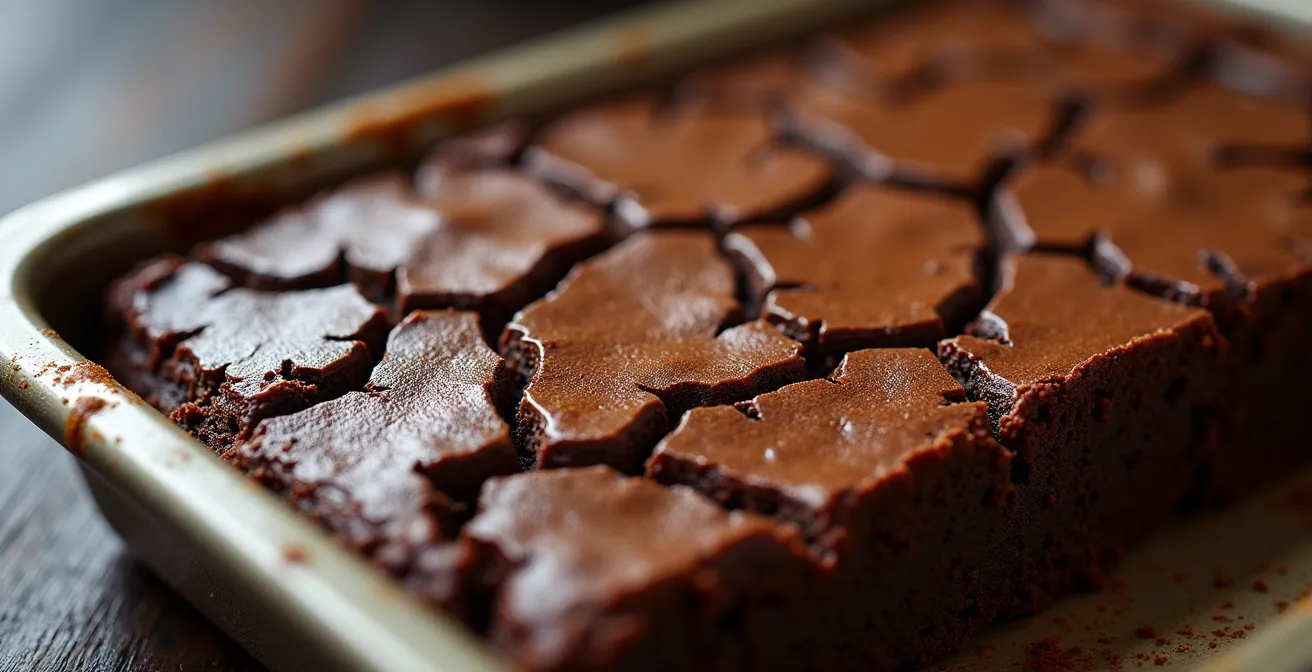
Why Does Dissolving Sugar in Hot Butter Create the Crinkle?
The secret to that iconic, shiny, crackly brownie top isn’t air whipped into eggs; it’s a feat of chemistry revolving around sugar dissolution. When you see that paper-thin, glossy crust, you’re essentially looking at a micro-layer of meringue that formed on the surface during baking. This layer is created when sugar, fully dissolved in the batter’s liquid, rises to the top, bakes, and then re-crystallizes as it cools. The key is getting the sugar to dissolve completely in the first place.
This is where hot butter becomes your most powerful tool. By melting butter and sugar together, the water in the butter (which constitutes about 20%) separates from the fat and becomes an excellent solvent for the sugar. Further mixing with eggs adds even more water (from the egg whites), ensuring maximum sugar dissolution. As the brownies bake, this sugary liquid, being less dense, migrates to the surface. The oven’s dry heat evaporates the excess water, leaving behind a delicate, crystalline sheet of sugar that cracks upon cooling.
To optimize this process, precision is crucial. Research from baking experts shows that the ideal temperature for the initial butter-sugar mixture is critical for success. According to King Arthur Baking, the sweet spot is an optimal temperature for the butter-sugar mixture is about 110°F to 120°F. This range is hot enough to effectively dissolve the sugar without being so hot that it scrambles the eggs you add next. Mastering this temperature control is the first and most important step toward guaranteeing a flawless crinkle top.
How to Slice Warm Brownies Without Them Falling Apart?
You’ve achieved the perfect crackly top, but your work isn’t over. Slicing into a pan of warm, fudgy brownies can quickly turn your masterpiece into a mess of crumbs and torn edges. The primary culprit is the still-molten chocolate and fats, which act as a lubricant, causing the delicate structure to collapse under pressure. The goal is to slice while the brownies are still pleasantly warm, but firm enough to hold their shape.
Patience is the first ingredient. After removing the pan from the oven, you must allow a crucial cooling window of at least 10-20 minutes on a wire rack. During this time, the “carryover cooking” process finishes, and the internal structure begins to set as the fats solidify. A sign that they are ready is when the edges have slightly pulled away from the sides of the pan. Attempting to slice them while they are piping hot is a guaranteed recipe for disaster.
Once partially cooled, the right tool and technique are paramount. Many bakers are surprised to learn that a simple, cheap plastic knife is often the best tool for the job. Its non-stick surface glides through the dense, fudgy interior without tearing. The technique is just as important: press straight down with firm, even pressure. Avoid any sawing motion, as this will snag the delicate top and create a jagged, crumbly cut. After each cut, wipe the knife clean to prevent dragging chocolate and crumbs across the next slice. This ensures every single brownie square looks as clean and professional as it tastes.
Action Plan for Flawless Brownie Slicing
- Initial Cooling: Let the brownie pan cool on a wire rack for a minimum of 10 minutes. Do not attempt to cut before this.
- Edge Check: Visually confirm that the edges of the brownie slab have started to pull away from the sides of the pan.
- Tool Selection: Opt for a plastic knife or a long, thin-bladed metal knife. If using metal, run it under hot water and wipe it dry before the first cut.
- Cutting Technique: Apply firm, direct downward pressure to cut. Do not use a back-and-forth sawing motion. Lift the knife out cleanly.
- Clean Between Cuts: Wipe the blade clean with a damp paper towel after each and every slice to prevent dragging and ensure sharp edges.
Butter vs. Oil: Which Makes the Fudgiest Brownie Interior?
The choice between butter and oil is one of the most significant decisions a baker can make, as it fundamentally alters the brownie’s final texture. While both are fats, their composition and interaction with other ingredients, particularly flour, lead to vastly different outcomes. The debate boils down to a single factor: water content and its role in gluten development.
Butter contains about 16-20% water. When mixed with flour, this water hydrates the flour’s proteins (glutenin and gliadin), enabling them to form gluten strands. While a small amount of gluten provides structure, too much results in a tougher, chewier, and more cake-like texture. Oil, on the other hand, is 100% fat. It effectively coats the flour particles, creating a barrier that prevents water from the eggs from activating significant gluten development. This gluten inhibition is the primary reason why oil-based brownies are consistently denser, more tender, and quintessentially “fudgy.”
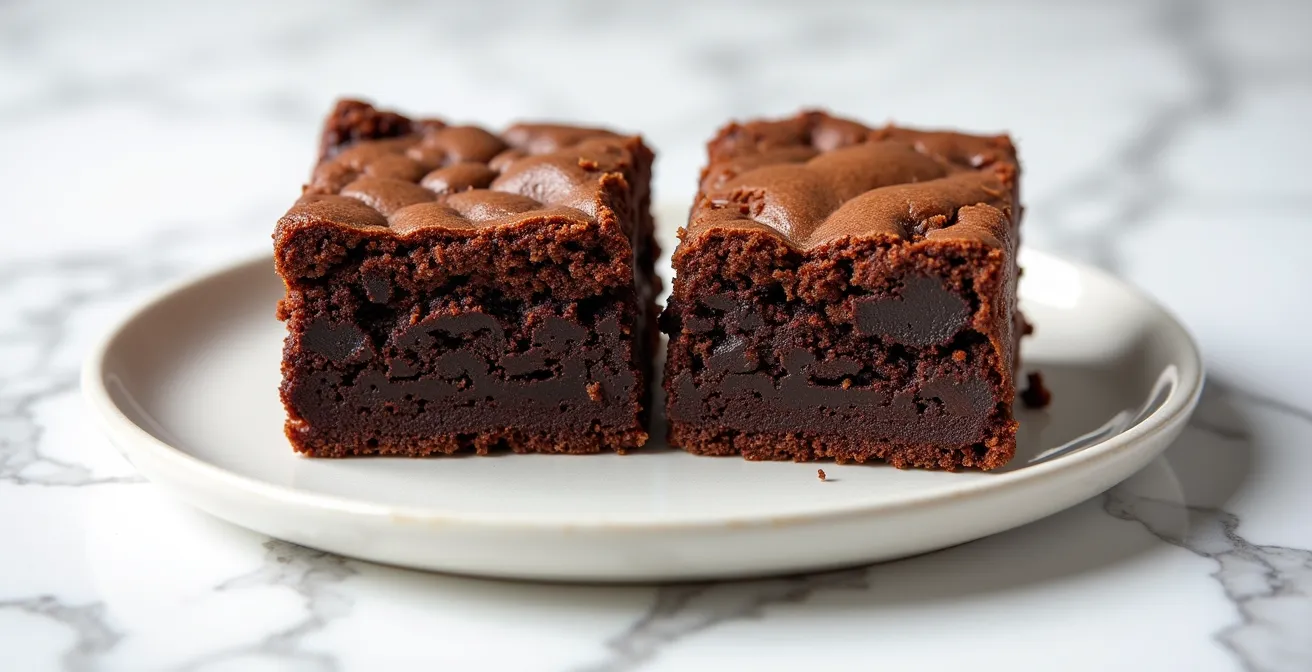
This textural difference is clearly visible when you compare the two side-by-side. An oil-based brownie will have a denser, tighter crumb, whereas a butter-based one will be slightly more open and structured. However, this doesn’t mean butter is an inferior choice. The milk solids in butter contribute a rich, complex flavor that oil cannot replicate. For many, this superior flavor is worth the slight trade-off in fudginess. Ultimately, the “best” fat depends on your priority: for unparalleled flavor depth, choose butter; for the ultimate dense, melt-in-your-mouth fudginess, oil is the clear winner.
This table, based on extensive testing by sources like King Arthur Baking’s analysis of brownie science, breaks down the key differences.
| Property | Butter | Oil |
|---|---|---|
| Water Content | 20% | 0% |
| Gluten Development | Some (water enables) | Minimal (100% fat coats flour) |
| Texture Result | Chewy, structured | Dense, ultra-fudgy |
| Crackly Top Formation | Good (with proper technique) | Better (more fluid batter) |
The Toothpick Test Mistake That Leads to Dry, Overbaked Brownies
For generations, bakers have been taught to rely on the “toothpick test” to check for doneness: insert a toothpick into the center, and if it comes out clean, it’s ready. While this works for cakes, it is the single biggest mistake you can make when baking fudgy brownies. A “clean” toothpick is a sign that the interior has fully set and all moisture has cooked off, which means you have officially crossed the line from fudgy to dry and cakey.
For a truly fudgy brownie, you want to pull it from the oven when the center is still slightly under-baked. The residual heat in the pan, a phenomenon known as carryover cooking, will continue to cook the brownie for another 5 to 10 minutes after it’s been removed from the oven. If the center is fully cooked in the oven, it will be overcooked by the time it cools. The perfect toothpick test for a brownie is one where the toothpick comes out with a few moist, sticky crumbs attached. If it’s covered in wet batter, it needs more time. If it’s perfectly clean, it’s too late.
For those who crave precision and repeatability, there is a much more reliable method: a digital thermometer. Just as you would for a steak, measuring the internal temperature removes all guesswork. According to professional baking guides, the target is to pull the brownies from the oven when the very center registers between your desired doneness. For a supremely moist and fudgy result, the temperature should be between 180°F to 190°F. This simple switch from a subjective visual test to an objective temperature reading is a game-changer for achieving consistently perfect texture.
When to Fold in Chocolate Chunks to Prevent Them Melting Completely?
Incorporating solid pieces of chocolate—be it chips, chunks, or chopped bars—is essential for adding pockets of gooey, melted chocolate that contrast with the fudgy crumb. However, timing is everything. Add them too early to a hot batter, and they will melt completely, losing their distinct texture and simply enriching the batter. Add them to a cold batter, and they may not melt enough, resulting in hard, waxy bits in the final product. The key is to add the chocolate when the batter is warm, but not hot.
The ideal moment comes after the primary mixing phase. Specifically, after you have combined the hot melted butter and sugar, and then whisked in the eggs and vanilla. This process will have cooled the batter slightly. Aim for a batter temperature of around 90-100°F (32-38°C). At this temperature, the batter is warm enough to gently melt the outer layer of the chocolate chips, helping them meld beautifully with the crumb, but not so hot that it liquefies them entirely. This ensures you get those sought-after, distinct pockets of molten chocolate.
The mixing technique is also crucial. Once you’ve added the chocolate chunks, you should fold, not stir. Use a spatula to gently turn the batter over on itself just until the chunks are evenly distributed. Over-mixing at this stage can break down the chocolate and cause it to dissolve into the batter. As baking authorities like King Arthur Baking have found, the goal is to get the melting process started in the warm batter, not to complete it. By folding gently, you preserve the integrity of the chocolate pieces, setting them up for a perfect melt in the oven.
How to Replace Eggs in Brownies Using Aquafaba for Identical Results?
For vegan bakers or those with egg allergies, replicating the unique properties of eggs in a brownie can seem like an insurmountable challenge. Eggs provide structure, leavening, and, crucially for the crackly top, the proteins needed for the meringue layer. Fortunately, there is a remarkable substitute that can perform all these functions: aquafaba, the humble brine from a can of chickpeas.
The magic of aquafaba lies in its protein content, which is similar enough to egg whites that it can be whipped into a stable foam. To replace one large egg, you’ll need 3 tablespoons of aquafaba. However, for it to create that essential crackly top, it cannot simply be added as a liquid. You must treat it exactly as you would egg whites: whip it with the sugar until it forms stiff, glossy peaks. This pre-made meringue is then folded into the rest of the batter, ready to rise to the surface and form that coveted crystalline crust during baking.
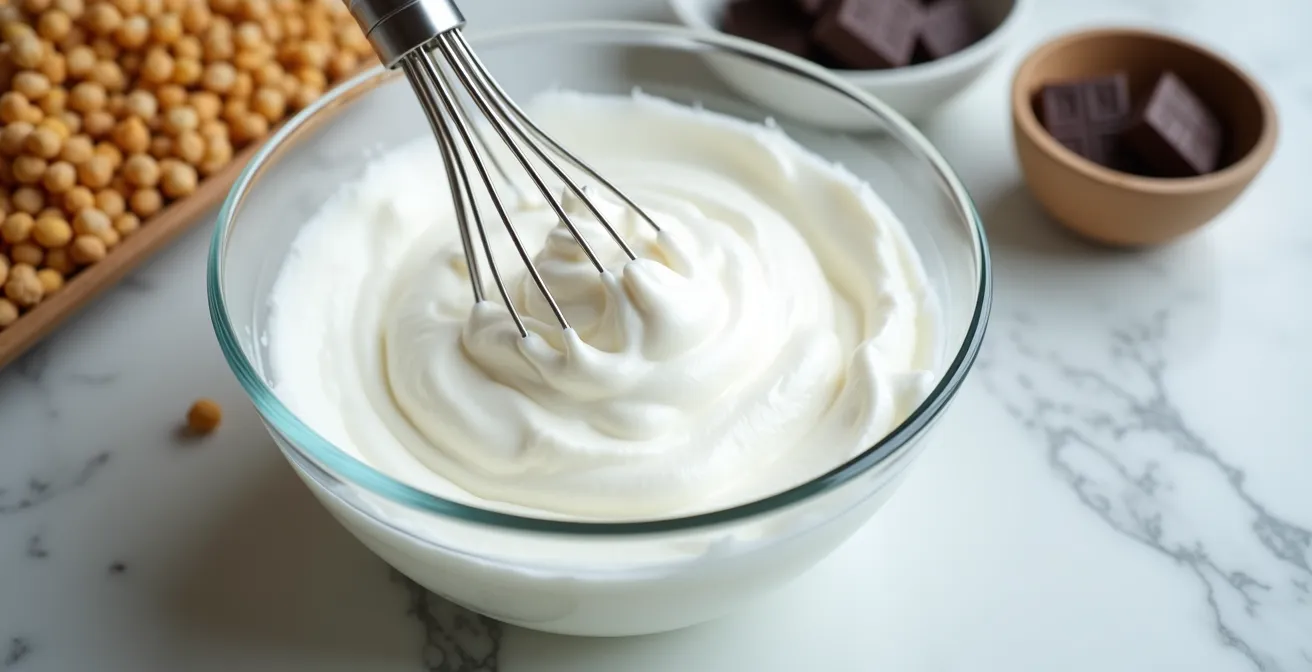
There are a couple of adjustments to keep in mind. Aquafaba can retain more moisture than eggs, which might lead to a slightly gooier center. To counteract this, you can either reduce the aquafaba by simmering it gently to concentrate the proteins (reduce about one-third by volume) or add an extra tablespoon of flour or cornstarch to your dry ingredients to absorb the excess liquid. With these minor tweaks, aquafaba doesn’t just act as a binder; it actively replicates the scientific function of eggs, making it possible to achieve a vegan brownie that is texturally indistinguishable from its traditional counterpart, complete with a perfect crackly top.
Why Does Using Melted Butter Create a Chewier Texture Than Creamed Butter?
The difference between a chewy, fudgy brownie and a light, cakey one often comes down to the very first step: how you handle the butter. The choice between melting your butter or creaming it with sugar fundamentally changes the amount of air incorporated into the batter, which directly dictates the final texture. Creaming—the process of beating softened butter and sugar together until light and fluffy—is a technique designed to incorporate air. These tiny air pockets expand in the oven, creating lift and a delicate, open, cake-like crumb.
This is precisely what you want to avoid for a dense, chewy brownie. By melting the butter first and then simply stirring in the sugar, you introduce virtually no air into the mixture. This results in a much denser batter. The minimal lift in the final product comes only from the chemical leavening of baking powder or soda, and the steam created by the liquid ingredients. This lack of aeration is the primary secret to a classic “fudgy” texture.
Furthermore, using melted butter has another crucial effect related to gluten development. As established, butter is not pure fat; about twenty percent of butter is made of water. When you use melted butter, you can control its interaction with the flour more effectively. By mixing the wet ingredients (melted butter, sugar, eggs) first and then gently folding in the flour at the very end, you minimize the time the flour is in contact with water. This short mixing time prevents the development of long, tough gluten strands, resulting in a more tender and chewy texture. In contrast, the prolonged beating in the creaming method encourages more gluten development, pushing the brownie further towards the cakey end of the spectrum.
Key takeaways
- The crackly top is a thin meringue layer formed by dissolved sugar re-crystallizing, not by air whipped into eggs.
- Use melted fat (butter or oil) instead of creamed butter to inhibit gluten development, which is the secret to a fudgy texture over a cakey one.
- Ditch the toothpick test. Use a digital thermometer and pull brownies from the oven between 180°F and 190°F for a perfectly moist center.
Mexican Mole vs. Indian Masala: Which Spice Profile Suits Brownies Best?
Once you’ve mastered the fundamental texture of a brownie, you can begin to explore more complex flavor profiles. Adding spices can elevate a simple brownie into a sophisticated dessert, but the choice of spice blend can also subtly affect the texture. Two popular and compelling profiles are the smoky, complex notes of a Mexican Mole blend and the warm, aromatic spices of an Indian Masala chai.
A Mole-inspired brownie typically features smoky chiles like ancho or pasilla, cinnamon, and sometimes ground nuts or seeds. These spices pair exceptionally well with dark chocolate (70% cacao or higher), creating a deep, resonant, and slightly spicy flavor. From a textural standpoint, the ground nuts and seeds in some mole powders can add a bit of extra fat, enhancing the brownie’s overall fudginess. In contrast, a Masala-inspired blend, with its notes of cardamom, ginger, cloves, and black pepper, is warm and fragrant. These dry, aromatic spices work beautifully with a milder semi-sweet chocolate (50-60%), allowing their delicate flavors to shine. Because they are dry, they can absorb a tiny bit of moisture, potentially making the final brownie a touch cakier, though the effect is minimal.
The choice of cocoa powder is also critical when introducing spices. As baking blog Sugarologie notes in its extensive research on brownie science, the type of cocoa can dramatically change the flavor foundation. The author states:
Dutch-processed (European-style) unsweetened cocoa is the source of chocolate flavor in this brownie. It is an alkalized form of natural cocoa and imparts a darker hue and more mellow flavor. This recipe is versatile enough to use any type of cocoa (natural, Dutch-processed, or even black), but try to choose a high-quality one. Dutch-processed is my preferred cocoa powder for almost all my baking as it has a fantastic flavor and color
– Sugarologie, My perfect fudgy chewy brownie
The mellow, less acidic flavor of Dutch-processed cocoa creates a perfect canvas for complex spice blends, whether you choose the smoky depth of Mole or the aromatic warmth of Masala.
| Aspect | Mole Spices | Masala Spices |
|---|---|---|
| Primary Flavors | Smoky, fruity (ancho, pasilla) | Warm, aromatic (cardamom, ginger) |
| Fat Content Impact | Adds fat from ground nuts/seeds | Dry spices, absorb moisture |
| Texture Result | Enhanced fudginess | Slightly cakier |
| Best Chocolate Pairing | Dark chocolate 70%+ | Semi-sweet 50-60% |
Frequently Asked Questions on How to Achieve the Perfect Crackly Top on Brownies Every Time?
Why doesn’t aquafaba create the same crackly top as eggs?
Aquafaba lacks the protein structure of eggs. You must whip it to stiff peaks with sugar first to create the meringue-like layer needed for the crackly top.
How much should I reduce aquafaba before using?
Reduce by approximately one-third over low heat to concentrate the proteins and match egg consistency.
Will aquafaba brownies be more moist than regular?
Yes, aquafaba retains more moisture. Add 1-2 tablespoons extra flour or 1 tablespoon cornstarch to compensate.